
Have you ever wanted a sturdy, budget-friendly workbench? Our DIY workbench plans let you create a custom workspace right in your garage. This beginner guide shows you how to build a solid bench without overspending.
Follow each clear, step-by-step instruction to cut, assemble, and finish your bench using everyday tools. Even if you're just starting in woodworking or looking to upgrade your workshop, these plans make the project straightforward and fun.
Let's build your perfect workbench together.
Step-by-Step DIY Workbench Plans for Beginners

This guide is made for beginners looking to build a strong and practical workbench right in their garage or shop. The project costs about $175 in materials. You can save roughly $35 if you reduce the top width to 24 in (61 cm) and use one sheet of 3/4 in (1.9 cm) plywood. Free printable plans and a DIY project planning checklist are available to help you get started with confidence, even if you're new to woodworking.
By following this guide, you'll learn to cut, assemble, and finish your workbench using everyday tools like a circular saw, drill, level, and tape measure. The plan covers making a top and bottom frame, placing stretcher supports 18 in (45.7 cm) apart and securing them with 2 1/2 in wood screws (after pre-drilling), and adding a back board inside the legs for extra knee room. For better stability and mobility, you'll also add 4 in (10.2 cm) caster wheels with washers placed over the screw heads.
- Cut all wood pieces with a circular saw (or miter/table saw) using the downloadable cut list.
- Set up the top frame by centering the two stretcher supports.
- Space the extra supports 18 in (45.7 cm) apart and pre-drill holes for the 2 1/2 in screws.
- Assemble the top frame and attach it firmly to the legs.
- Mark a 6 in (15.2 cm) rise on each leg and install the bottom frame inside, fastening it with 2 1/2 in screws.
- Place the plywood top and shelf on the frames using pre-drilled holes and 1 1/4 in screws for a tight, smooth fit.
- Install the 4 in caster wheels with washers on top of the screw heads to add solid mobility.
This step-by-step process builds a durable workbench in under two hours. You'll end up with a reliable workspace that's perfect for all your DIY projects.
Tools & Materials for Your DIY Workbench Plans
Must-Have Tools
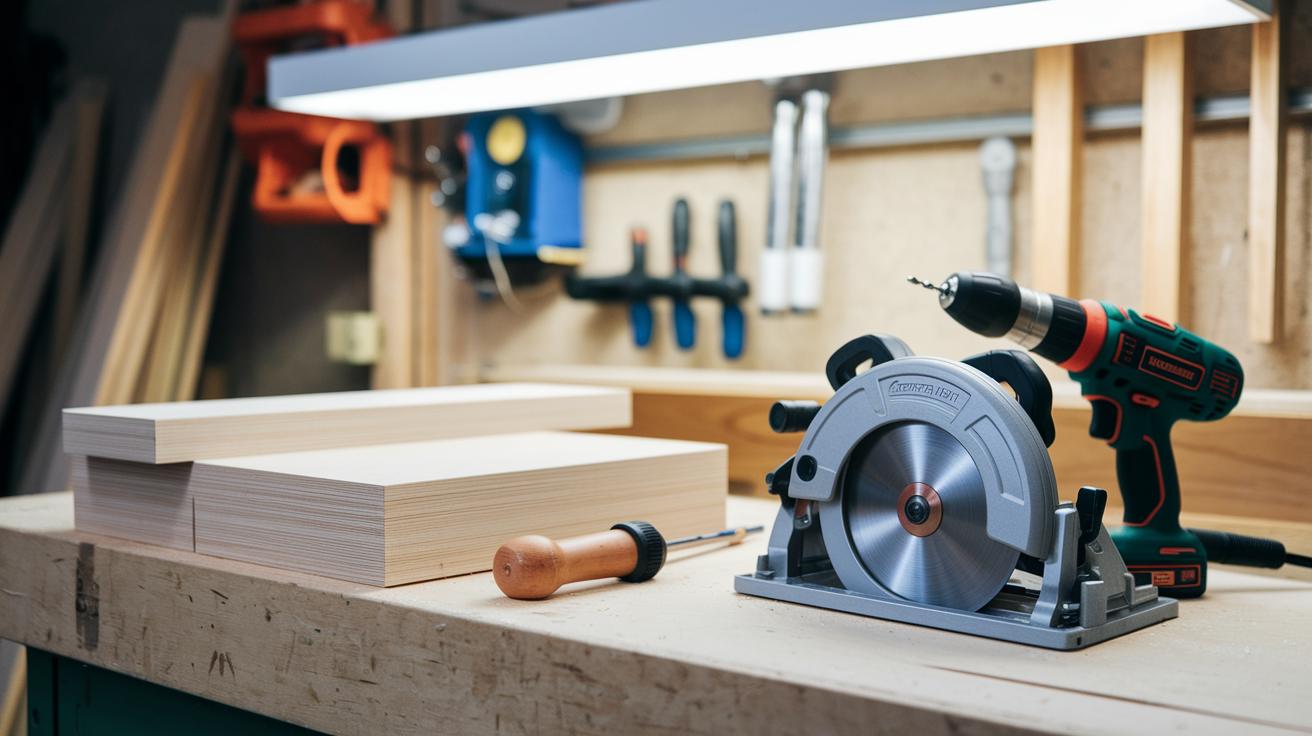
Get started with the right tools. You will need a circular saw (or miter/table saw) to cut plywood and lumber to the correct sizes. Use a drill/driver to drive the 2 1/2" screws and 1 1/4" screws, and for pre-drilling holes to help prevent wood splitting. A speed square, level, and tape measure will help you mark straight lines and keep your pieces even. If you are missing any of these, check out the best home tool kit for homeowners for a complete set of power and hand tools.
Required Materials
Before you start, gather strong and quality materials. Use 2×4 lumber for the legs and frame; choose straight, low-knot wood for extra stability. The tabletop and shelf work best with 3/4" plywood, which gives you a strong and smooth surface. Use 2 1/2" wood screws for assembling the frame and 1 1/4" screws to attach the plywood. For mobility and extra support, add 4" caster wheels. To finish your workbench, apply Minwax Gunstock Stain to show the wood grain, then cover it with a clear polyurethane or lacquer to protect it during everyday use.
Cutting Dimensions & Cut List in DIY Workbench Plans

Getting your measurements right is the first step to a solid workbench. We use one sheet of plywood for both the top and the shelf. Cutting the sheet to 24 in (61 cm) wide saves you around $35 compared to larger sizes. Cut the legs to 34.5 in so your bench stands firm. The top and bottom frame boards should be 48 in long. Measure the stretcher supports to be 40.5 in, and the back board should be 48 in by 3.5 in. Lastly, plan the shelf plywood at 46.5 in by 22.5 in. Always remember: measure twice, cut once.
| Piece | Dimensions | Quantity |
|---|---|---|
| Plywood Top | 24 in x 48 in | 1 |
| Shelf Plywood | 46.5 in x 22.5 in | 1 |
| Legs | 34.5 in (L) | 4 |
| Frame Boards | 48 in (L) | 2 |
| Stretcher Supports | 40.5 in (L) | 2 |
| Back Board | 48 in x 3.5 in | 1 |
Frame Assembly in DIY Workbench Plans

Top Frame Assembly
Check your pilot hole depth and screw placement to stop the wood from cracking, especially if the wood quality varies. Use a countersink bit to make a small dent for the screw head so the parts sit flush. This little step helps ease wood stress before you secure the top frame.
Make sure every pilot hole is drilled to the right depth so the screw does not strip the wood. If you see gaps or misaligned parts between the stretcher supports and the top frame, try a different screw length or adjust your drilling. These small fixes help keep your workbench strong and level.
Bottom Frame & Surface Attachment
Measure 6 in (15.2 cm) for each leg carefully. Clamp the bottom frame securely before drilling the pilot holes. If the wood has slight differences, use extra clamps to keep everything in line during installation.
After you attach the bottom frame, check that the plywood top and shelf lie evenly. Remove any wood dust from the pilot holes, as dust can make the screws loose. If any area seems uneven, review your pilot holes and screw depth, and make the needed adjustments before finishing the attachment.
Custom Design Options for DIY Workbench Plans
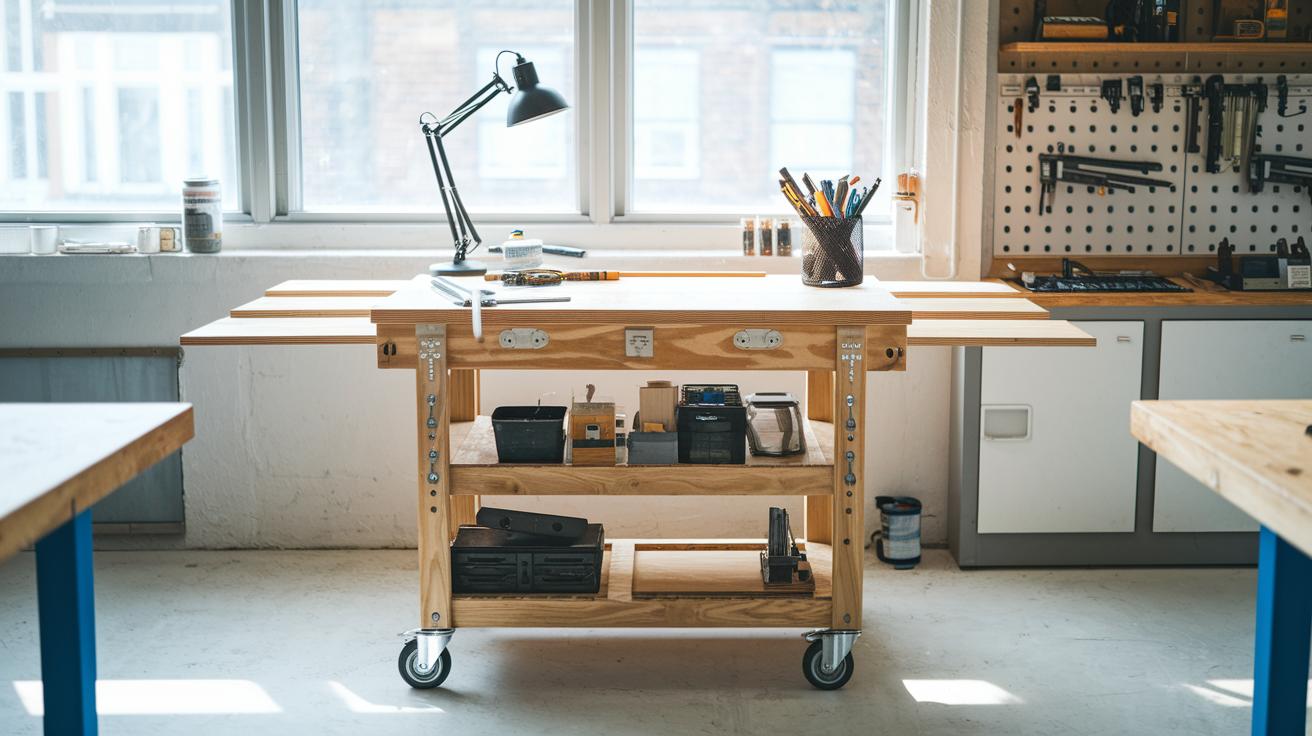
You can customize your workbench to fit your specific needs. Adding caster wheels makes the bench easy to move and frees up floor space. Under the lower shelf, build in shelves or drawers to keep your tools and small materials organized. You could also add foldable side extensions. They provide extra workspace when needed and tuck away neatly when not in use.
For added convenience, route tool slots along the work surface edge. This gives you a dedicated spot for frequently used tools, reducing clutter and keeping them easy to reach.
You can also upgrade your bench to serve more functions. Install a miter saw station on one end for precise cuts. Adding drawer slides to the shelf and a pegboard backboard on the vertical surface helps keep all your tools organized and accessible. These upgrades boost your workbench functionality while keeping a compact design that supports your projects safely and effectively.
Safety Guidelines in DIY Workbench Plans

When building your workbench, safety comes first. Always wear safety glasses and ear protection when using power tools. Pre-drill screw holes to keep the wood from splitting and secure the pieces with clamps. Make sure the legs are well anchored so the bench stays stable and resists tipping. These steps help reduce mistakes and lower the risk of injury as you work.
For extra security when attaching caster wheels, fasten them with washers over the screw heads. Use a level to check that each caster is set straight. Test wood finishes like stain on a scrap piece before applying it to your workbench to avoid unexpected color or texture changes. Work slowly and methodically to ensure both safety and a quality finish. Stay alert and follow these precautions throughout the process.
Finishing & Maintenance Tips for DIY Workbench Plans
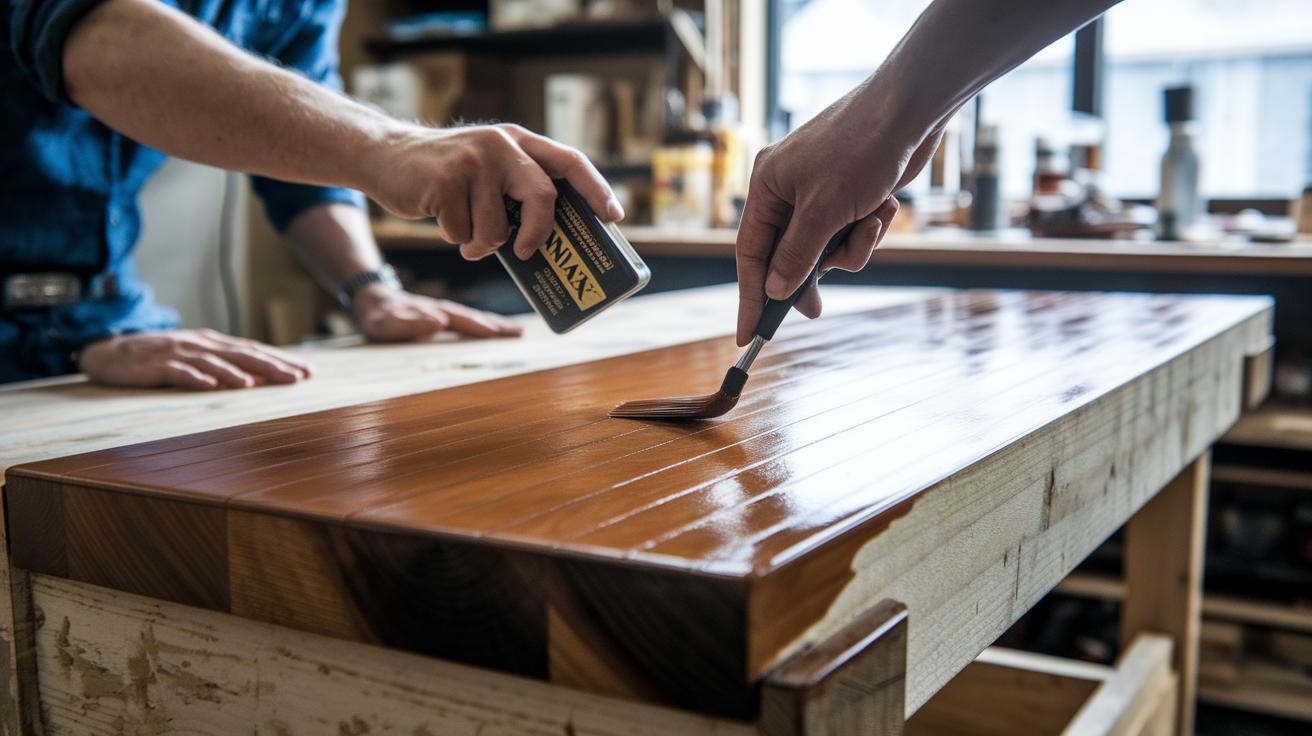
Now that you’ve built your workbench, it’s time to finish it and protect it for the long haul. Start by testing Minwax Gunstock Stain on a spare scrap of wood to make sure the color is just right. Brush the stain on evenly and let it dry completely.
Once dry, apply two coats of clear polyurethane. Sand lightly between coats for a smooth finish. This process makes the wood look great and adds a strong layer to guard your bench against everyday use.
For ongoing care, check your workbench every year. Tighten all the screws to keep the bench stable. Look over the surface for signs of wear and reapply the finish if needed to keep it smooth and safe. Also, remember to lubricate the caster wheel bearings regularly so your bench stays easy to move.
Final Words
In the action, you’ve followed clear diy workbench plans that explain each step, from cutting your pieces with a circular saw to assembling sturdy frames and adding caster wheels. Every stage was designed to build your skills and ensure a safe, efficient project.
We hope these step-by-step instructions make your build achievable and enjoyable. With careful planning and proper measurements, your workshop project will be both affordable and lasting. Keep up the good work and remember: precision now leads to pride later!
FAQ
DIY workbench plans free
The DIY workbench plans free give you immediate access to downloadable designs without cost. They offer complete instructions and a cut list, making your project planning both simple and budget-friendly.
Free workbench plans PDF
The free workbench plans PDF provide an all-in-one document with detailed steps and dimensions. They allow for easy printing and quick reference while you build your workbench at home.
How to build a workbench for beginners
The how to build a workbench for beginners guide offers clear, step-by-step instructions. It covers planning, cutting, and assembly, ensuring that beginners can build a safe and sturdy workbench.
Heavy duty workbench plans PDF
The heavy duty workbench plans PDF focus on reinforcing your workbench for rigorous tasks. They include precise dimensions and robust construction techniques to ensure durability in demanding workshop settings.
Traditional workbench plans PDF
The traditional workbench plans PDF outline classic design features and assembly steps. They provide a time-tested blueprint with detailed measurements, ensuring a reliable workbench that meets traditional woodworking standards.
How to build a workbench out of 2×4
The how to build a workbench out of 2×4 instructions emphasize using common lumber sizes. They detail the steps of cutting, framing, and securely fastening the pieces to form a practical and durable workbench.
Free heavy duty workbench plans
The free heavy duty workbench plans deliver sturdy designs at no cost. They combine robust construction methods with clear instructions, making them ideal for projects that require extra strength and reliability.
Rolling workbench plans free
The rolling workbench plans free integrate caster wheels for mobility. They include detailed guidance on installing casters and assembling the workbench, so you can easily move your project around your garage or shop.
