
Have you ever thought that just a few boards can transform your backyard into a relaxing space? This guide explains the process in clear, simple steps. We show you how to plan your deck, take accurate measurements, and build it the right way. You'll learn about smart layout choices and the best materials to create a safe area for grilling, relaxing, or spending time with friends. Whether you're new to deck building or just need a clear plan, we break it down in a way that feels easy and doable.
Backyard Deck Construction Essentials
Start by measuring your space carefully. A standard deck is around 300–400 sq ft (28–37 m²) but decks can be as small as 100 sq ft (9 m²) or even over 450 sq ft (42 m²). Watch out for trees, fences, and uneven ground when you measure. Always double-check your measurements to avoid mistakes later.
Decide if your deck will be attached to your house or stand on its own. This choice changes how you use ledger boards (the boards fixed to your house) and footings (the concrete supports). Draw a simple sketch and mark key features so you keep track of the design and ensure safe connections.
Make a detailed materials list before you start. Write down every item including lumber, hardware, lighting, and any built-in seating. Using quality materials like 2×6 ground-contact pressure-treated lumber for the frame helps your deck last longer. Remember to leave gaps of 1/8″ to 3/16″ between decking boards for proper expansion and contraction.
Plan the overall design of your outdoor platform. A raised deck can give you a cozy space for relaxing, entertaining, or grilling. Think about adding built-in seating and lighting to boost both style and function. With accurate measurements and a well-prepared materials list, you set a solid foundation for a safe, enjoyable deck project.
Site Preparation and Foundations for Backyard Decks
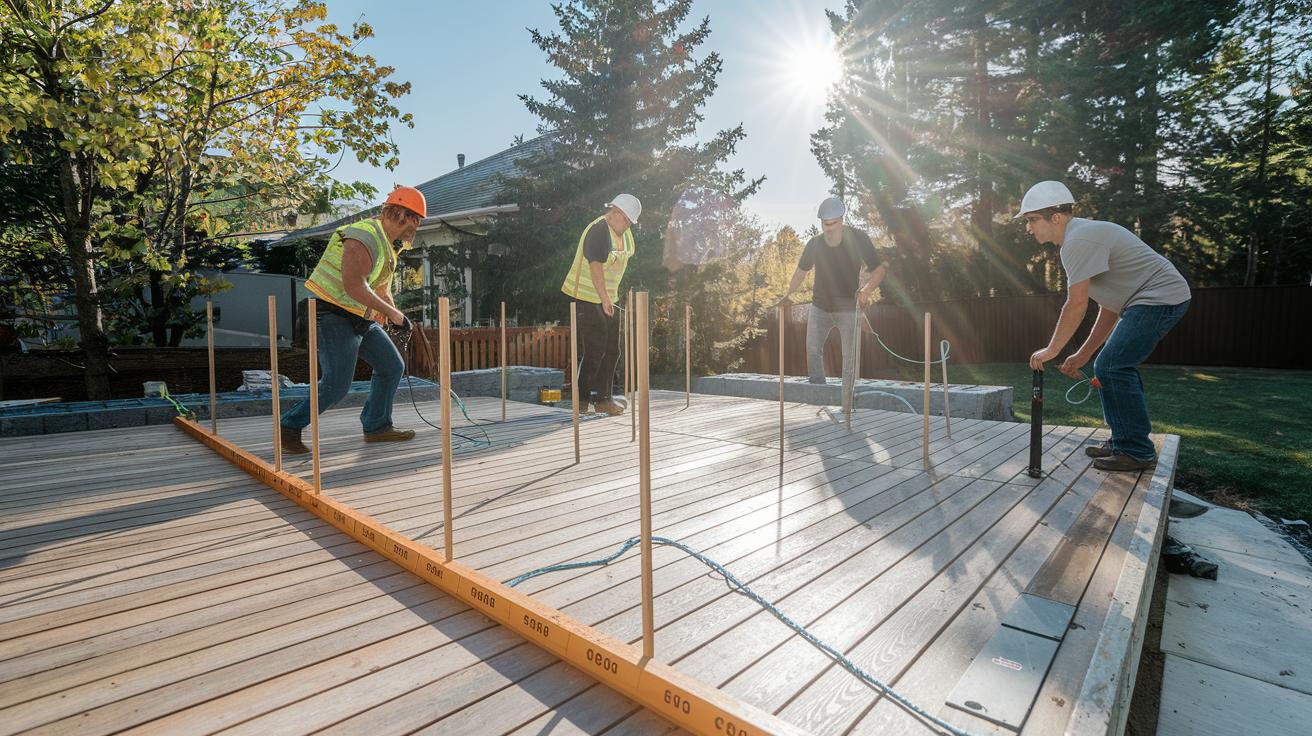
Start by cleaning the area and making sure the soil is level. Use a transit or level to check the yard’s slope. Mark where your deck will go with stakes and string. Then, measure 3, 4, and 5 feet to confirm the layout is square. This helps avoid alignment problems later.
Choose your footing based on your soil type and frost line. You can use concrete post forms or precast deck blocks. For a site with little slope, self-leveling deck blocks provide a stable base with less hassle. Use 2×6 prime pressure-treated lumber (wood treated for ground contact) for posts to protect against moisture.
Taking your time with site preparation saves trouble later. A solid, accurate base makes it easier to mount the deck safely and meet code. Follow these simple steps for a reliable foundation:
- Clear and level the site.
- Stake and square the layout.
- Excavate for footings or set deck blocks.
- Pour concrete or position precast blocks.
- Install post anchors or brackets.
For more detailed information on deck footings, refer to the deck footings guide.
Building backyard decks Made Simple
Begin by choosing strong lumber. Use 2×6 ground-contact pressure-treated boards for the joists to give your deck lasting support. For the deck surface, you can use cedar, redwood, or tropical hardwood if you like a natural look with warmth. If you prefer low maintenance, composite decking is a good choice. It uses hidden-fastener systems for a neat finish and works well on island decks where you do not need extra supports.
Next, select the proper hardware to secure your structure. Use galvanized or stainless-steel screws along with joist hangers to build a solid frame. Add ledger flashing to protect the connections from water damage and rot.
Gather these essential tools before you start:
| Tool |
|---|
| Circular saw |
| Cordless drill or impact driver |
| Speed square |
| Post-hole digger |
| Level |
| Chalk line |
If you have them, a nail gun and power sander can help you install boards faster and finish the edges nicely. With quality materials and the right tools, you set yourself up for a deck that is both reliable and attractive.
Framing and Structural Assembly for Raised Backyard Terraces
Ledger Board Setup
Start by firmly attaching the ledger board to the house's rim joist if your deck is connected. Use flashing to guide water away from the board. Make sure the flashing hangs over the ledger board so moisture stays out of the wood. Check that the ledger board is level before you begin. Double-checking the level now will help you avoid future water damage.
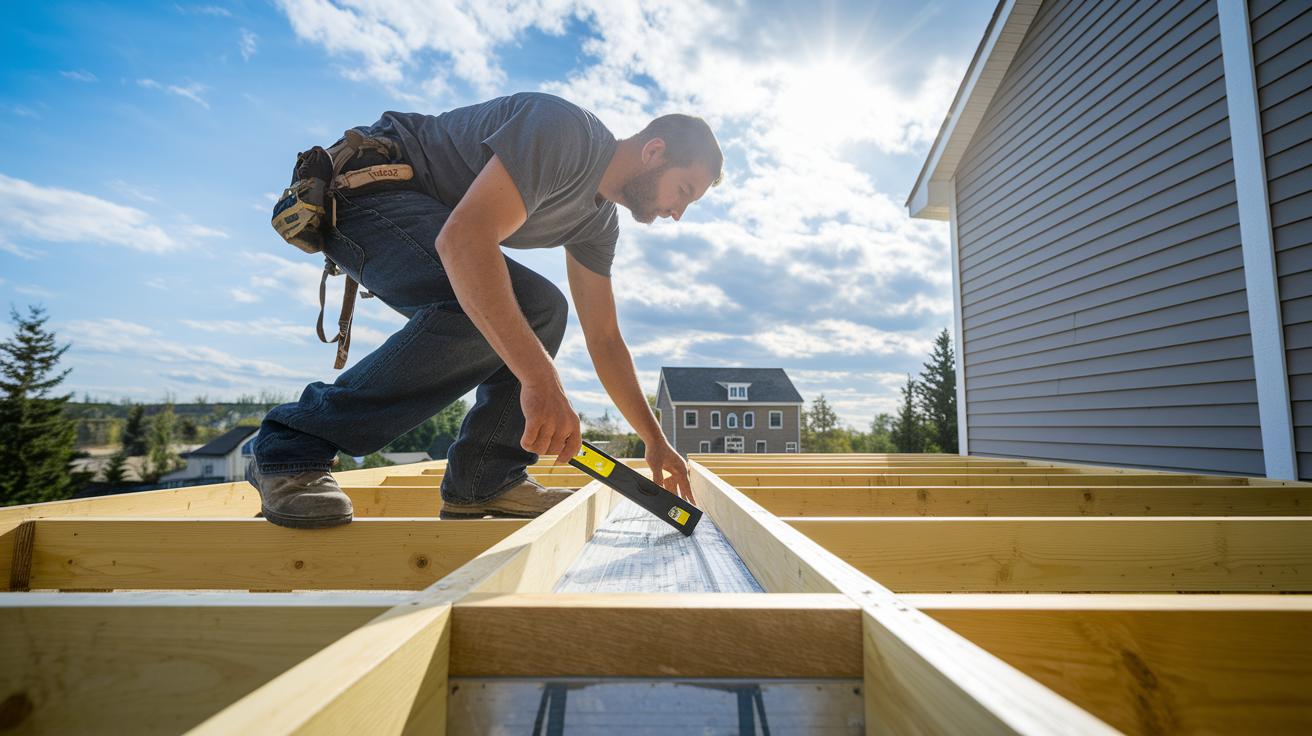
Joist Layout and Spacing
Lay out your joists using a chalk line to mark 16 in (41 cm) centers for normal loads. For heavier loads like a spa or hot tub, mark at 12 in (30 cm) centers for extra support. Secure each joist with joist hangers, using structural screws and galvanized hardware to make a strong, lasting connection. A simple tip: snapping a chalk line is like drawing a straight line on paper to guide your work.
Beam and Support Posts
Choose beam sizes from span tables, often using two 2×10 or 2×12 boards. Set support posts on concrete footings to keep everything stable. For free-standing decks, mount the beams on posts with post caps and carriage bolts or structural screws. Adjust the post heights if needed so that the deck surface stays level. Taking time to adjust now means all beams will line up evenly and your deck will be safe for many years ahead.
Installing Decking Boards and Safety Railings on Backyard Platforms
Start by placing your deck boards from the outer edge and work your way in toward the house. Begin at the edge of the deck and move inward, fastening each board while leaving a gap of 1/8 in (0.32 cm) to 3/16 in (0.48 cm) between the planks. This gap lets the boards expand and contract with the weather. Use composite hidden-fastener clips to create even gaps and a smooth finish that keeps your deck neat and lowers future maintenance.
Next, install the safety railings. Check that the top rail is at least 36 in (91 cm) high and that the balusters are no more than 4 in (10 cm) apart, as required by building codes. Install the railings after the decking is complete so they line up evenly with the deck surface.
Here are some popular railing styles that add both safety and charm to your deck:
| Style | Description |
|---|---|
| Cedar with Tempered Glass Infill | Combines natural wood with a modern glass touch. |
| Stainless-Steel Cable Railing | Sleek and durable with a minimal look. |
| Planter-Integrated Rail System | Adds greenery and style in one design. |
| Classic Vertical Picket Rail | A traditional design that never goes out of style. |
Take your time, measure twice, and secure every part properly. A careful installation meets local safety codes and gives you a deck that looks great and lasts long. For more ideas, explore various deck railing designs to find the best style for your home.
Cost Estimation and Budget Strategies for Backyard Decks

For a 300 sq ft deck, expect to spend about $1,500 on lumber, $500 on labor or a helper, $200 on tool rentals, and $100 on permits. Add 10% to your lumber cost for fasteners and hardware.
Review your cost options early. Buying in bulk at big-box stores lets you pick up supplies curbside and cut down on delays. When choosing between wood and composite boards, know that composites can cost 20-30% more, especially if you want special railings or built-in features.
Decide if you want to hire a contractor or do it yourself. Compare contractor quotes with the savings of a DIY approach or enlisting a motivated helper. Track and update your prices as you adjust your materials list.
Keep a clear list of all expenses, and update it while you shop. This careful approach helps you avoid overspending and lets you enjoy building your deck without any budget surprises.
Maintenance and Seasonal Care for Durable Backyard Decks
Keep your deck in top shape with a simple, regular care routine. First, give your deck a good power wash once a year. This helps remove dirt and mildew that can stain the wood. Every 2–3 years, put on a UV-resistant seal to protect the wood from harsh sun and weather.
When spring arrives, check all the fasteners. Tighten any loose screws to keep your boards secure. Also, look over the deck for any signs of rot or warping. If you spot damaged boards, replace them before the problem gets worse.
In winter, clear off snow quickly to stop ice buildup. Use a non-metal shovel to avoid scratching the wood, and choose an ice melt that is safe for wooden decks.
- Power-wash the deck annually
- Apply a UV-resistant seal every 2–3 years
- Tighten screws each spring
- Replace any damaged boards promptly
- Clear snow with non-metal tools and safe ice melt
Final Words
In the action, we covered planning your layout, preparing a level site, and choosing the right materials and tools. We broke down framing, deck board installation, and safe railings. We also discussed cost estimates and smart budget tips. Lastly, we shared seasonal care advice to keep your project in top shape. Every step helps in building backyard decks that last and suit your needs. Tackle your project with confidence and enjoy the process as your outdoor space evolves.
FAQ
Building backyard decks on a budget
The building backyard decks on a budget approach focuses on cost-effective planning, using affordable materials, and doing much of the work yourself to keep expenses low while achieving a sturdy design.
Building backyard decks pictures
The building backyard decks pictures provide clear visuals of layout, construction steps, and finished details that help you see the process from planning to the final look.
Building backyard decks for beginners
The building backyard decks for beginners guide covers simple steps from site preparation to framing and railing installation while explaining basic concepts in clear, easy language.
How to build a deck step by step with pictures
The how-to-build-a-deck step by step with pictures methodically shows you each phase—from marking the layout and installing footings to assembling the frame and adding decking—with helpful visual cues.
How to build a small deck platform
The how-to-build-a-small-deck platform process involves planning the size, choosing proper posts and footings, constructing a compact frame, and installing decking boards with appropriate gaps for wood movement.
How to build a raised deck attached to house
The how-to-build-a-raised-deck attached to house method starts with securely installing a ledger board with flashing, then adding joists, beams, and support posts to form a safe and stable deck.
How to build a deck off a house
The how-to-build-a-deck off a house plan uses freestanding support posts and beams, avoiding the need for a ledger board, while still following similar steps for a durable outdoor structure.
DIY wood deck
The DIY wood deck project involves careful planning, selecting quality pressure-treated lumber, and following simple, step-by-step instructions so you can build a robust, attractive deck yourself.
How much would a 20×20 deck cost to build?
The cost to build a 20×20 deck generally depends on materials and design details, with estimates typically ranging from $3,000 to $10,000 for a complete project.
What is the 3/4/5 rule for decks?
The 3/4/5 rule for decks uses a triangle with side lengths in a 3:4:5 ratio to help confirm a right angle, ensuring your deck layout is square and properly aligned.
Do I need 2×8 or 2×10 joists for my deck?
The decision between 2×8 or 2×10 joists for your deck depends on the deck’s span, load requirements, and intended spacing, with 2x10s offering more strength for heavier loads.
How much does a 14×20 deck cost to build?
The cost to build a 14×20 deck varies by material choice and design, with prices usually falling between $5,000 and $12,000, covering lumber, hardware, tool rental, and permits.
