
Ever thought about building your own deck that saves you money and turns your backyard into a relaxing retreat? It may seem challenging at first, but with a bit of planning and a few simple tools, you can create a great space for grilling and unwinding. In this guide, we show you how to measure your space and install the deck boards step by step. So, gather your tools, take your time, and get ready to enjoy a deck you built yourself.
DIY Deck Building Overview: A Complete Step-by-Step Guide

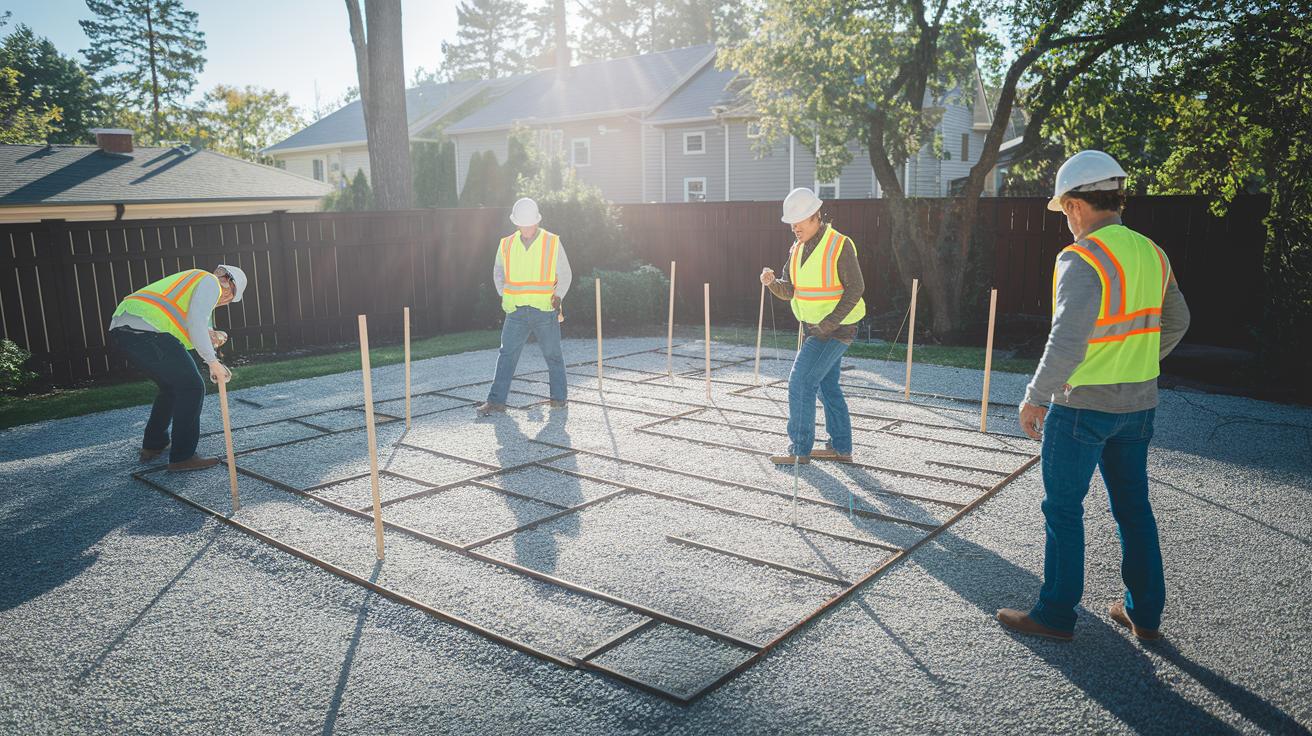
Start by measuring your space and drawing a rough layout for your deck. This first step is important to make sure your deck fits well in your backyard and meets your needs, whether you plan to use it for seating, grilling, or even a small café spot. Tip: Measure twice before cutting.
Next, focus on the main parts of your deck: posts, beams, joists, and deck boards. Mark where the posts will go and decide if you want to use concrete post forms for extra strength or set them directly in footings. Use pressure-treated lumber with a copper-based MCA treatment (this treatment guards against rot and fungi and is safe for plants, people, and pets). Look for black end tabs to know if the lumber is meant for light-duty work or ground contact.
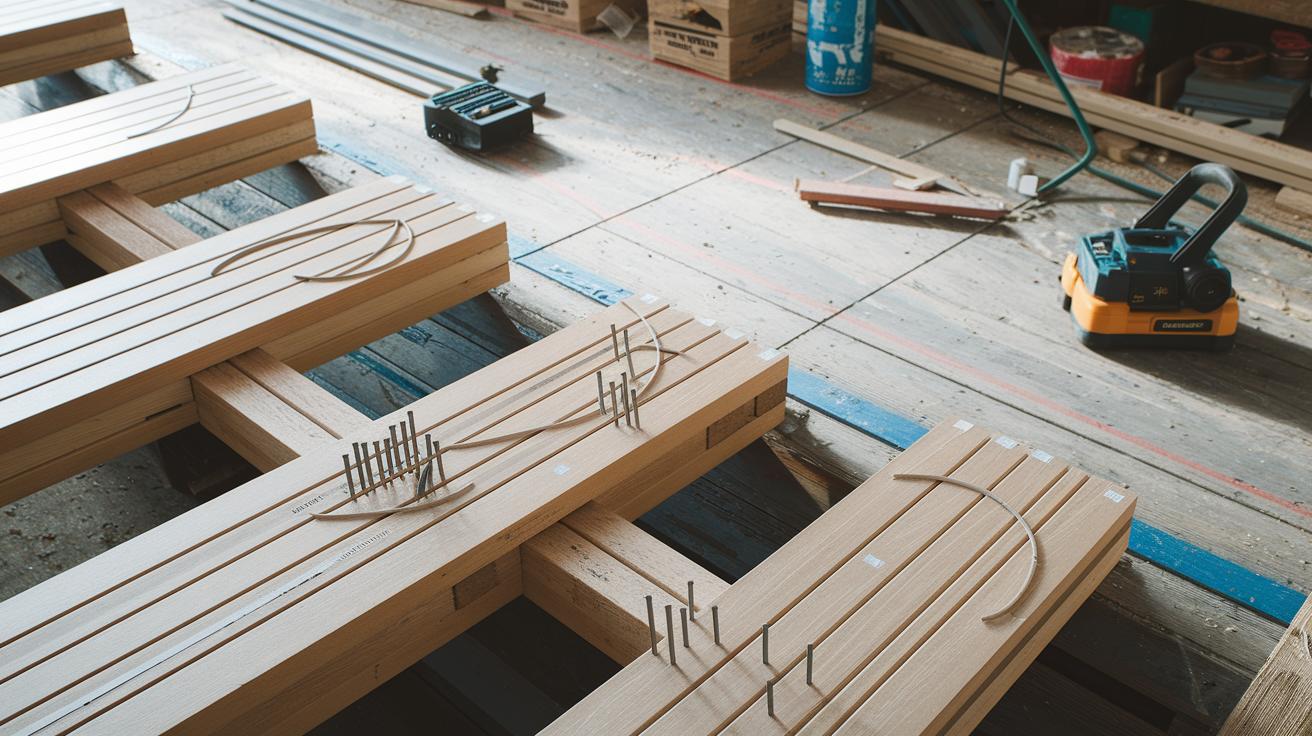
Then, place the beams on top of the posts. Lightly crown the boards (give them a slight curve) and mark the natural curve with arrows so the pattern stays consistent. Check the beams with chalk lines to be sure they are level, and adjust them for any small yard slopes.
Now, install the joists. Use joist hangers or set them directly on the beams, spacing them 16 in (41 cm) apart from center to center. This spacing helps maintain an even overhang and gives the deck boards enough room to expand or contract with weather changes.
After that, lay the deck boards over the joists. Secure each board with corrosion-resistant screws and stagger the end joints to boost strength and durability.
Before you start cutting or drilling, plan every detail. Think through your options, measure carefully, and draw several design ideas to work through challenges like angled fences or uneven ground. A careful, methodical plan is the key to a successful DIY deck project.
2. how to build a DIY deck: Enjoy Outdoors

Begin by measuring your space accurately and sketching a few layout ideas. Think about how you'll use the area, for grilling, seating, or a cozy outdoor café. Accurate measurements set the stage for a solid design.
Next, set a budget. List expenses like materials, labor, and permits based on local code requirements. Check if your area has specific setback rules or post depths for safety. You might use deck design software to visualize and adjust your plan. This review helps you spot hidden costs and plan smartly.
Now, decide if you need concrete post forms or direct footings. Also, consider if your deck will include steps. Small design changes can change your costs, so compare materials and methods to save money without losing quality.
Finally, put together a DIY deck project checklist to track your progress and supplies. Many home centers offer curbside pickup for large lumber orders, which saves time and hassle. Reviewing your checklist before you start ensures your deck will be strong, safe, and ready for outdoor enjoyment.
DIY Deck Foundation: Footings and Post Installation Guide
-
Mark where you will place each post. Use string and stakes to lay out your design. Check local building codes to know how deep the footing must be. In some areas, you may need a footing that is 36 in (91 cm) deep.
-
Dig each hole using a shovel or a post hole digger. Remove loose soil and debris from the bottom of the hole. A clean base helps the concrete bond well. Tip: Use a tape measure to double-check the depth against code requirements.
-
Rent a concrete mixer if you plan to fill several footings. Mix three 60-lb bags at a time so you work efficiently. Aim for a mix that is easy to pour and holds its shape. Pour the concrete with a slight slope away from the post to keep water from pooling and damaging the wood.
-
Set the deck posts using 2×6 ground-contact pressure-treated lumber. Place each post into the wet concrete. Use a level to make sure the post is plumb (vertical). Adjust it while the concrete is still soft, so it does not lean forward or backward.
-
Let the concrete cure completely before adding any extra parts to the deck. Do one last check along the side of each post to be sure it is stable. This step is key for a safe and durable deck foundation.
DIY Deck Framing Techniques: Installing Beams and Joists
-
Begin by setting your beams on the deck posts. Crown each board by giving it a slight curve, and mark the curve with an arrow (for example, "Curve this way"). Nail the beam in place temporarily, then secure it with screws to keep it steady.
-
Level the tops of the beams. Snap chalk lines along their lengths to spot any uneven spots. Next, run an electric planer over rough areas until the surface feels smooth and even.
-
Mount the joists next. You can attach them with hangers or cut notches into the beams. Keep a uniform spacing of 16 in (41 cm) from the bottom of each joist. This spacing creates a neat overhang for the rim joist, much like lining up dominoes with equal gaps.
-
For decks built on uneven ground, use a leap-frog taping method. Alternate between two 2×8 boards every 2 ft (61 cm) to bridge bumps and dips, like stepping stones that form a secure path.
-
Advanced tip for experienced DIYers: complete the framing by adding a rim joist around the deck edge. Fasten the joist hangers with a Senco nailer, and double-check the alignment and tightness of each connection before continuing.
DIY Deck Board Installation: Pressure-Treated Lumber and Spacing

-
Choose 2×6 prime ground-contact pressure-treated lumber for your deck boards. This wood is made to resist rot when it touches the ground. We picked 2×6 boards to protect the lower sections of the deck, even during heavy rains.
-
Check the manufacturer’s gap recommendation before laying the boards. Leave a gap of about 1/8 to 1/4 in (0.32–0.64 cm) between boards. This space lets the wood expand and contract with changes in the weather.
-
Fasten each board with corrosion-resistant screws or deck clips. Stagger the end joints to add strength and create a natural look. This step avoids long, continuous seams that might weaken over time.
-
Apply deck tape to the joists under areas that see heavy traffic before you install the boards. The tape acts like an extra shield, helping to extend the life of both the joists and the boards. Lay it down smooth and straight, much like preparing a runway.
-
Check that every board sits level and the gaps remain even as you work. Use a tape measure and a level. Measure twice to be sure your deck surface is sturdy and durable.
DIY Deck Railing & Stairs: Safety-Compliant Installation Tips

Before you begin, take out the old railing and refinish the support structure. Remove any debris and old fasteners so your base is clean and secure. Check for damage or rot to make sure your new railing has a solid foundation.
Next, follow your local building codes. Railings are usually 36 in (91 cm) to 42 in high, and the gaps between the balusters should not exceed 4 in. Mark each post and use a tape measure to check these distances. For example, stand at a post and measure up 36 in (91 cm) to mark the minimum height required before attaching the new railing.
For the stairs, use 2×12 lumber to build your stair stringers. Cut the stringers to the correct angle, and attach them firmly to the deck frame. Then install the treads and risers, ensuring each step is securely fastened to avoid any shifting. Tip: Gently tap each step with a rubber mallet to check that it is stable.
For more style ideas, visit the deck railing ideas page at https://alphapix.org?p=90 to view various picket styles and modern guardrail options.
Finishing and Maintaining Your DIY Deck: Waterproofing, Stain, and Care

Start by applying a water-resistant deck stain or sealant just as the manufacturer recommends. This step shields your deck from rain, moisture, and sun damage. Tip: Test one board first by waiting 24 hours to see if small water beads form.
Next, install under-deck skirting to cover storage and protect your joists (the wooden supports). This not only improves the deck’s look but also keeps animals and debris out. Tip: Choose skirting that matches your deck’s finish for a smooth, coordinated look.
Then, add low-voltage LED lighting along the stairs or railings. These lights boost safety and create a warm, inviting glow when the sun goes down. Many deck owners find that this simple fix transforms the deck into a cozy extension of their living space.
Finally, mark your calendar for a yearly check. Clean off any debris, tighten loose fasteners, and reapply sealant as needed. These regular checks help you spot early wear and avoid expensive repairs later.
Final Words
In the action, you’ve covered everything from planning the layout and budgeting, to digging footings, installing beams and joists, and finally laying out deck boards and railings. Every step builds the knowledge and confidence needed for a high-quality structure. The guide showed you clear methods, precise measurements, and practical tips so you can finish your deck safely and on schedule. Now you have a proven blueprint to learn how to build a DIY deck and enjoy a rewarding project from start to finish.
FAQ
Q: How do I build a DIY deck step by step for beginners, including from scratch and with pictures?
A: Building a DIY deck involves planning, gathering materials, and following clear steps such as leveling, framing, and board installation. Detailed picture guides help show each stage for beginners.
Q: How can I build a DIY deck or deck on a budget?
A: Building a deck on a budget means planning carefully, buying cost-effective materials, and reusing supplies when possible. Measure your space and compare prices at local home centers for savings.
Q: How do I build a small deck platform?
A: To build a small deck platform, plan a compact layout, prepare a solid foundation with proper posts, and use durable lumber like pressure-treated wood for a stable, attractive structure.
Q: How do I build a deck attached to a house?
A: Building a deck off a house requires checking local codes, securing proper anchors, and designing the connection so the deck safely extends from the home while matching your style.
Q: What is the cheapest way to build a deck right now?
A: The cheapest method uses budget-friendly materials like economical pressure-treated lumber, smart planning for minimal waste, and taking on the work yourself to reduce labor costs.
Q: What does the 3/4/5 rule for decks mean?
A: The 3/4/5 rule for decks is a guideline for joist spacing and beam support, helping ensure your deck frame is strong and properly balanced when constructed.
Q: How much does a 20×20 deck cost to build?
A: A 20×20 deck typically costs between $1,500 and $4,000, with prices varying based on materials, design complexity, and whether you do it yourself or hire help.
Q: Do I need 2×8 or 2×10 joists for my deck?
A: Choosing between 2×8 and 2×10 joists depends on deck span and load requirements. For longer spans or heavier loads, 2×10 is recommended; check local plans for precise guidance.
