
Do you wonder why one room feels dull while another brims with energy? A DIY room makeover might be just what you need. This guide shows you how to check what each room needs and plan a space that works for you. It walks you through simple steps that blend style with function. Whether you’re setting up a snug guest room or a lively office, you can transform your space today without breaking your budget.
Kickstart Your DIY Room Makeover: Identify Needs and Set Objectives
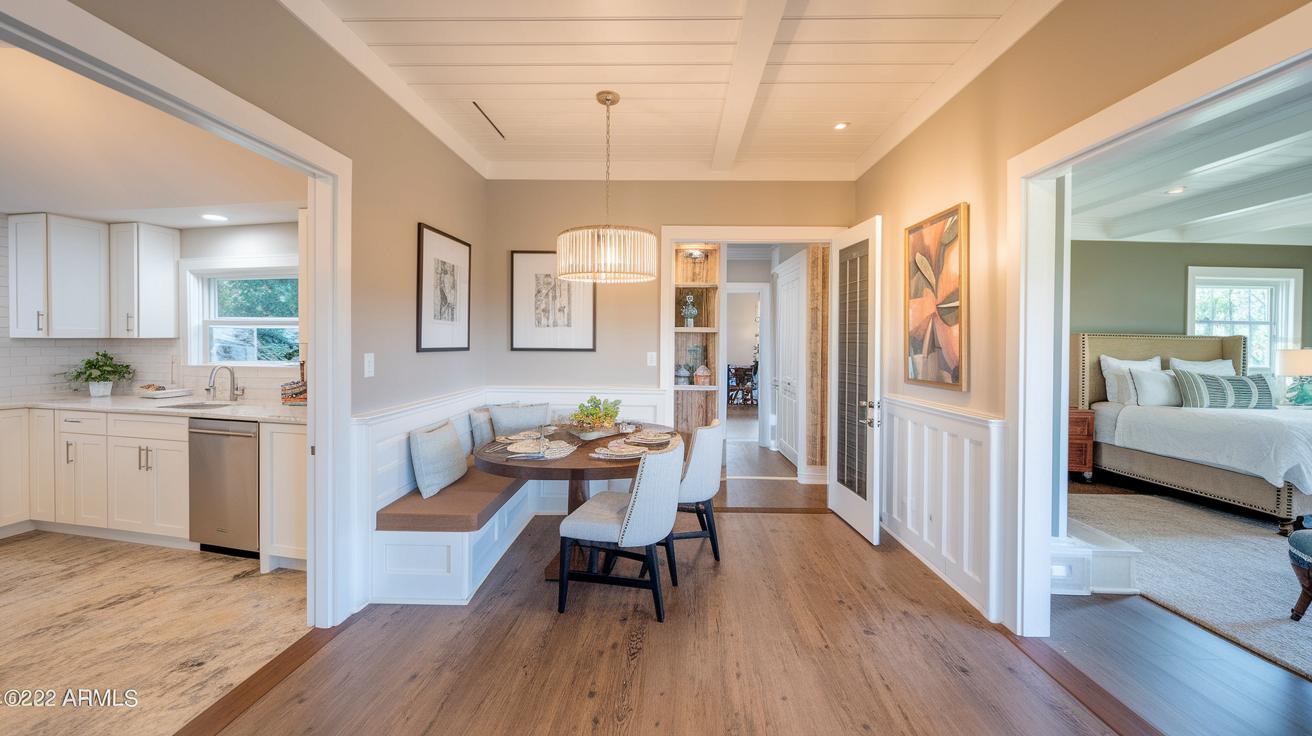
Walk through each room and list what you need each one to do. Ask yourself, "What should this room be for?" For example, a guest room that also serves as an office might need a desk and shelves. A breakfast nook in the kitchen might work best with a small table and chairs. This initial planning helps you create spaces that fit your daily life.
List the main points for each space:
- Kitchens: Decide if you want energy-saving appliances or a cozy dining area.
- Bathrooms: Think about waterproof floors and a smart vanity setup.
- Bedrooms: Choose a bed that stands out, and plan for storage.
- Family Rooms: Pick flooring that can handle lots of use.
- Basements: Determine if it will be a home office, gym, or extra guest area, and check for any issues like exposed wiring.
Measure your rooms and draw a simple floor plan to see where furniture will go. Write down what you need like built-in storage, extra seating, or extra lighting. For example, note: "I need a reading nook with a comfy chair and a lamp." This process makes your goals clear and guides your shopping and design decisions. Clear goals keep you on track and make sure every change has a purpose.
Curating Design Inspiration in Your DIY Room Makeover Guide

Start by collecting images that match your style and vision for the room. Use online tools like Adobe Spark or Canva to build a mood board. These tools let you save pictures, textures, and colors that you love. This helps you form a clear plan for your makeover.
Pick a color set that works with your room’s light. If you have little natural light, go with light colors to brighten the space. If your room is well-lit, add a bold accent color to bring energy. For example, think of a calm blue with crisp white for a peaceful look.
Group your ideas by style. Write down things like furniture, wall decor, and flooring. This way, every piece matches the others. A mood board not only speeds up your decision-making but also gives you a clear blueprint for your decor.
Draw a simple layout to see how your colors and patterns fit together. Notice how one accent wall can change the feel of the entire room. This technique keeps your design ideas organized and practical.
Strategic Planning and Budgeting for Your DIY Room Makeover Guide

Begin by drawing a clear floor plan of your room. Sketch every wall, door, and window to scale so you can check if your furniture will fit and that there is enough room to move around. This drawing helps you see the best places for main items and avoids costly mistakes later.
Next, make a complete checklist of all the materials and hardware you will need. Include items like curtain rods, sheers, screws, and small decorative details. Using a detailed DIY project planning checklist (https://alphapix.org?p=105) can help you cover every item. This list becomes your project blueprint and makes shopping easier.
After your checklist is ready, set up a clear budget. Use a simple spreadsheet (like Excel) to track costs such as retail price, taxes, and shipping fees for big items like flooring, cabinets, and countertops. A DIY project budget template (https://alphapix.org?p=109) is a handy tool to record each cost and adjust as needed. Be sure to add a small extra amount for unexpected expenses.
- Draw your room layout.
- Create a complete materials checklist.
- Record each expense in a spreadsheet.
- Update your budget as your plan changes.
Check your floor plan, checklist, and budget often. This careful planning and budgeting help keep your design goals on track and prevent overspending.
Step-by-Step Execution of Your DIY Room Makeover Guide
-
Choose a style that feels like you. Pick from options like Indie, Cottagecore, Witch, Dark Academia, or Galaxy. Picture a room with soft pastels and unique art that sets a cozy, indie tone.
-
Clear out unwanted items. Remove what doesn’t fit your chosen style to make space for your new ideas.
-
Pick a matching color scheme. Use light hues for rooms with little natural light and add a bright accent if the room is well-lit. This will set the right mood for your makeover.
-
Dress up your walls and ceiling. Add wallpaper stickers, art prints, or subtle ceiling designs. This simple change can give your room a fresh feel without being too bold.
-
Arrange or find furniture that does more. Choose pieces like a coffee table with storage or a desk that works as a vanity. You can also rearrange what you already have to give a new look.
-
Make the bed a focal point. Select a bed with storage drawers or an attractive canopy design. This upgrade helps set a calming vibe for the room.
-
Group decor by theme. Place throw pillows, rugs, and framed photos together so each detail supports your overall style.
-
Set up cozy lighting. Use string lights, LED strips, or projectors to create a warm, inviting glow that highlights your decor.
-
Add clever storage ideas. Use foldable baskets, desk organizers, or stylish coat hangers to keep clutter away and maintain a neat look.
-
Bring in plants thoughtfully. Choose plants that match your room’s light and your care routine. Place them where they can thrive and add a burst of natural color.
Room-Specific Enhancements in the DIY Room Makeover Guide

Begin in the kitchen. Freshen up by updating your cabinets and replacing old countertops. Add recessed lighting to brighten work areas and choose tile backsplashes that match your hardwood floors. For example, a sleek white countertop paired with blue-tinted glass tiles creates a cool, inviting look.
Next, head to the bathroom. Pick waterproof flooring options like 100% waterproof hardwood alternatives to keep your space safe. Upgrade to a spa-style vanity with a modern mirror and plenty of storage. Picture a calm bathroom where your new vanity and floor work together to create a peaceful retreat.
Now, transform the bedroom. Make the bed the room’s centerpiece with a canopy or modern bunk setup if you share the space. Hang blackout curtains to block light and set a restful mood. For instance, a bold headboard with matching blackout drapes can make bedtime feel luxurious.
In the family room, choose the right flooring for your lifestyle. Whether you like bold textures that stand out or classic styles that evolve with your needs, the right floor can change the whole room. Think of a durable area rug that brings the seating area together.
Finally, give your basement a clear purpose. Decide if it will be an office, gym, or guest room. Fix any exposed wiring and finish the concrete floors to improve safety and comfort. This clear approach tailors each room to fit your everyday needs.
Final Words
In the action, this DIY room makeover guide walks you through assessing needs, gathering bright design ideas, planning a detailed layout, budgeting carefully, and executing clear, step-by-step changes. Each section reinforces a smart approach to revamp any space from kitchens to basements. The guide offers room-specific tips that turn your vision into reality while keeping efforts manageable. Stay encouraged and keep refining your plan. Enjoy the process and watch your space transform into a functional work of art.
