
Have you ever wondered how to save time and money on your DIY project? Planning your materials well can help you avoid mistakes that cost both. Break your project into small parts, make a list, take precise measurements, and do simple math to calculate what you need. This guide walks you through each step so you know exactly what to buy and how much to order. Ready to get your project on track by mastering your material estimates? Let's dive in and get started!
Step-by-Step Guide to Estimating Materials for Your DIY Project

-
Break Down Your Project
Begin by dividing your project into clear sections like walls, floors, and ceilings. Listing each area helps you focus on what needs to be measured and counted. For example, separate your project into parts to ensure every material is accounted for. -
List Every Material Needed
Write down everything you will use. This includes big items like wood and small items such as nails, glue, and fasteners. Having a complete list helps prevent delays because you won’t miss even the smallest supply. -
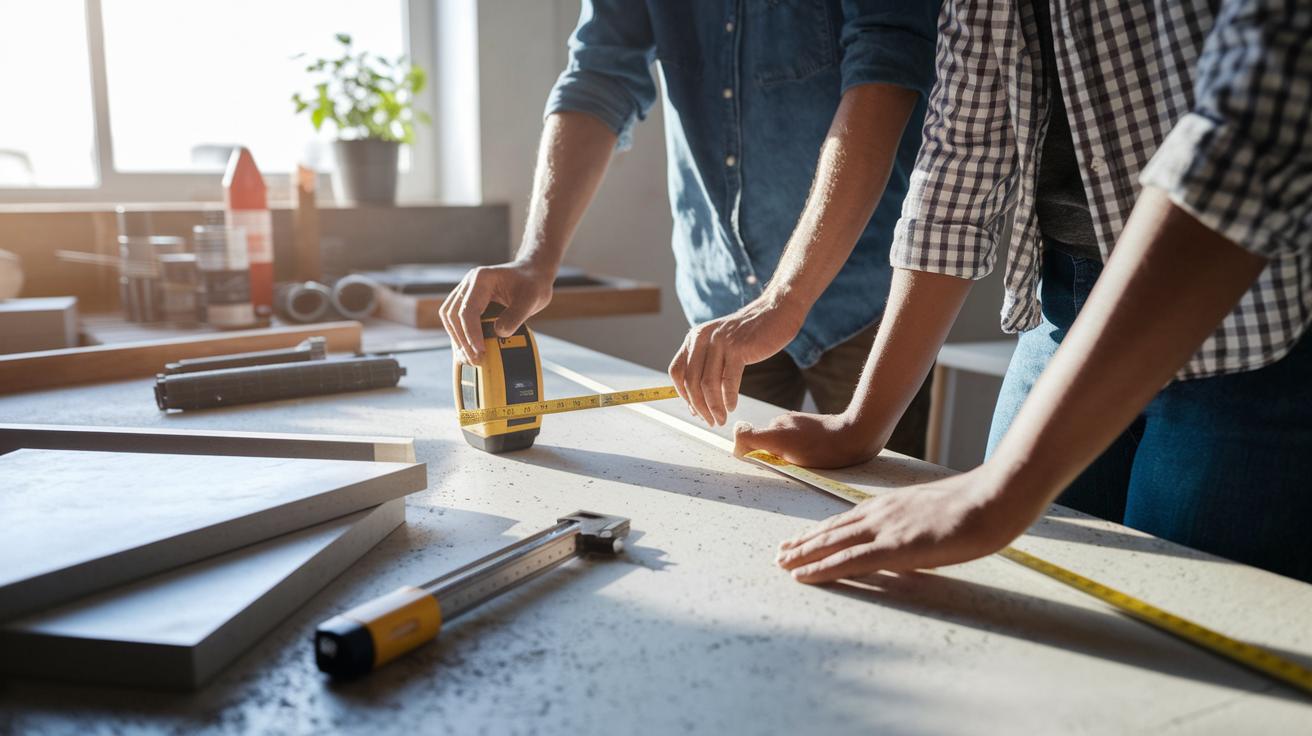
Take Accurate Measurements
Measure each area for its length, width, and height. Always double-check your numbers, it only takes 24 in (61 cm) to go wrong! For concrete, multiply length by width by depth (in cubic feet or cubic meters) to find the volume you need. For paint or tile, calculate the area carefully. Remember: measure twice to avoid mistakes that could cost you time and money. -
Do the Calculations
Apply simple formulas to figure out how many materials you need. For instance:Material Calculation Concrete Length × Width × Depth (in cubic ft, then convert to bag count) Tile Floor area ÷ tile coverage Paint Surface area ÷ coverage per gallon Multiply your results by the cost per unit to estimate your budget. It’s smart to add a little extra for waste and any unexpected changes. Following these steps makes your estimate clear and easy to follow, keeping your project on track.
Precision Measurement and Formula Basics for DIY Material Estimation
Double-check your measurements using both a tape measure and a digital tool. This helps catch mistakes early and stops you from underestimating or overestimating materials. Always re-measure important dimensions. For example, use a digital caliper to check the depth because an extra 0.5 in (1.3 cm) can change the concrete volume a lot.
Use these simple formulas to calculate your materials:
• Concrete: Multiply length × width × depth (ft³) and then convert to the number of bags needed based on mix coverage. Always compare your results with a digital conversion tool.
• Tile: Multiply the room’s length by its width to get the area, then divide by the area each tile covers. Verify the tile size twice to avoid ordering too many or too few.
• Paint: Divide the total surface area by the coverage per gallon. Add an extra 10% for waste. This step helps you stay precise and avoid shortages or excess.
| Material | Calculation | Advanced Tip & Example |
|---|---|---|
| Concrete | L × W × D (ft³), then convert to bags | 10 ft × 5 ft × 0.5 ft = 25 ft³; check with a digital tool (~2 bags if 1 bag covers 12 ft³) |
| Tile | (L × W) ÷ tile area | 12 ft × 8 ft = 96 ft²; verify each tile is 1.5 ft² to get ~64 tiles |
| Paint | Total area ÷ coverage per gallon | 400 ft² ÷ 350 ft²/gal; add 10% extra (~1.14 gallons, round up for waste) |
Make sure you double-check every step. If your measurements seem off, take a moment to recalc and use a digital conversion tool.
Accounting for Waste, Variations, and Overages in DIY Material Estimates

When planning your DIY project, add extra supplies. It’s easy to forget things like nails, fasteners, or glue. To keep mistakes at bay, add about 10% extra for items like tile, lumber, and fasteners. This extra helps cover waste from cutting, order errors, or unexpected changes.
A common error is leaving out waste allowances or miscounting small parts. Always check your numbers again. Even a small mistake can delay your project or add extra cost.
Keep in mind that extra fees may apply. Delivery charges, sales tax, and local price changes can raise your final bill. For example, a slight rise in lumber price can add up when you buy a lot.
To keep your estimate on track:
- Add a 10% waste allowance for important materials.
- Double-check measurements and counts for small items.
- Include potential extra fees and taxes in your budget.
By planning for waste, price changes, and additional charges, you ensure you have enough supplies and stay on budget.
Digital Tools, Spreadsheets, and Checklists for DIY Material Estimation
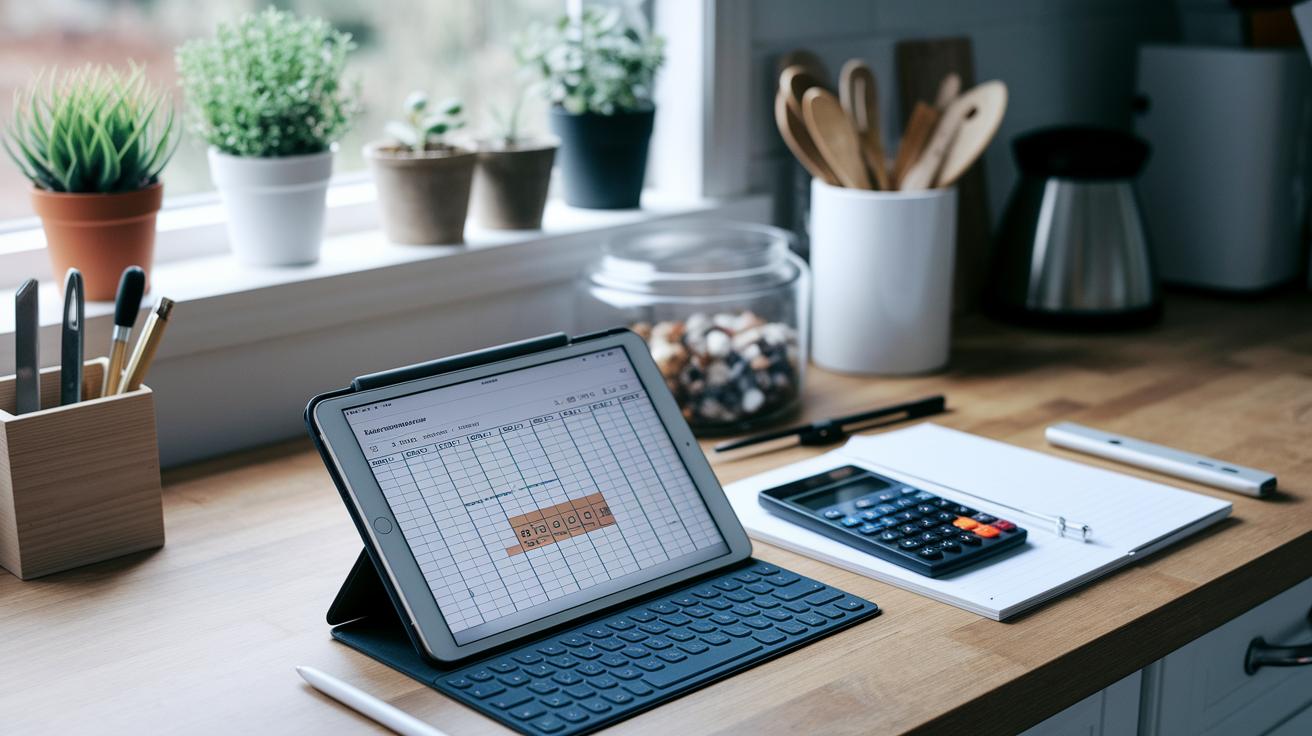
Digital tools make your material planning faster and simpler. They help reduce mistakes and keep your project on track. A good materials-estimate spreadsheet lists each item, tells you how many you need, shows the cost per unit, and names the supplier. It even marks what you already bought and what is still needed. This clear checklist keeps you from running out of materials.
Building-material calculators make guessing less of a hassle. They ask for basic details like room dimensions and coverage rates. This way, if you need concrete bags, tiles, or paint, you get quick and accurate estimates. Many free templates are available to help you organize your project, cut down errors, and combine all costs in one view.
Using these digital resources turns the dry task of estimating into a quick and smart part of planning your DIY project. It gives you better accuracy and lets you adjust for extra material you might need, ensuring nothing important is missed.
Budget Strategy Development and Cost Projection for DIY Material Estimation

Accurate cost estimation is key to keeping your DIY project on track. Start by multiplying the number of items you need by their unit price, then add tax and delivery fees. For example, if you need 10 packs of glue at $8 each, remember to include any tax and a flat delivery fee to get the true cost.
Break your spending into two groups: hard costs such as materials, labor, and equipment, and soft costs like extra reserves, permit fees, and risk management. This way, you can clearly see where your money goes and spot chances to save.
For residential projects, a good benchmark is $85 to $120 per square foot. If your project covers 600 square feet, your base cost will be roughly between $51,000 and $72,000 before adjustments. Make sure to allow for a ±10% price change to cover any fluctuations.
Always check prices with local suppliers, since market conditions and supply chain issues can affect costs. It’s best to keep a detailed spreadsheet of every material and its cost, noting all fees and extra charges.
Set aside around 10% of your overall budget as a contingency. This extra buffer will help you handle any unexpected expenses or changes during your project. A thorough, updated budget plan supports smart decision-making and keeps you in control of your project’s finances.
Real-World Example: Estimating Materials for a Small DIY Deck Project
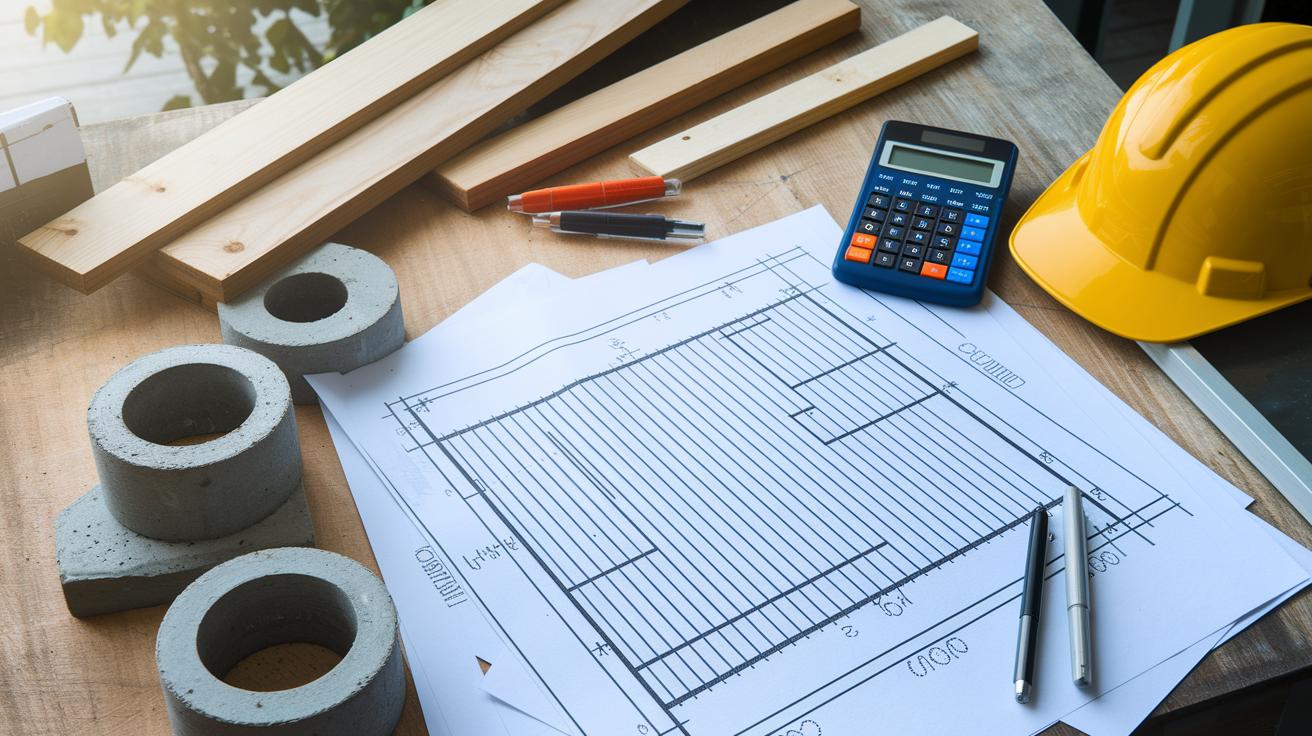
For this project, picture a 200 sq ft (18.6 m²) deck built with 2×8 deck boards (each 12 ft or 3.66 m long), joists, railings, and 4 concrete footings. Start by estimating the deck boards. Each board covers about 5 sq ft (0.46 m²). Divide 200 by 5 to get 40 boards, then add 10% for waste and cutting errors. This means you need roughly 44 boards. Tip: Always double-check the board coverage before you order. A small error of 0.5 sq ft can lead to a shortage or overspend.
Next, work on the joists. Count how many you need based on your deck layout and spacing. For a typical layout, you might use 8 joists to support the decking. For the railings, measure the deck’s perimeter; a 200 sq ft deck may call for about 40 linear feet (12.2 m) of railing. Plan for safety by adding the right fasteners and brackets.
Now, consider the concrete footings. Each footing measures 1.5 ft × 1.5 ft × 2 ft (0.46 m × 0.46 m × 0.61 m), which gives about 4.5 ft³ (0.13 m³) of volume per footing. Multiply by 4 to get the total volume, then check your local concrete mix yield to see if you need more material.
| Material | Quantity | Unit Cost |
|---|---|---|
| Deck Boards | 44 boards | $12 |
| Joists | 8 pieces | $15 |
| Railings | 40 ft | $5/ft |
| Concrete Footings | 4 units | $50 |
| Fasteners | 1 pack | $20 |
Final Words
In the action, you learned to break your project into clear parts and measure every element accurately. You explored practical formulas, waste allowances, and digital tools that keep your work neat and safe. Small adjustments like adding extra for waste and using checklists can keep costs predictable and schedules on track.
Keep your approach organized and your budget in check. Embrace these tips as you learn how to estimate materials for a DIY project.
FAQ
How to estimate materials for a DIY project online and free?
The method to estimate DIY project materials online involves listing all needed components, taking precise measurements, and using online calculators that guide you step-by-step—all available free.
What free building material calculator or app is available?
Free building material calculators and apps provide ready-to-use tools that digitize measurements, compute framing or wood quantities, and help organize material lists for efficient DIY planning.
How do you estimate the quantity of materials needed for a project?
Estimating material quantities requires measuring dimensions and using formulas—like multiplying length, width, and depth for volumes—while adding extra allowance for waste and unforeseen cuts.
How do you estimate the cost of materials for a DIY project?
Estimating cost starts with calculating each material’s quantity, multiplying by its unit price, and including additional charges such as tax, delivery fees, and a buffer for price variations.
What is the formula for calculating material needs?
The formula for calculating materials typically uses measurements—such as concrete volume equals length × width × depth—to convert project dimensions into required units for accurate supply estimation.
