
Have you ever looked at your room and wished it had more life? Simple changes can turn a plain space into a lively retreat. Inspired by a farmhouse project in Kentucky, these budget-friendly tips show you how to brighten your decor with just a few clever tricks. Imagine a standout accent wall or a new light fixture replacing an old one. In this post, we share easy updates that pack a big punch. Try these ideas and see how small touches can completely transform your room.
creative room makeover hacks brighten your decor
We can spruce up any room in no time with a few clever tricks that won't break the bank. Inspired by a farmhouse project in Kentucky, these ideas turn even a plain space into an eye-catching canvas. A bold accent wall, for example, sets a striking focal point.
Trying out new design touches can give a tired room a fresh vibe. For instance, a bright accent wall or a trendy light fixture swap can completely change the mood. Seeing before-and-after images might inspire you to try these changes without spending too much.
Here are some ideas:
- Paint one wall with a bold color to draw attention.
- Switch out old light fixtures for stylish, budget-friendly models.
- Combine different lighting sources to mix work light with mood lighting.
- Upcycle old furniture to bring new charm to your space.
- Change your draperies for an instant refresh.
- Choose decor that ties colors and patterns together.
Mix these hacks into a plan that feels uniquely yours. Start by picturing the look you want, and then add one or two ideas from our list. Experiment with where you place items, the contrasts you create, and the textures you mix. For more tips, check out DIY home decor projects (https://alphapix.org?p=216) and see how little changes can build a brighter, more welcoming space.
DIY Accent Walls and Artistic Murals for Instant Personality

You can easily turn a plain wall into a standout feature. Gather a can of chalk paint (for a smooth, matte finish), some painter’s tape (FrogTape works well), and stencils for adding patterns. These supplies let you create a bright accent wall or a cool mural even if you’re just starting out.
Here’s a simple guide for a clean finish:
- Clean your wall and cover nearby areas with drop cloths. Tip: Think of it like wrapping a special gift to keep it safe.
- Measure the wall and lightly mark where your design will go using a pencil.
- Apply the painter’s tape along the edges to get neat lines and guard areas you want to keep paint-free.
- Roll on a base coat of chalk paint with even, smooth strokes. Choose a color that pops against your design.
- Place the stencil on the wall and press it down firmly. Use a small roller or sponge to dab over the stencil so that the paint covers it evenly.
- Remove the tape while the paint is still a bit wet to reveal sharp, clean edges.
When picking contrast colors, choose shades that accent your design without taking over the room. Also, cover windows and trim with extra plastic or tape so your bay window’s natural light shines through without any paint splatters.
Clever Lighting Upgrades and Layered Illumination
Mix different light sources to set a warm and balanced mood in your room. Layered lighting makes it easy to switch between bright, focused beams for work and soft, ambient glows for relaxing. Try using trendy fixtures and mood lighting tricks to bring your decor to life. When you see light fixtures on sale, swap out your old ones to update your space without breaking the bank.
A craft room might use three lighting layers:
- Overhead can lights for general brightness.
- Table lamps on work areas for clear task lighting.
- Under-shelf LED strips to add a gentle accent.
Before you start wiring or installing any switches, check this safety list:
- Turn off the power at the breaker before handling wiring.
- Make sure all light fixtures work with your current circuits.
- Inspect cords and plugs for any signs of wear.
- Use the right tools with insulated handles.
- Follow all manufacturer instructions and call a professional if needed.
Following these steps keeps your lighting beautiful and your installation safe.
Repurposing and Upcycling Old Furniture for Unique Character
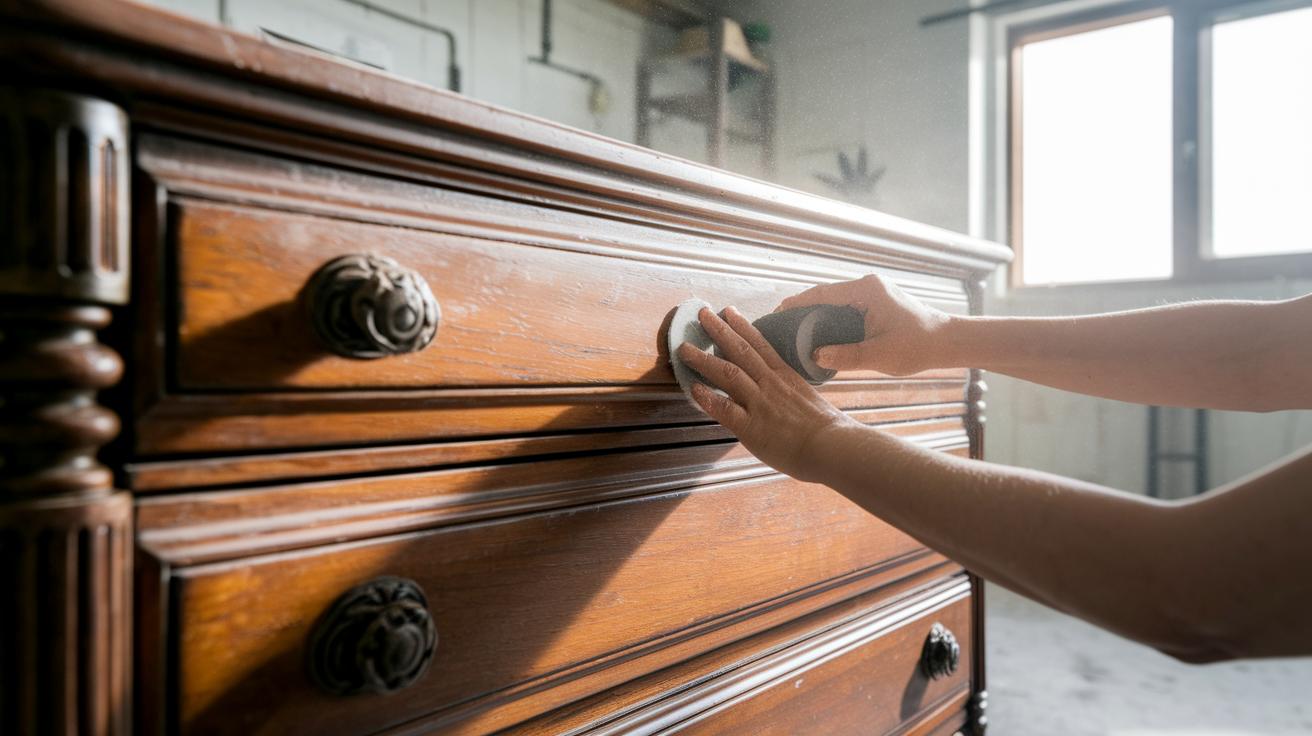
Give your old furniture a fresh start by turning it into a standout piece. First, take time to prep your item. Clean the surface, strip off any old finish, and sand down rough spots. A light sanding helps new paint or stain stick better and gives your piece a neat look.
Follow these steps for a great transformation:
- Use sandpaper to remove loose finish or peeling paint. This makes the surface smooth.
- Pick a good quality paint or stain that matches your design. Apply a base coat and then a topcoat for a durable finish.
- Update old hardware by replacing knobs, handles, or adding a decorative accent. This change makes a big difference.
- Add fabric or upholstery to parts like cushions or chair backs. Measure carefully and secure the fabric with a staple gun.
- Consider adding extra details like decoupage or a stencil design. These touches give your piece a unique personality.
- Check your work and fix any spots that need extra sanding or another coat of paint.
Tools and materials you will need include:
- Sandpaper (medium and fine grit)
- Paint or wood stain and brushes or rollers
- Replacement hardware (knobs, handles)
- Upholstery fabric and a staple gun
- A cleaning cloth and primer
You might also try using scrap wood to build a bench or window seat like in farmhouse designs. These steps help you save money while adding a personal touch to your home décor. Enjoy the process and have fun turning tired furniture into unique, functional art!
Layout, Color Schemes, and Decor Curation for Balanced Design
A balanced room starts with planning how furniture flows. In one craft room makeover, seating was placed at each end while a large work table took center stage under a bay window. Walls and floors featured a diamond pattern, and cushions and bookcases were arranged in a way that pulls the colors together. This plan gives you creative ideas and smart tips to keep your space stylish and practical.
Follow this three-step layout process:
- Draw a clear floor plan. Mark where big pieces like seating and the work table will go. Notice where natural light comes in from windows.
- Set up your key pieces. Place the work table in the center to create balance and an inviting feel. Make sure there is enough room to move between items.
- Bring in accent decor. Add pillows, art, and bookcase displays that link the room’s colors without cluttering the space.
Here are some recommended color-pairing tools:
- A painted color wheel
- Digital color matching apps
- Fabric swatches and sample boards
When mixing patterns, start with one main color. Choose one large, neutral pattern and mix in smaller prints to boost interest. Try both warm and cool hues to create pleasing contrast.
Clever Storage Solutions and Organization Hacks

Brighten your room with simple storage ideas that keep clutter away and your tools close at hand. A neat space sparks creativity and makes your daily projects more fun. These tips, inspired by DIY paper and ribbon organizers and built-in shelves, help even a small room feel larger and more useful.
Try these five practical organization ideas:
- Floating shelves: Mount them on your walls to display decor and hold supplies.
- Pegboards: Hang them near your workspace for quick access to tools and materials.
- Under-bench drawers: Use the area below seating for hidden storage.
- Modular cubes: Stack them to create storage that can change with your needs.
- Decorative baskets: Place them on tabletops or below shelves to store smaller items nicely.
Before-and-after photos show that these ideas can turn a messy area into a tidy, inviting workspace. With built-in shelves framing windows and modular bins for craft supplies, every item finds its place.
| Storage Idea | Dimensions / Cost Estimate |
|---|---|
| Floating Shelves | 24 in x 12 in (61 cm x 30 cm) | ~$25 each |
| Pegboards | 36 in x 18 in (91 cm x 46 cm) | ~$30 each |
| Under-Bench Drawers | Varies by bench size | ~$50 total |
| Modular Cubes | 16 in x 16 in (41 cm x 41 cm) | ~$40 each |
| Decorative Baskets | Varies by design | ~$15-30 each |
These smart storage solutions create a space that is stylish and functional for any creative project.
Budget Planning, Project Timeline, and Before-and-After Inspiration
Plan your room makeover on a budget by using a clear spending plan and timeline. First, decide on your total project budget. Think of it as a roadmap that connects your ideas with real costs. For instance, a cottage-style bedroom makeover used paint and trim for under $200. Small, smart changes can truly brighten a space.
Try this 4-step budgeting process:
- Set your budget and list your top priorities. Write down what you'll spend on key items like paint, trim, and fixtures.
- Look for sales and special deals. Check local ads or discount events to fit even high-end products into your plan.
- Make a schedule. Break the work into weekend and weekday tasks so the project feels more manageable.
- Track your progress with photos. Take pictures before you start and after you finish each phase.
A sample project schedule might be:
| When | Task |
|---|---|
| Weekend | Buy supplies, clean the room, and apply the base coat. |
| Weekday | Refresh details like trim touch-ups and updating fixtures. |
| Next Weekend | Add final touches by arranging furniture and styling the space. |
| Weekday | Review progress and adjust the plan if needed. |
Before-and-after images show how these steps can transform your room. With a set budget, clear timeline, and consistent tracking, you can see how each smart move brings your space to life. Enjoy watching your ideas come together!
Final Words
In the action, you saw how simple hacks can transform any space. We covered everything from setting up accent walls and layering light fixtures to repurposing furniture and organizing with clever storage ideas. Each section provided step-by-step tips and clear cost estimates. Creative room makeover hacks prove that small changes can have a big impact on your space. Enjoy applying these ideas to create a room that feels fresh, organized, and full of life.
FAQ
How to decorate a room with simple things and get DIY aesthetic ideas for small spaces, including ideas for girls?
DIY room decor for small spaces mixes simple, affordable projects like accent walls and upcycled décor with creative touches that add charm—perfect for any room, including a girl’s space.
What is the 3-5-7 rule and the rule of 3 in interior design?
The rule of 3 means grouping items in odd numbers to promote visual balance, while the 3-5-7 rule suggests scaling decor proportions based on room size for a well-balanced design.
What is the 3 4 5 rule in interior design?
The 3 4 5 rule uses geometric ratios to form right angles and clear lines, guiding you in placing elements for a structured and harmonious layout.
How can I makeover my bedroom cheaply?
A cost-effective bedroom makeover focuses on repainting, updating lighting, and rearranging decor to refresh your space without major expenses.
