
Have you ever worked on a project for hours only to have one small mistake throw everything off? Getting your measurements right is key. Using good-quality tools and following simple steps helps you avoid errors and saves both time and materials. When you have a clear plan to follow, your work becomes more consistent and your cuts turn out just as planned. Keep reading to learn how to make measuring easy and get your project looking just right every time.
Get Accurate Measurements Every Time with DIY Techniques
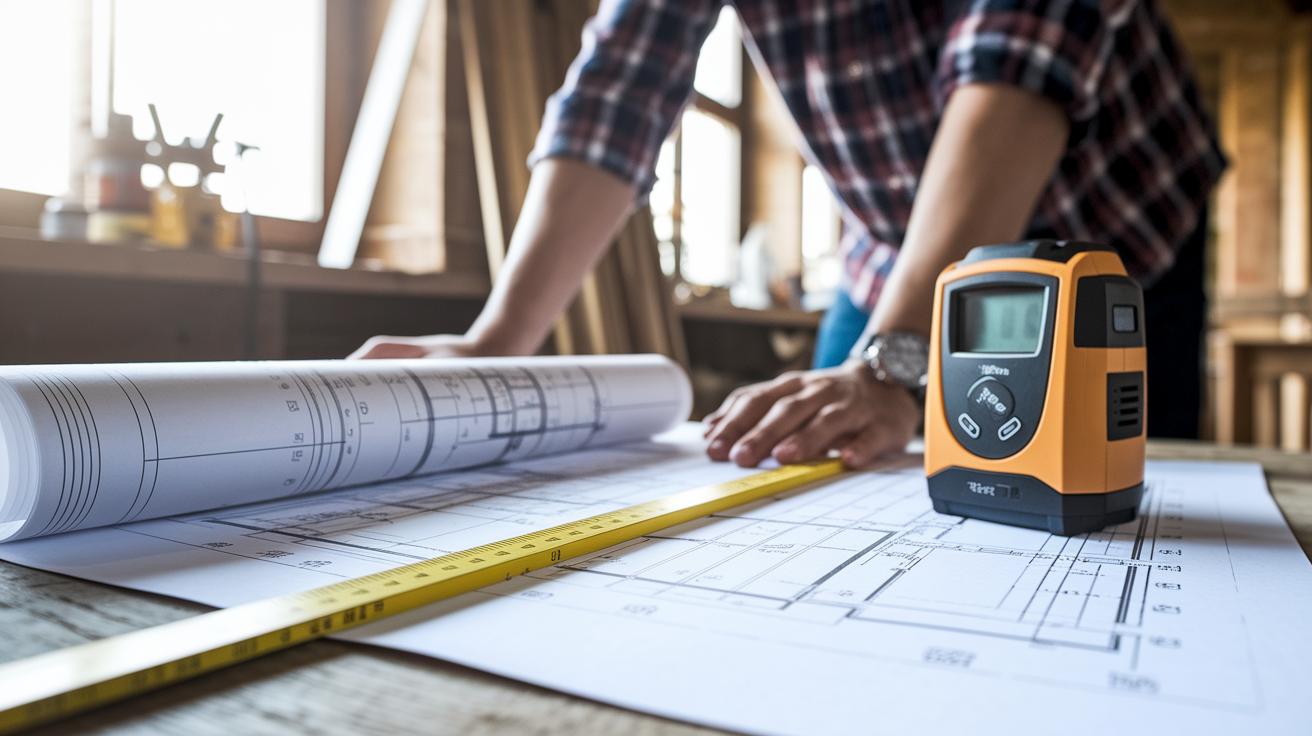
Accurate measurements help you save money and materials. Plan your layout carefully and check your dimensions twice before you cut. This careful approach, measure twice, cut once, reduces waste and mistakes. Using good tools and checking them before you begin means you won't run into problems like tape sag, parallax errors, or hook misalignments.
Follow these clear steps to keep your work accurate:
- Identify your project area and list every measurement needed.
- Choose quality tools like a tape measure, steel ruler, set square, or digital device.
- Mark key reference points on your workpiece.
- Check each tool for proper calibration using a reliable guide.
- Take each measurement twice, watching out for errors such as sagging tape or misaligned hooks.
- Write down all your measurements to double-check.
- If you can, verify your final numbers with a different tool.
By using these simple, step-by-step methods, you build confidence in your measurements. Every project becomes easier, and each cut and placement aligns perfectly with your design.
Fundamental Tools for Precise DIY Measurements
Getting the right tools matters for any DIY job. Using reliable tools helps you cut, mark, and line things up correctly the first time. Mixing both traditional and digital tools lets you double-check your work and catch mistakes before they cost you time or money. Each tool has its own benefit. For example, a tape measure offers a hands-on feel, while a laser device gives instant exact numbers.
| Tool | What It Does | Best Feature |
|---|---|---|
| Tape Measure (3 m/9 ft) | Measure short distances and layouts | Has a hook (approx 1/8″) for accurate starts |
| Steel Ruler & Set Square | Draw straight lines and right angles | Gives flat and accurate edges |
| Marking Knife | Cut fine lines on wood or metal | Makes crisp, precise marks that pencils can’t match |
| Sliding Bevel Gauge & Protractor | Check and transfer angles | Features an adjustable, lockable blade |
| Spirit Level | Check for level and plumb surfaces | Ensures both vertical and horizontal accuracy |
| Laser Distance Meter | Measure long distances (up to 260 ft/79 m) | Offers continuous mode and memory for quick checks |
| Digital Tape Measure | Quick conversions and precise reading | Features unit conversion and data hold functions |
Using both old and digital tools improves your measurement accuracy. Traditional tools let you feel subtle issues such as tape sag or reading errors. Digital devices give fast and repeatable numbers that are easy to read. This blend of time-tested methods with modern tech means you can double-check your numbers and tackle projects of any size with confidence.
Step-by-Step Calibration Protocols for DIY Measuring Instruments
For calibrating your tape measure, line it up with a certified gauge block to set the zero point. Extend the tape along the block’s edge and check that the measurement matches exactly. Write the date of calibration in your log and repeat this routine regularly to catch any wear.
For a spirit level, place it on a flat, factory-verified surface. Adjust the vial until the bubble sits right in the center. This way, you know your readings will be reliable. Note the calibration date so you can track its accuracy over time.
With your sliding bevel gauge, lock the blade to a known 45° angle. Compare the set angle with that of a trusted tool or a pre-calibrated surface. If there’s a difference, adjust the gauge and record the change in your log.
To check your protractor, align it with a machinist’s square. Place the square along the protractor’s edge and mark any offset you find. Recording these differences helps you keep future measurements accurate.
For the laser measure, use a calibrated reflector plate at a fixed distance. Take several readings and compare them for consistency. Logging these results lets you know if the device needs servicing to maintain accurate measurements.
Troubleshooting Common Measurement Pitfalls in DIY Projects

If you don't look straight at the measuring tape, you might get a wrong reading. This error, called parallax error, happens when your sight isn’t perpendicular to the scale. A worn hook or a misaligned tape end can also give you a false zero. And when the tape sags on long runs, it may read shorter than it is. Always hold the tape straight and follow the line exactly.
Tool issues can add to these mistakes. For example, if you ignore the width of your saw blade (known as kerf), your pieces may not fit well. Also, steel tapes can stretch in warm weather by about 0.0007 in (0.018 mm) per foot for each °F rise in temperature. Remember these factors when planning your cuts to prevent errors from adding up.
Quick fixes can help before you drill or cut:
- Measure twice with different tools – for example, use a tape measure and a steel ruler.
- Mark your key points clearly and check them against a known reference.
- Double-check your measurements to catch mistakes early.
These steps help you work more confidently and avoid problems later on.
Digital and Tech-Driven Techniques for Accurate DIY Measurements
Digital tools help cut down on mistakes when you take measurements. They give clear, instant readouts, so you don't have to worry about misreading numbers. Devices like digital tape measures and laser meters show measurements right away on bright screens that often let you freeze the reading. Smartphone apps and 3D modeling software let you see a virtual layout of your project, too. This means you can check sizes quickly and avoid wasted cuts or extra work.
Digital Tape Measures
Digital tape measures can save your past readings with a built-in memory. They have a hold mode that lets you keep a measurement on screen. You can easily change between inches and centimeters. Plus, the backlit display works in low light to reduce misreads. These features make them great for jobs where every measurement counts.
Laser Distance Meters
Laser distance meters are perfect for long distances. They can measure continuously along lengths up to 260 ft (79 m). Many models also allow you to mount a tripod for steadier readings over long spans. This helps you get accurate measurements indoors and outdoors without many errors.
AR & 3D Modeling Apps
Smartphone apps using augmented reality (AR) let you see measurements overlaid on your surroundings. This makes it easier to plan room layouts and set up furniture. With 3D modeling software, you can take these exact numbers to build a detailed virtual model of your space. This mix of AR and digital tools helps you work more confidently and reduce costly mistakes.
Custom Homemade Measurement Solutions for Budget DIYers

For budget DIYers, making your own measurement tools is a smart way to get accurate results without breaking the bank. You can use everyday items to build tools that work like pricey equipment. These self-made tools help you check dimensions, level surfaces, and repeat measurements for projects like tiling or decking. They let you use classic methods with a modern twist, ensuring every cut and mark is solid.
- Water level tool: Fill clear tubing with water and mark level points for plumb and a 45° angle.
- Story pole: Use scrap wood to build a fixed-length pole that lets you repeat measurements without extra math.
- Circle layout tool: Drill 1/8 in (0.3 cm) holes every inch along a yardstick and use a pin pivot to trace perfect circles.
- Yarn gauge: Wrap yarn around a cylinder to measure its circumference accurately.
- DIY spacers: Cut plywood strips to the same thickness to keep regular gaps in tile or decking work.
Maintaining Consistent Readings in DIY Measurement Techniques
When you work on a project, use two measuring tools, like a tape measure and a steel ruler, to check each measurement. Compare your numbers with a known standard, such as gauge blocks or a test piece with a set length. For instance, measure 24 in (61 cm) with a tape and then verify it with a steel ruler.
Write down each measurement in your project journal. This log will help you spot any changes or if your tools start to shift over time.
- Use two different tools to check important dimensions.
- Write every measurement in your project journal.
- Check your tools against a known standard before and after key cuts.
- Test your tools often to make sure they stay accurate.
Consistent record-keeping and regular checks help ensure every cut and drill matches your design.
Final Words
In the action, you worked through planning, tool selection, calibration, and troubleshooting. You learned how proper layout and pre-use checks keep projects on track and waste to a minimum.
Using accurate diy measurement techniques means every step is predictable and safe. Your careful approach makes finishing projects a confident process. Keep measuring, stay precise, and enjoy your next DIY project.
FAQ
Most accurate DIY measurement techniques
The most accurate DIY measurement techniques combine careful planning, calibrated tools, and verification with digital devices. They help reduce mistakes and material waste, making your project results both precise and reliable.
How to measure and cut wood accurately
The approach to measure and cut wood accurately involves clear layout planning, using quality tools, and verifying dimensions before cutting. This method minimizes errors such as tape sag or misalignment for cleaner cuts.
How much does the little metal hook at the end of the tape measure move
The little metal hook at the end of a tape measure typically shifts about 1/8 inch (3 mm). This slight movement helps compensate for the hook kerf, ensuring that you get consistent and reliable measurements.
How to read a tape measure in mm
Reading a tape measure in millimeters means focusing on the metric markings and smaller tick marks that represent each millimeter. It allows you to determine accurate measurements quickly for detailed projects.
How to read tape measure in meters
Reading a tape measure in meters involves identifying the large, clear meter markings along the tape. By noting the additional subdivisions, you can accurately measure parts of a meter for precise layouts.
Tape measure reading 32nds
Tape measure reading 32nds means each small division represents 1/32 of an inch. This fine-scale reading is useful for detailed work, especially in tasks requiring precise measurements like woodworking.
How to read a measuring tape in cm
Reading a measuring tape in centimeters is done by focusing on the clear centimeter indicators and the smaller marks between them. This method facilitates accurate measurements for daily DIY projects and precise layouts.
Carpenter measurement calculator
A carpenter measurement calculator converts units and sums dimensions to help plan accurate cuts and layouts. It simplifies the process of calculating material lengths and angles, reducing waste and improving project precision.
