
Have you ever looked at a stack of wood and wondered what you could build with it? Carpentry may seem tricky at first, but it can be fun and easy on your wallet. When you learn to measure, cut, and nail, you build real skills and gain confidence. Every project you complete makes you feel proud. This guide will show you how simple projects can spark your creativity and start you on a rewarding carpentry journey.
Building Your Basic Carpentry Foundation
Carpentry is a fun, budget-friendly hobby that lets you build projects with your own two hands. Cutting wood and fitting pieces together can be a calming activity, and every project lets you add a personal touch. Many beginners enjoy the feeling of achievement as each measured cut and nailed joint boosts their confidence.
Before diving into any project, do some research and start with small, hands-on practice. It’s important to learn the proper techniques because both power and hand tools come with risks. Master the basics like measuring accurately, hammering nails correctly, and sawing in a straight line to keep your work both safe and neat. Use a tape measure and a carpenter’s pencil to mark your cuts for a clear and professional finish.
Always approach your projects with patience and attention to detail. Spend time learning proper tool handling and safety rules. From driving a nail to trimming a piece of wood, every step builds your skill. Remember, every experienced carpenter began with simple projects and focused on the basics first. Enjoy the learning process and let each project guide you to a rewarding carpentry journey.
Assembling Your Basic Carpentry Tool Kit
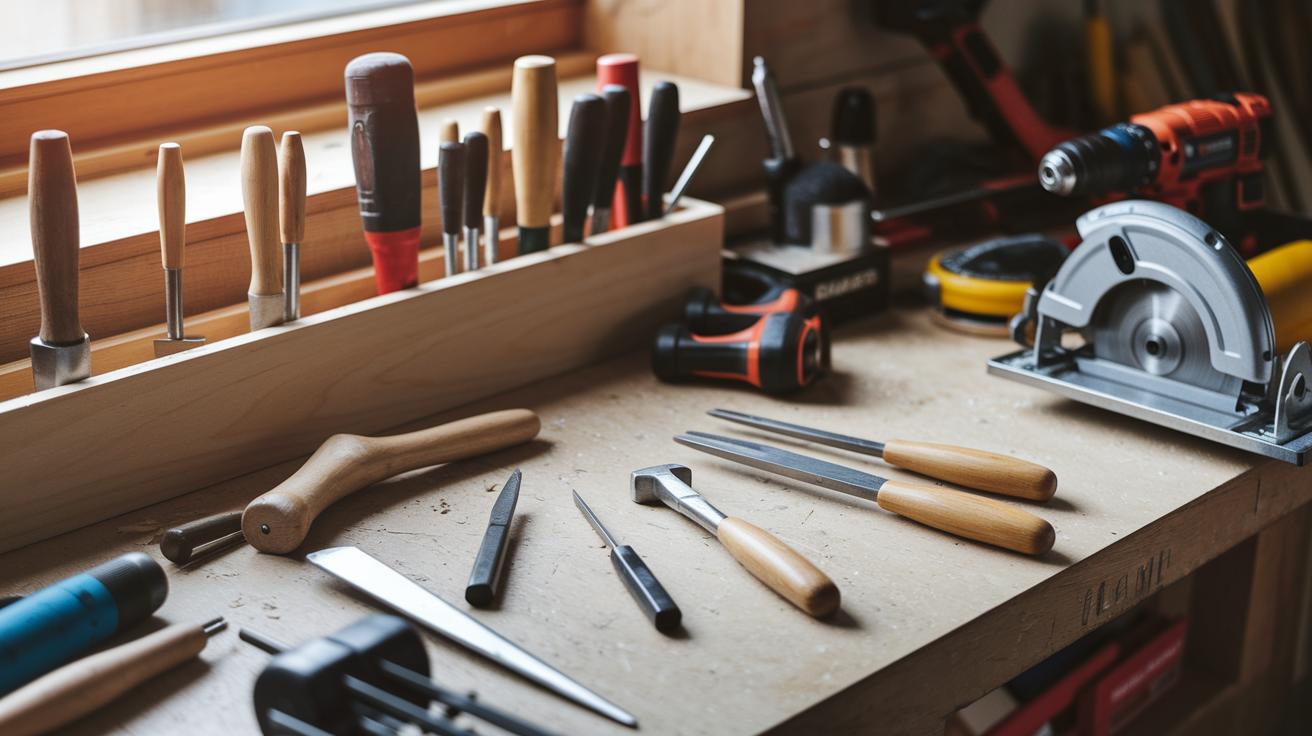
Good tools help you work accurately and safely. Choosing reliable equipment gives you confidence in every project. High-quality tools work better, last longer, and lower the risk of accidents while giving your work a neat finish. With a mix of tools, you can handle tasks from fine detailing to long, straight cuts.
Using both power tools and hand tools lets you unlock your full potential in wood crafting. Hand tools like chisels and claw hammers give you great control for delicate details and precise joinery. On the other hand, power tools such as circular saws and drills speed up tasks like cutting and drilling. Together, they form a balanced toolkit that fits many project needs.
- Chisel set – great for shaping, carving, and joinery
- Claw hammer – drives nails in and pulls them out with ease
- Tape measure – helps check every cut and mark for accuracy
- Circular saw – makes fast, clean, straight cuts
- Power drill – drills holes and drives screws at adjustable speeds
- Miter saw – cuts cross and bevels with precision
- Combination square – marks and verifies angles accurately
- Hand plane – smooths surfaces for a refined finish
- Jigsaw – cuts intricate curves and patterns neatly
- Woodworking clamps – hold pieces together during assembly
Taking care of your tools is just as important as choosing them. After each use, clean off sawdust and debris to keep them working well. Sharpen blades on chisels, hand planes, and saws with the proper sharpening stone. Check power tools regularly to ensure they are clear of clogs and lubricate moving parts as needed. Store your tools in a dry, organized spot to avoid rust and damage. Follow these tips, and you'll enjoy safe and efficient carpentry projects every time.
Setting Up a Basic Carpentry Workspace and Safety Practices
Choose a dedicated spot for your carpentry projects. Set up a sturdy workbench instead of using a household table or countertop. Make sure the area has plenty of light and good airflow to control dust and help you see clearly. Keeping your space neat reduces trip hazards and helps you focus on the work at hand.
Always put safety first. Wear safety glasses, hearing protection, and work gloves to shield your eyes, ears, and hands from flying debris and sharp edges. Store heavy or sharp tools safely when not in use to lower the risk of accidents.
Manage your electrical cords carefully. Keep them organized to avoid tangles and tripping. Use grounded outlets with GFCI protection (this helps prevent shocks) for extra safety. For more tips on electrical safety in your workshop, see electrical safety for DIYers.
Mastering Measuring and Layout in Basic Carpentry
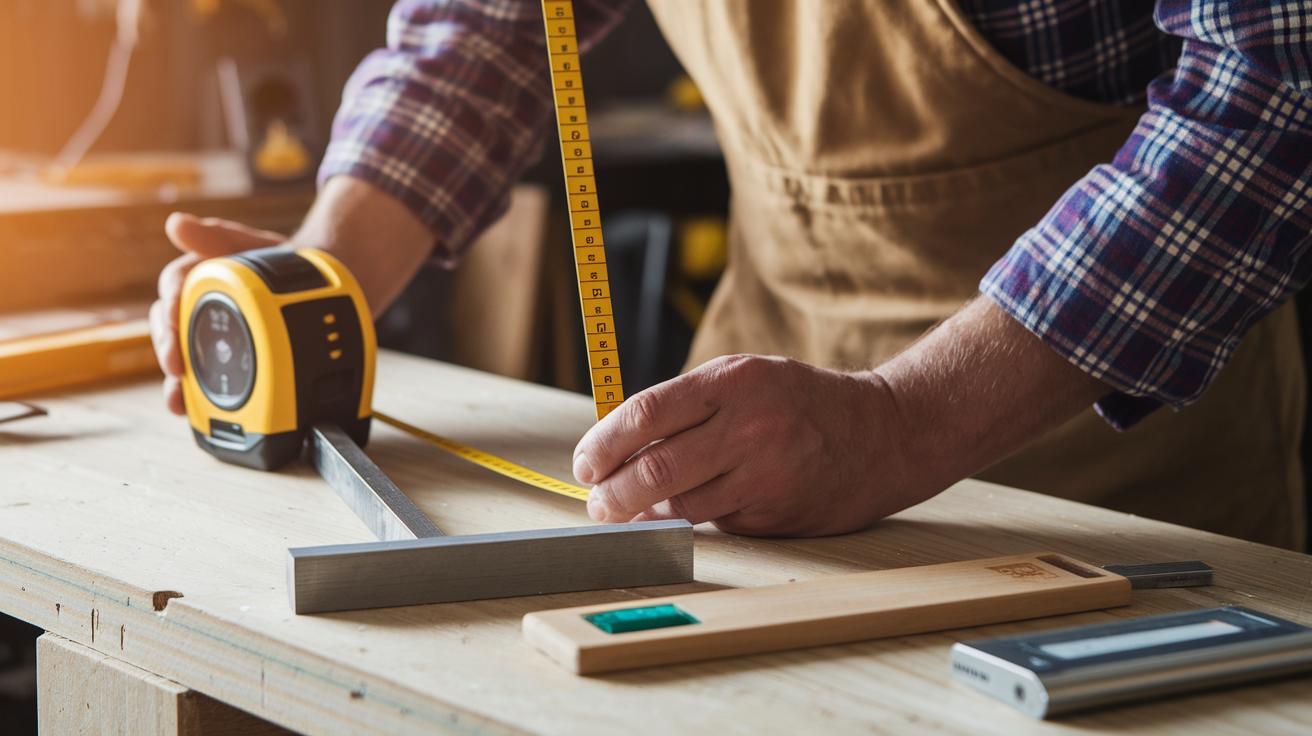
Accurate measurements set the foundation for every project. Always hook your tape measure securely and read it to 1/16 in (1.6 mm) to avoid mistakes. A steady hand and exact numbers turn raw ideas into well-crafted pieces.
Keep your markings clear next. Use a carpenter’s pencil with a rectangular shape so it won’t roll away. When you use a combination square or speed square (a tool that helps make true 90° angles), you draw straight and reliable lines. These tools help bring your blueprint to life.
By focusing on careful measuring and neat markings, you build the base for accurate cuts and solid joints. Practice these steps to feel confident before you start sawing. This attention to detail reduces errors and keeps your work precise.
Cutting Techniques for Basic Carpentry Projects
Cutting is a vital part of any carpentry project. The right saw and proper technique improve your accuracy and safety. Whether you make long, straight cuts, curves, or rip cuts along the grain, using the correct method helps you avoid mistakes. Keep a steady stance, mark your cut clearly, and use a sharp blade to achieve clean results. Practice slowly until you feel confident in every cut.
Handsaw Techniques
Hold the handsaw with a firm but relaxed grip. Stand with your feet shoulder-width apart for balance. First, score a shallow cut (kerf) along your marked line. Then, saw slowly and steadily. Keep the blade aligned with your line to avoid splintering. This clear stance and controlled pressure make each stroke safe and effective.
Power Saw Safety and Handling
Power saws need extra care. Always check that the blade guard is in place and set the blade depth to match your workpiece thickness. Hold the saw with two hands to keep it steady. When using a jigsaw, move at a smooth and steady pace to follow curves carefully. These steps help you work safely while achieving accurate cuts.
Common Joinery Methods in Basic Carpentry
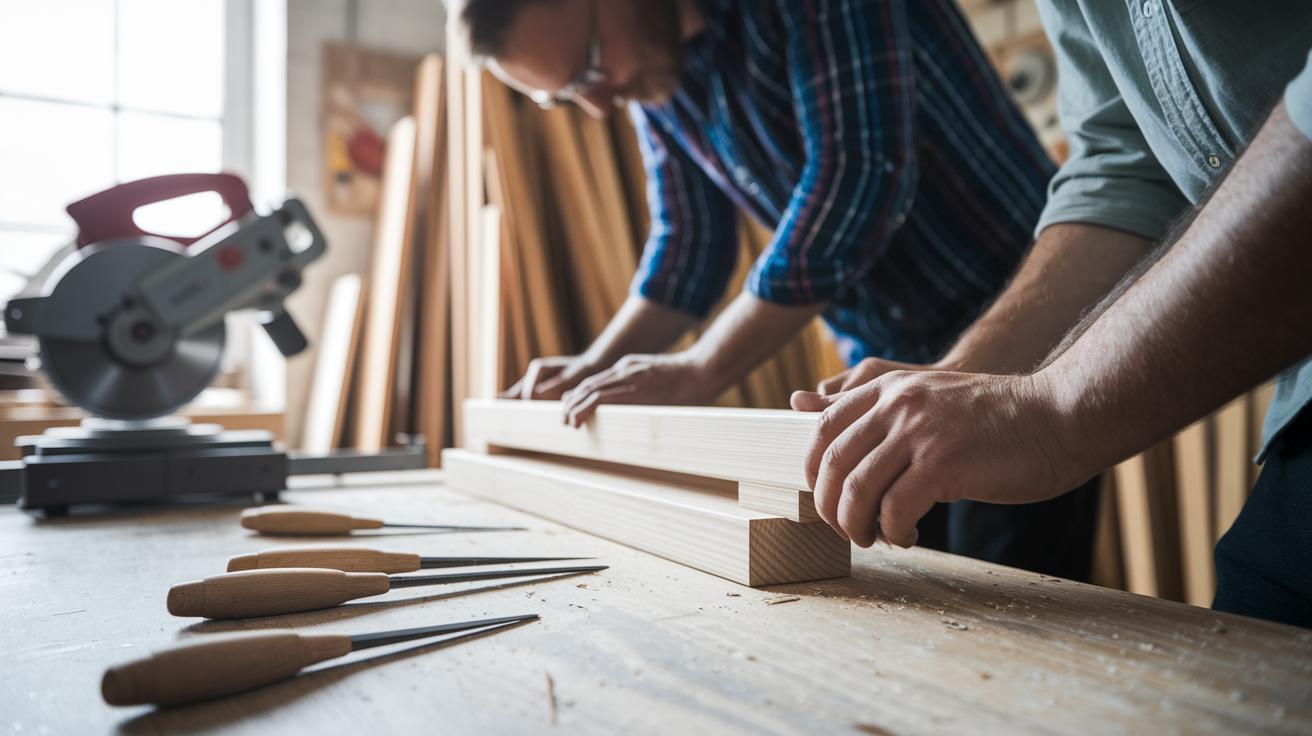
Joinery is a key skill in carpentry. It connects wood pieces to form a strong, lasting structure. By learning simple joinery techniques, you set up a base for more detailed projects later. Whether you build a bench or a decorative frame, the right joint makes your work stable and neat.
You need the right tools to get good results. For example, a chisel helps trim and fit joints perfectly. One basic method is the butt joint, where you line up the end of one piece to the face of another and secure them using glue, nails, or screws. Another method is the miter joint. Using a miter saw, you can cut clean angles that are perfect for frames and trim. As you improve, you might try dowel joints or lap joints to add extra strength to your work.
Butt Joint
Start by laying out your pieces carefully. Mark where the wood will join. Cut the ends square so they fit evenly. Then, spread a good amount of glue along the surfaces. Secure the joint with nails or screws. Finally, use clamps to hold the pieces in place while the glue dries. This simple method is a great way for beginners to start with joinery.
Miter Joint
Measure the angle you need with care. Set your miter saw to the correct angle and make a clean cut. After cutting, apply glue along the edges and join the pieces together. Clamp the joint firmly until the glue sets. The result is a neat, smooth corner that works well for picture frames or trim. With practice, miter joints will add a polished look to your projects.
Starting Simple DIY Wood Projects in Basic Carpentry
Begin with easy projects that let you practice measuring, cutting, and joining wood. Choose builds that need only a few tools and focus on basic skills. These low-risk projects help build your confidence while keeping things simple. Avoid plans with complex joinery or heavy materials. Instead, use everyday tools and clear techniques.
- Basic Bookshelf: A small shelf with four upright supports and two shelves. It uses simple butt joints (where two pieces meet at their ends) to hold it together.
- Picture Frame: A straightforward frame built with miter joins (angled cuts that meet for clean corners) to show off your precision.
- Step Stool: A practical project that reinforces careful measuring and cutting with a simple structure.
- Side Table: An easy table design that uses straight cuts and basic joinery, perfect for practicing steady measurements.
- Birdhouse: A fun, budget-friendly project that uses simple cutting and secure assembly, ideal for outdoor decoration.
- Planter Box: A durable box built with simple techniques. It also gives you a chance to experiment with different finishes.
Before you try tougher builds, note down every measurement and any changes you make during assembly. Write your measurements and record which techniques work best. This habit will build your skills and help you save materials when you move on to larger projects.
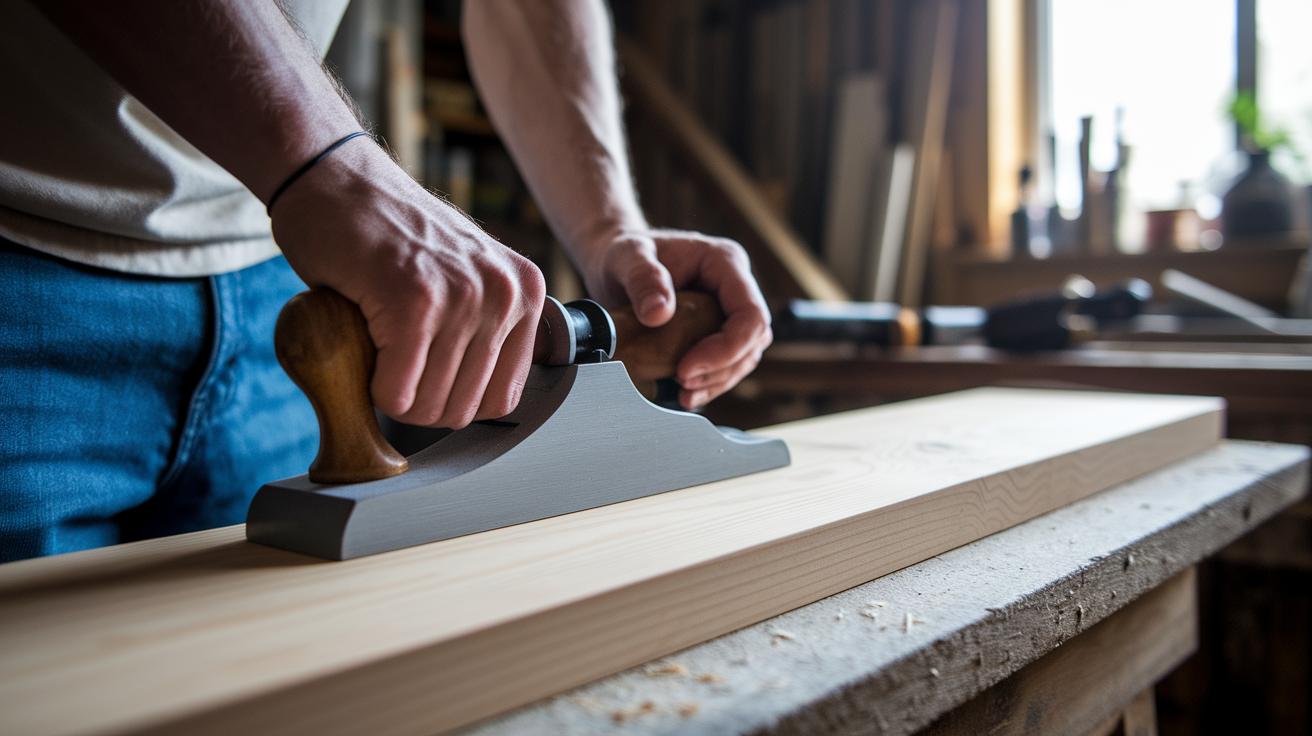
Basic Wood Finishing Techniques in Basic Carpentry
-
Start by smoothing your wood with hand planes and sanding tools. Use a block plane to even out rough spots and fix bumps. Begin with 80-grit sandpaper (rough paper for deep marks) and then move to 220-grit (finer paper for a smooth feel). This step is key for getting your wood ready.
-
Next, bring out the natural grain by applying a stain. Use a quality brush or cloth to rub the stain evenly along the wood’s lines. Wipe off any extra stain as you go. Let the stain dry for 4–6 hours so the color deepens and your project gains character.
-
Finally, protect your work with a sealant to lock in the finish. Choose a product like polyurethane or tung oil, and apply it in thin, even coats. Sand lightly between coats to smooth out any raised grain. This careful step protects your piece and shows off the wood’s natural warmth. Enjoy your flawless finish!
Final Words
In the action, you learned how to build your basic carpentry foundation, from proper tool selection to safe workspace setup and accurate measuring. The guide showed you step-by-step techniques for cutting, joining, and finishing your projects.
You explored how simple DIY wood projects can help you develop the skills needed for basic carpentry. Every detail was meant to build your confidence.
Keep practicing these techniques. Enjoy the journey and celebrate each milestone as you grow in practical carpentry skills.
FAQ
What does a basic carpentry PDF or skills PDF provide?
A basic carpentry PDF provides fundamental techniques, safety tips, and step-by-step guides that help beginners learn proper tool use, accurate measuring, and common joinery methods.
What do basic carpentry courses and classes cover for beginners?
Basic carpentry courses and classes cover essential skills like measuring, cutting, and joining wood, along with safety practices and hands-on projects to build confidence and competence.
What are some good basic carpentry resources like books and YouTube channels?
Basic carpentry books and YouTube channels offer visual tutorials, practical tips, and project ideas that simplify learning the essential techniques and safety guidelines for beginners.
What are the essential basic carpentry tools a beginner needs?
Basic carpentry tools include a tape measure for accuracy, a claw hammer for nails, chisels for shaping wood, hand saws for precise cuts, and power tools like a circular saw for longer cuts.
What is the 3/4/5 rule in carpentry?
The 3/4/5 rule in carpentry is used to check for right angles using the Pythagorean triple, ensuring accurate measurements and square joints during project assembly.
How can you become a self-taught carpenter?
You can become a self-taught carpenter by leveraging free online tutorials, practicing hands-on projects, and gradually advancing your skills through accessible courses and trusted resources.
Do carpenters really make 100k a year?
Many carpenters can earn around $100k a year, though income varies with experience, location, specialization, and whether they work full-time or freelance.
How do you get started in basic carpentry?
To get started in basic carpentry, learn essential skills, acquire a starter toolkit, follow safety guidelines, and practice with simple projects that build your confidence gradually.
How does basic carpentry relate to other trades like masonry, woodworking, and construction?
Basic carpentry skills form a strong foundation that applies to fields such as masonry, woodworking, and construction, often extending into related areas like electricity and painting for comprehensive home projects.
