
Ever wonder if your electrical DIY project is riskier than you think? A small error, like a loose wire, can cause shocks or even fires that could harm your home and cost you money. This guide will help you decide when it is safe to do simple fixes yourself and when you should call an electrician. We offer clear, practical tips so you know when to take action and when to let a professional handle the more challenging tasks.
Core Electrical Safety Guidelines for DIYers
DIY electrical work done wrong can be very dangerous. It may lead to shocks or even fires. For example, a loose or poorly insulated wire might give you a sudden shock. You may also see sparks from an overloaded appliance. These problems happen when you skip important safety checks.
Trying to save money with quick fixes can cost you much more later. A bad repair can harm your home and lead to expensive corrections. If your work does not meet current safety standards, your homeowner insurance might not cover damage. This means you could be responsible for a lot of extra costs.
Always remember these safety tips:
- Turn off the power (de-energize circuits) before you start.
- Use tools that are rated for electrical work.
- Never bypass built-in safety devices.
Following these steps will help keep your project safe. If you are in doubt, it might be best to call a professional electrician.
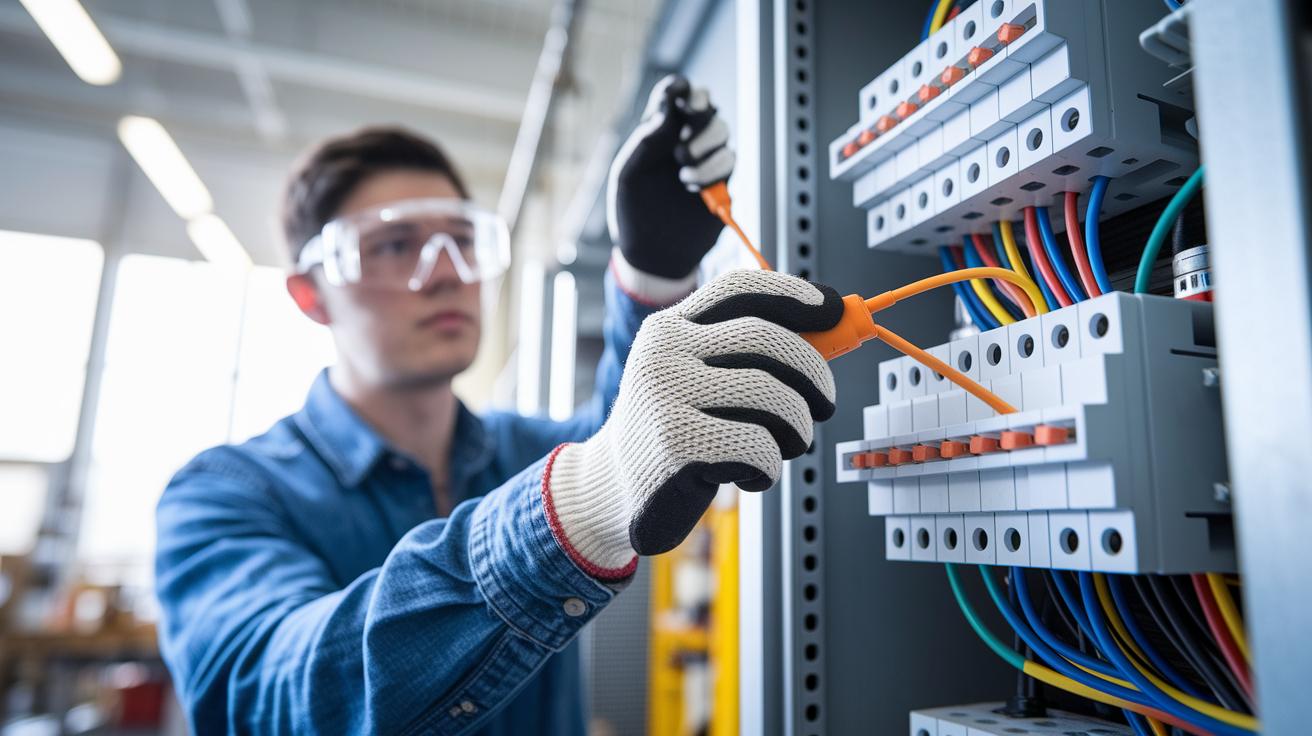
Essential Protective Equipment and Tools for DIY Electrical Work

When doing electrical work, always wear the right safety gear. It helps protect you from shocks, arc flashes, and other risks. Use insulated tools to avoid loose connections and shorts that could hurt you. Test circuits with a non-contact voltage tester to make sure they are off before you begin.
Make sure your tools meet today’s safety standards. Pros rely on items like lockout/tagout circuit locks, rubber-insulated gloves, and safety glasses with side shields. Keeping these tools close by can mean the difference between a safe project and a dangerous one.
Here's a simple checklist for your electrical DIY project:
- Insulated screwdrivers and pliers
- Non-contact voltage tester
- Lockout/tagout circuit locks
- Rubber-insulated gloves
- Safety glasses with side shields
Identifying Common Electrical Hazards in DIY Projects
Before you start any electrical repair, it's important to check for hazards. Look for warning signs in your home's wiring. These signs can point to problems like overloaded circuits, loose wiring, or old systems that might cause fire or shock risks. If you notice any of these issues, stop and call a professional before moving forward.
- Flickering or dimming lights can mean the circuit is overloaded or circuits are failing.
- Warm or buzzing outlets might show that wiring is loose or worn out, which can spark a fire.
- Breakers that trip often indicate too much electrical demand or a short circuit in your system.
- A burning smell or scorch marks near outlets are serious signs of overheating.
- Relying on too many extension cords can suggest that your system needs a professional check.
Step-by-Step Procedures for Safe DIY Wiring and Testing
Pre-Work Safety Check
Before you begin wiring, turn off the right breaker. Lock it out with a lockout/tagout device so it cannot be accidentally turned on. Then, use a non-contact voltage tester to ensure there is zero voltage in the circuit. Test each wire until your tester shows no voltage. This simple step keeps you and your tools safe.
Wiring Installation Best Practices
Once you confirm the circuit is off, carefully strip the insulation from the wires. Work slowly to avoid damaging the copper core. Make sure you use the correct wire gauge for the circuit load as stated by the National Electrical Code (NEC). Also, use proper color coding to prevent mix-ups. Tighten all terminal screws to the manufacturer’s specifications. Think of it like following a recipe: using the right measurements and steps leads to a safe and lasting result.
Post-Work Testing and Ground Verification
After finishing the wiring, restore the power. Check all outlets and lights to make sure they work correctly. Use your tester once more to verify that the grounds are well connected and each circuit shows normal voltage levels. This final check is important because proper grounding cuts down on shock risks and stray electricity.
| Step | Key Action |
|---|---|
| 1 | Turn off breaker & test circuit |
| 2 | Remove device cover & inspect wiring |
| 3 | Strip wires & make secure connections |
| 4 | Restore power & verify functionality |
Electrical Safety for DIYers (when to call an electrician)
Warning Signs You’re in Over Your Head
If you notice lights that flicker, outlets that feel warm or buzz, or breakers that keep tripping, it could mean your wiring has issues that go beyond a simple DIY fix. Overloaded circuits or loose connections can cause these problems, and even if the issue seems minor, it might lead to dangerous shocks or even a fire. When these signs show up, it's best not to push your limits, call a professional.
Navigating Codes, Permits, and Professional Help
For larger jobs like upgrading your electrical panel or adding new circuits, following the proper codes matters a lot. Permits and the National Electrical Code (a safety guideline for wiring) are not just rules; they keep your home safe and secure your insurance. A licensed electrician will handle the permits, document everything properly, and have the right insurance. Before you start any big electrical project, plan and check that your work follows the current standards to avoid legal and financial issues.
Final Words
In the action, these guidelines break down each step, from managing hazards to the proper use of protective tools. Small, clear steps keep complex electrical tasks within reach. They show how to spot red flags like flickering lights or buzzing outlets and stress the need for de-energized circuits before work. Always prioritize electrical safety for DIYers (when to call an electrician) if uncertain. Stay patient, measure twice, and keep practicing safe setups. Each step brings better skills and a safer, more confident project finish.
FAQ
When should you call an electrician?
The guidance advises calling an electrician when you face repeated breaker trips, warm outlets, flickering lights, or tasks that exceed DIY skills such as panel upgrades, as these issues may risk safety and violate codes.
What are the five golden rules for electrical safety?
The five golden rules for electrical safety include de-energizing circuits before work, using rated and insulated tools, wearing proper personal protective equipment, verifying zero voltage with testers, and never bypassing built-in safety devices.
What would be considered an electrical emergency?
An electrical emergency involves signs like burning smells, sparks, exposed wiring, or a strong shock. If these occur, vacate the area immediately and call emergency services to avoid serious injury or fire.
