
Ever feel boxed in by a deck attached to your house? With freestanding deck plans, you can design a deck that stands on its own and fits exactly where you want it. This method makes building easier because you can place the posts and footings only where they work best. In this article, we guide you step by step, from selecting the right spot to setting solid concrete footings, so you can create an outdoor space you'll love.
Freestanding Deck Plans Explained: How to Design and Build a Standalone Deck
A freestanding deck is built entirely on posts and footings. It stands alone without a ledger board attached to your house. A cantilevered design supports the deck using parallel beams that extend past the posts. This method makes construction simpler and lets you place the deck wherever it fits best in your yard.
One perk of a freestanding deck is how easy it is to build. You can locate posts exactly where needed and pour concrete footings that match your layout. Many builders also opt for Trex composite boards. These boards are strong and need no sealing or staining, making them perfect for outdoor use.
Moisture control is very important. We apply moisture-blocking products to key connections to protect against water damage. This is key, especially when creating cantilevered sections.
Our guides include clear instructions along with over 120 photos, detailed diagrams, pro tips, and helpful videos. Whether you go with a simple plan or a more detailed DIY freestanding deck plan, you can build an outdoor space that is both beautiful and functional.
Follow the steps carefully and adjust the design to suit your yard. This approach gives you a deck that blends style with practicality.
Site Selection and Planning for Freestanding Deck Plans

Plan carefully before you begin. First, choose a flat spot that gets plenty of sunlight and has safe, clear access. Look around for natural obstacles like trees or large shrubs. Think of it as picking that perfect corner of your yard where you can unwind after a long day.
Next, use a tape measure to mark the deck area on your ground. Draw clear boundaries and then decide where each concrete footing will go. Count the footers you need by looking at the deck size and the number of supports required. Spread them out evenly using simple math. A level surface is key for building a strong, lasting deck.
Before you start digging and pouring concrete, check your local guidelines for footing depth and spacing. It might help to watch a video that explains footer and ledger requirements. Mark stake lines and use a level to check each mark before you pour. This way, you set the right elevations right from the start.
Lastly, put together a detailed planning checklist. A checklist keeps your measurements, heights, and support positions organized. Try our DIY project planning checklist as a guide. Double-check every setup step to make sure you’re ready before shifting to construction.
Design Variations in Freestanding Deck Plans
When planning your deck design, think about the different sizes available and how each one can change your outdoor space. Small decks, like an 8×8 or 10×10 design, work well in tight yards and create a warm spot for a few chairs and a small table. They give you a cozy area to enjoy.
If you want more space for extra chairs or a grilling station, try a 12×12 design. It offers enough room while still feeling inviting. For those dreaming of a garden retreat, larger decks such as 12×16 or 12×24 provide plenty of room for different zones. You can set up a dining area, a seating corner, and even a space for outdoor games.
Modern decks make use of materials that are both appealing and low-maintenance. For example, Trex composite boards give you a strong, natural look without constant upkeep. White PVC trim adds a clean, crisp edge, while a vinyl composite railing with steel posts boosts the deck's modern feel.
Cantilevered beam details add a creative touch by letting the deck extend past the support posts. This design choice creates an open, airy feel. Whether you choose a square, simple layout or a rectangular, spacious plan, there is a style to suit your taste and backyard layout, merging practicality with modern design.
Framing Diagrams and Material List for Freestanding Deck Plans
Start your project by studying a clear framing diagram. This diagram shows all the main parts of your deck structure. You’ll see where to place pressure-treated 6×6 posts (rated for ground contact) that create a strong foundation. These posts support double 2×8 band boards along the deck’s edge for extra strength.
Next, plan your joist layout carefully. Floor joists are fastened with joist hangers to keep them evenly spaced. For many decks, 2×10 beams span the opening. In some designs, parallel steel I-beams are used to create a cantilevered section. This gives you firm support and a level surface. Blocking is then added between joists. It gives you a place to mount the railing and hides the cut ends of composite deck boards, creating a neat frame-like look.
Below is a simple material list and an overview of the framing diagram:
| Component | Specification |
|---|---|
| Posts | Pressure-treated 6×6 (ground-contact rated) |
| Band Boards | Double 2×8 boards |
| Beams | 2×10 lumber or parallel steel I-beams |
| Floor Joists | Mounted with joist hangers |
| Blocking | Installed between joists for rail support and finishing detail |
| Trim | PVC 2×12 trim board |
| Deck Boards | Composite boards |
Before you start building, review the diagram closely. It shows how beams and joists are arranged. This helps you see where every component goes so that your deck ends up strong, durable, and attractive. Taking the time to study the diagram will make your assembly easier and avoid surprises during installation.
Step-by-Step Build Guide for Freestanding Deck Plans
-
Mark your footing spots using a tape measure to ensure proper spacing. Dig holes deep enough to hold pressure-treated 6×6 posts. Always check local codes for the needed depth.
-
Pour concrete into each hole and set the posts so they stay perfectly vertical. Let the concrete cure well to form a strong base.
-
Once the posts are set, install your parallel beams. These beams support the deck independently from any house connection. Use a level to make sure the beams are even across the span.
-
Fasten a pair of 2×8 band boards along the deck edge. These boards add extra strength and serve as support for the floor joists. Clamp and fasten them until they are flush and even.
-
Lay out the floor joists using joist hangers. Space them evenly to match your design. Check each hanger’s position to keep things consistent.
-
Install blocking between the joists. Blocking creates a secure spot for mounting the rail system and covers the cut ends of the composite deck boards, giving you a neat, finished look.
-
Fasten the composite boards to form your deck surface. Follow the manufacturer’s advice on fastening methods and spacing. A video on fastening techniques can help guide you.
-
Trim the edges with a PVC 2×12 board for a clean, finished appearance. The PVC board is lightweight and adds a crisp detail with little upkeep later.
-
Build the stair stringers with care. Measure and cut precisely, and refer to a video on stair stringer calculations for accurate riser and tread sizes. Look for tips on using powder-actuated fasteners or through-bolts when securing the steps.
Following these clear steps will help you create a safe and attractive freestanding deck. Take your time to measure and level each part, and soon you’ll have a deck you can be proud of!
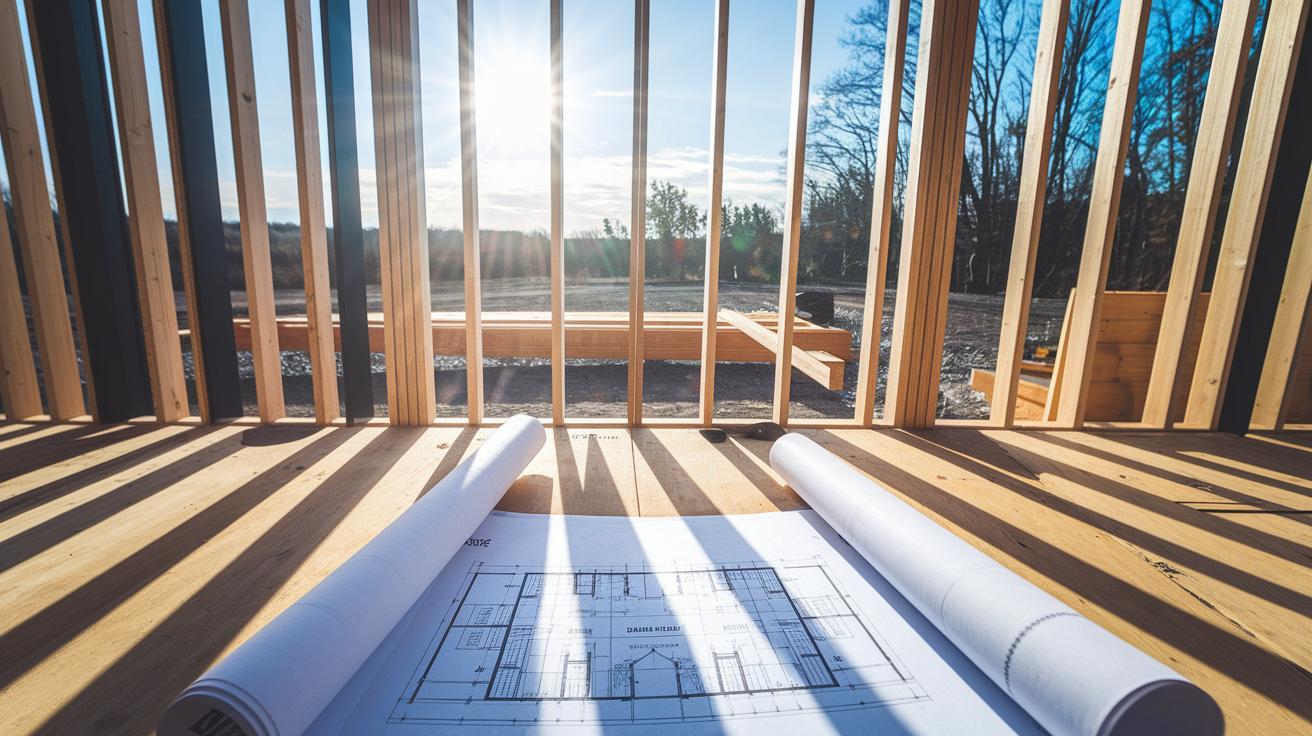
freestanding deck plans: Pure outdoor delight

Our downloadable blueprints, kits, and resources are here to help you build the perfect freestanding deck. The plans come in a PDF that you can easily print at home. They show you clear framing diagrams and a full materials list with labels to tell you where every part goes.
We also offer kit installation guides for backyard floating kits. These guides break down the deck building process into simple parts. You get easy-to-follow layouts, part lists, and helpful images to make the whole process smooth.
Our PDF plans take you step by step through constructing the frame, much like putting together a puzzle. With over 120 clear images and simple directions, you can work with confidence and cut out the guesswork. Start building your dream deck today!
Safety Guidelines and Troubleshooting for Freestanding Deck Plans
Improperly fastened beams and joists are a common weak link in deck building. Use the right connectors such as powder-actuated fasteners (fasteners driven by a small charge) or through-bolts to secure these joints. Always check that each connection is tight and level. This helps keep the deck from shifting or sagging over time.
Water can cause damage if it seeps into beam-to-post connections. Apply a moisture-blocking product to these points to form a barrier that keeps water out. If you use a ledger board even for a short time, add moisture-blocking flashing to prevent water buildup that could lead to rot or decay.
Tip: Check your attachment methods during each phase of the build to catch issues early.
Common troubleshooting strategies include:
- Making sure all beams and joists are securely fastened.
- Using a level to verify the alignment.
- Reapplying moisture-blocking treatments when needed.
Regular maintenance checks help spot any fastener loosening or water infiltration. Addressing these concerns early can save you from more complex repairs later. Stick to approved construction methods and stay alert throughout your deck’s lifetime.
Maintenance and Care Tips for Freestanding Deck Plans

Trex composite decking and PVC trim boards are a smart, low-maintenance choice. They don't need sealing, brightening, or stripping. Still, a bit of regular upkeep will keep your deck looking great and lasting longer.
Keep an eye on your deck each season. In the fall, especially after wet weather, check that all screws and fasteners are tight. In the spring, clean the composite boards with soapy water and a soft brush. You can use the same gentle cleaning method on the PVC trim boards.
Here are some practical tips:
Regular care keeps your deck fresh and minimizes the chance of unexpected repairs. Treating your outdoor space with simple, timely maintenance helps ensure it stays inviting for years to come.
Final Words
In the action, we detailed how to choose your site, set footings, and pick a design that fits your space. We broke down every step, from framing diagrams and material lists to downloadable blueprints and hands-on build guides. Safety checks, troubleshooting advice, and maintenance tips help you keep your deck in top shape. With these clear guidelines and freestanding deck plans, you have everything you need to finish your project confidently and on schedule.
FAQ
Where can I find free printable freestanding deck plans with pictures, a material list, and size variations?
Free downloadable deck plans are available in PDF format. They include detailed diagrams, pictures, and material lists to help you design and build a freestanding deck confidently.
What does the 3/4/5 rule for decking mean?
The 3/4/5 rule for decking means using the 3-4-5 triangle method to check right angles. This simple math trick helps you ensure your deck’s structure is square and true during construction.
How high can I build a freestanding deck and what is the biggest deck I can build without a permit?
Freestanding deck height and size limits vary by local regulations. Typically, decks built below 30 inches above grade and within specific square footage limits may not require a permit. Always check with your local building authority.
How much does it cost to build a freestanding deck?
Costs depend on the deck’s design, materials, and labor. DIY projects may range from a few hundred dollars for small decks to several thousand dollars for larger or custom decks.
