
Have you ever noticed that some tool carts can feel like traps instead of helping you out? When your tools are scattered in every drawer, finding that right screwdriver wastes time and adds frustration. An organized tool cart saves time and makes every project feel safer and simpler. With easy steps like clearing out, cleaning, and sorting your tools by type, you can turn your messy cart into an efficient workspace. Read on to see how simple tweaks can transform clutter into a smooth storage solution.
Step-by-Step Tool Cart Organization Setup
-
Clear out all drawers and remove every tool from your cart. Begin by taking everything out so you can start fresh.
-
Clean each drawer, side panel, and surface well. Wipe off any dust, metal shavings, or rust using a damp cloth to keep the tools in good shape.
-
Group your tools by type and how often you use them. Separate screwdrivers, wrenches, and pliers into their own piles. Then sort them into daily, weekly, and occasional use stacks. This makes everything easier to find.
-
Place the tools you use most in the top tray or drawer. Items like a cordless drill or tape measure should be within easy reach. Store heavier tools, such as impact drivers and hammers, in the lower drawers to keep the cart balanced.
-
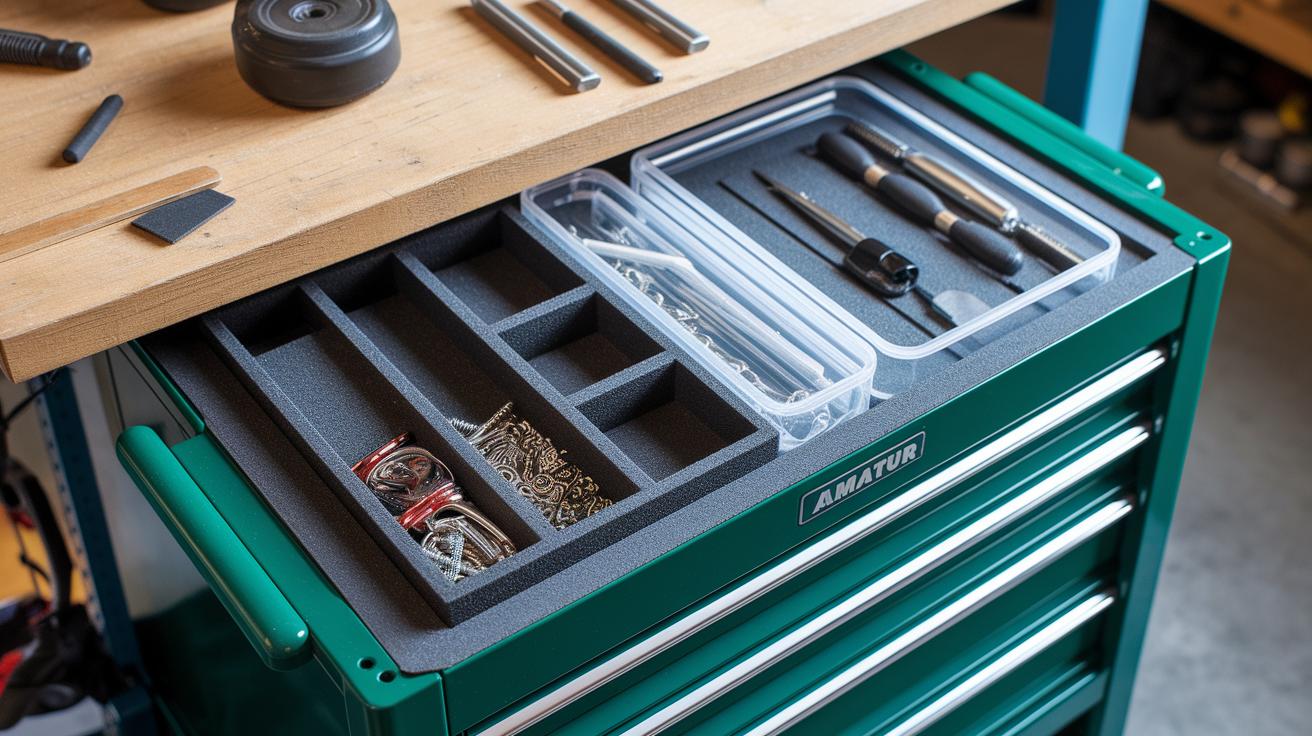
Use trays, dividers, foam inserts, or small organizers to separate items like sockets, bits, and fasteners. Think of it as organizing recipe ingredients so each group has its own space.
-
Label each drawer or compartment with clear tape and marker labels or magnetic strips. Try some simple color coding, for example, blue for power tools and red for cutting tools, so you never scramble for the right wrench.
-
Mount VELCRO® Brand EASY HANG™ Magnet Straps on the side panels. Hang tools like pliers, tape measures, extension cords, and hammers without drilling holes. This setup lets you grab tools quickly, reduces project stress, and keeps your cart from becoming overcrowded.
Choosing the Right Accessories for Efficient Tool Cart Organization
- Install drawer dividers and foam inserts to keep small parts like sockets, bits, and hex keys secure. For example, a divider creates separate slots so each tool stays just where you expect it.
- Use removable trays with clear lids for screws, nails, and fasteners. With the clear lid, you can quickly see every part at a glance.
- Organize small pieces with an adjustable parts organizer and add a drawer liner. The liner protects against scratches and moisture and stops tools from shifting when the cart moves.
- Mount VELCRO® Brand EASY HANG™ Magnet Straps on metal panels to secure items such as hammers, pliers, tape measures, extension cords, or garden tools. Their magnetic grip holds several pounds without any drilling.
- Label drawer fronts with bright, color-coded bands or magnetic strips. This tip makes it easy to find the right tool every time.
Upgrade tip: Combine these changes with a full tool set, like a top home tool kit for homeowners, to boost your accessory plan and overall efficiency.
Layout Optimization for Your Tool Cart Setup
Start by grouping your tools by job type, like plumbing, electrical work, car repair, or general fixes. This method helps match your tools to your work routine. Use foam-cut templates to trace each tool's shape in the drawers so that every item, from screwdrivers to pliers, has its own spot. This keeps everything in place when you move your cart.
Add side panels or small pegboards to the cart walls to hang tools you use often, as well as clamps and safety gear. Put hooks and magnetic tool holders along the side rails to grab essentials like wrenches and screwdrivers quickly. Keeping these items separate not only speeds up your work but also keeps your setup tidy over time.
For heavier tools, consider the cart's height and how smooth its wheels roll. Place items such as impact drivers or hammers in the lower sections to improve balance and ease of movement. Arrange your tools based on the projects you do most. For more ideas on how to mount your tools, check out DIY workbench plans that show side-panel pegboard options.
| Layout Type | Ideal Use | Key Components |
|---|---|---|
| Basic DIY Cart | Home repairs | Foam inserts, side hooks |
| Mechanic’s Portable Cart | Automotive work | Heavy-duty trays, magnetic holders |
| Woodworker’s Rolling Rack | Carpentry projects | Pegboards, tool-specific dividers |
| Electrical Tech Cart | Wiring and circuits | Insulated holders, labeled compartments |
Maintenance Tips to Keep Your Tool Cart Organized Over Time

-
Clean your tool cart every 3 months. Empty all drawers, wipe down surfaces, and remove any debris. Set aside 15–30 minutes for this task to help your cart work well.
-
Check your tools for damage often. Look at handles, tips, and metal parts. If any tool is broken, repair it or take it out of the cart. This keeps your tools safe and working longer.
-
Update your labels and color codes when you add new tools or change how you organize them. Replace old or faded labels with clear tape and a white marker. For example, if your power tool drawer label becomes hard to read, replace it to avoid mix-ups.
-
Store seasonal or rarely used items in an offsite bin. Keep frequently used tools in the cart to free up room for projects. If your cart feels too crowded, move large or seldom-used items to another storage space.
-
Repair torn drawer liners and secure loose magnet straps as needed. Fixing small tears right away can stop bigger issues later. Following these steps will help your tool cart stay organized and ready for every task.
Deep Dive: Customizing Tool Cart Configurations
These examples show tried-and-true setups with simple upgrades based on real feedback.
Take the Mechanic's Portable Cart. It has a deep bottom drawer, custom foam inserts, and side magnet straps. Now it includes a built-in charging station for cordless tools. One local mechanic said, "The charging dock keeps my battery-powered impact wrench ready, even on busy days." To add this feature, measure a 3 in (7.6 cm) by 3 in (7.6 cm) space on the side panel and attach a small insulated box there.
Next, consider the Electrical Technician Cart. It comes with insulated tool holders, a shallow top compartment for wire strippers and crimpers, and color-coded drawer labels. An upgrade here is a foam-lined, adjustable insert for specialty meters. One technician shared, "This update saves me minutes on every repair, keeping tools and testers clearly separated." These small changes boost efficiency without altering the original design.
The Woodworker's Rolling Rack now has an extra sliding tool drawer that features easy-pull knobs. This drawer lets you grab small items quickly without moving the whole setup. A woodworker noted, "The added drawer made retrieving drill bits smoother during intensive projects." This tweak improves your tool layout and ergonomics.
The Compact DIY Cart originally features a foldable work surface, compartment trays, and magnetic screwdriver holders. You can transform it with a swap-out tray system that lets you switch between a tool cart and a workbench fast. One renter commented, "It fits perfectly in my small space and even provides a ready work surface when needed."
| Tool Cart | Original Features | New Customizations |
|---|---|---|
| Mechanic’s Portable Cart |
– Deep bottom drawer for impact wrenches – Custom foam inserts for metric and SAE sockets – Side-mounted magnet straps for pliers and ratchets |
– Built-in charging station for cordless tools – Feedback: “The charging dock keeps my impact wrench ready.” |
| Electrical Technician Cart |
– Insulated tool holders on side rails – Shallow top compartment for wire strippers and crimpers – Color-coded drawer labels |
– Foam-lined adjustable insert for specialty meters – Feedback: “The update saves me valuable minutes on every repair.” |
| Woodworker’s Rolling Rack |
– Modular bins for sanding discs, drill bits, and router bits – Built-in clamp rack – Peg-hook grid for measuring squares and chisels |
– Added sliding tool drawer with easy-pull knobs for small items |
| Compact DIY Cart |
– Foldable platform (24″ x 36″) that doubles as a temporary work surface – Stackable compartment trays – Magnetic screwdriver holders on the front panel |
– Swap-out tray system for quick storage-to-workbench conversion – Renter review: “Perfect for small spaces and quick workspace conversion.” |
For example, one mechanic mentioned that before adding the charging station, he spent 10 extra minutes between jobs looking for a free outlet. These new ideas bring fresh insights and clear modifications to help you perfect your tool cart design.
Final Words
In the action, you’ve learned the step-by-step process to refresh and arrange your tool cart for easier use. You cleared out clutter, cleaned every part, and organized tools by type and frequency. The guide showed how to use dividers, trays, and magnetic straps to keep everything in its place. This tool cart organization setup ensures reliable access to your tools during projects, saving time and reducing stress. Keep your layout neat with regular maintenance, and you’ll enjoy a more efficient workspace. Happy building and safe DIY-ing!
FAQ
How can you organize a tool cart effectively?
Organizing a tool cart works best when you clear every drawer, clean all surfaces, sort your tools by type and use frequency, then use dividers, foam inserts, and magnet straps for secure storage.
How can you set up a toolbox or tool chest like a pro?
Setting up a toolbox is easiest when you empty it, sort your tools by daily or occasional use, use drawer dividers or foam inserts for small parts, and label each compartment for quick access.
What are common toolbox organizer mistakes?
Common mistakes occur when drawers become overcrowded, tools are mixed up, compartments are not labeled, and heavy items are not placed to maintain balance, making items hard to find.
What is the best way to organize a tool board?
Organizing a tool board is most effective when you mount hooks and magnetic holders in a layout that groups related tools together, ensuring items like screwdrivers and wrenches are easily visible.
