
Have you ever thought about turning plain clay into art? Pottery is a fun way to express creativity. In this guide, we show you how to set up an inspiring space and learn techniques like wheel throwing, hand building, and slip casting (using liquid clay). We break down each step so you can transform raw clay into beautiful pieces. Ready to brighten your day with a hands-on creative project? Read on and learn how pottery can be both fun and fulfilling.
Master Essential Techniques to Learn Pottery: Your First Steps
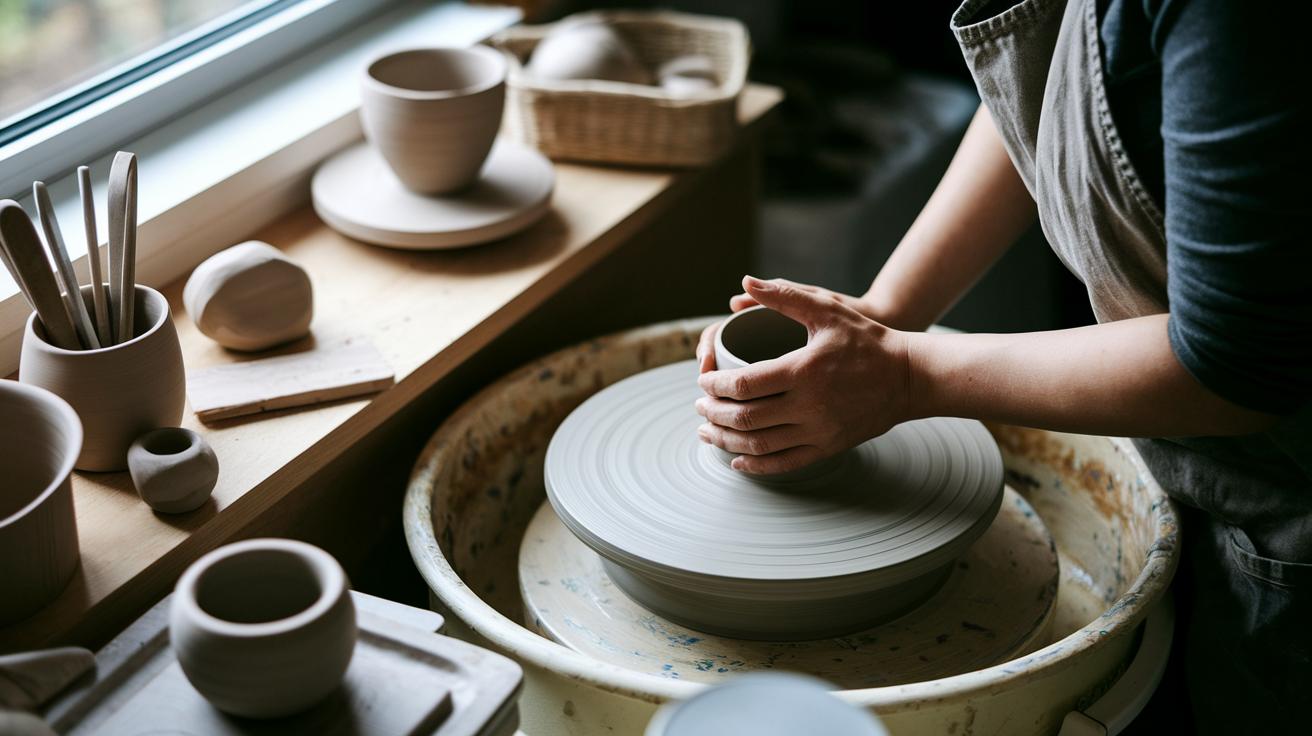
Set up a dedicated space for your pottery. Choose a table by a window with plenty of natural light and add a few shelves to keep your clay, tools, and finished pieces organized. A tidy workspace makes the creative process easier and keeps your supplies handy.
Try these three main techniques:
-
Wheel Throwing:
- Start with wedged clay (it’s like kneading dough to remove air pockets) and center it on your spinning wheel.
- Gently use your fingers to pull up the walls until you form a balanced, round piece.
- Trim off any extra clay once it reaches the leather-hard stage to perfect the shape.
-
Hand Building:
- Use simple hand movements to shape your clay.
- For pinch pots, begin with a small ball of clay, press your thumb into the center, and slowly pinch outward to form a bowl.
- With coil pots, roll out ropes of clay, layer them, and smooth the joints together.
-
Slip Casting:
- Pour liquid clay slip into plaster molds.
- The mold absorbs water, which lets the slip take the shape of the mold.
- This method is great for creating multiple identical pieces.
Remember, practice is key to mastering pottery. Experiment with each technique and learn from your mistakes, the more you practice, the more confident you'll become in your clay work.
Home Studio Ceramics Setup for Learn Pottery: Tools, Clay, and Space

Set aside a small space with plenty of natural light. A table placed by a window works well so you can watch your work while enjoying the view outside. Adding a few shelves for clay, tools, and drying ware keeps your studio neat and lets creativity flow.
For beginners, you can put together a basic toolkit for under $12 using common household items. The right tools really make a difference. Your toolkit should include a wire cutter (to cut clay), a sponge (to smooth surfaces), trimming tools (to refine shapes), an apron (to keep your clothes clean), and a small water container (to keep clay moist and for cleaning). Also, choosing the right type of clay is important. Use fine-grog clay for wheel throwing because it has a smooth texture. If you plan to try handbuilding, go with a coarse-grog clay body for extra strength and better shape retention.
| Tool | Purpose | Approximate Cost |
|---|---|---|
| Wire Cutter | Cut clay | $2 |
| Sponge | Smooth surfaces | $1 |
| Trimming Tools | Refine shapes | $3 |
| Apron | Protect clothing | $2 |
| Water Container | Keep clay hydrated | $2 |
Remember to use fine-grog clay for wheel throwing or a coarse-grog clay body when handbuilding. Keeping your space organized will spark creativity and help boost your pottery skills.
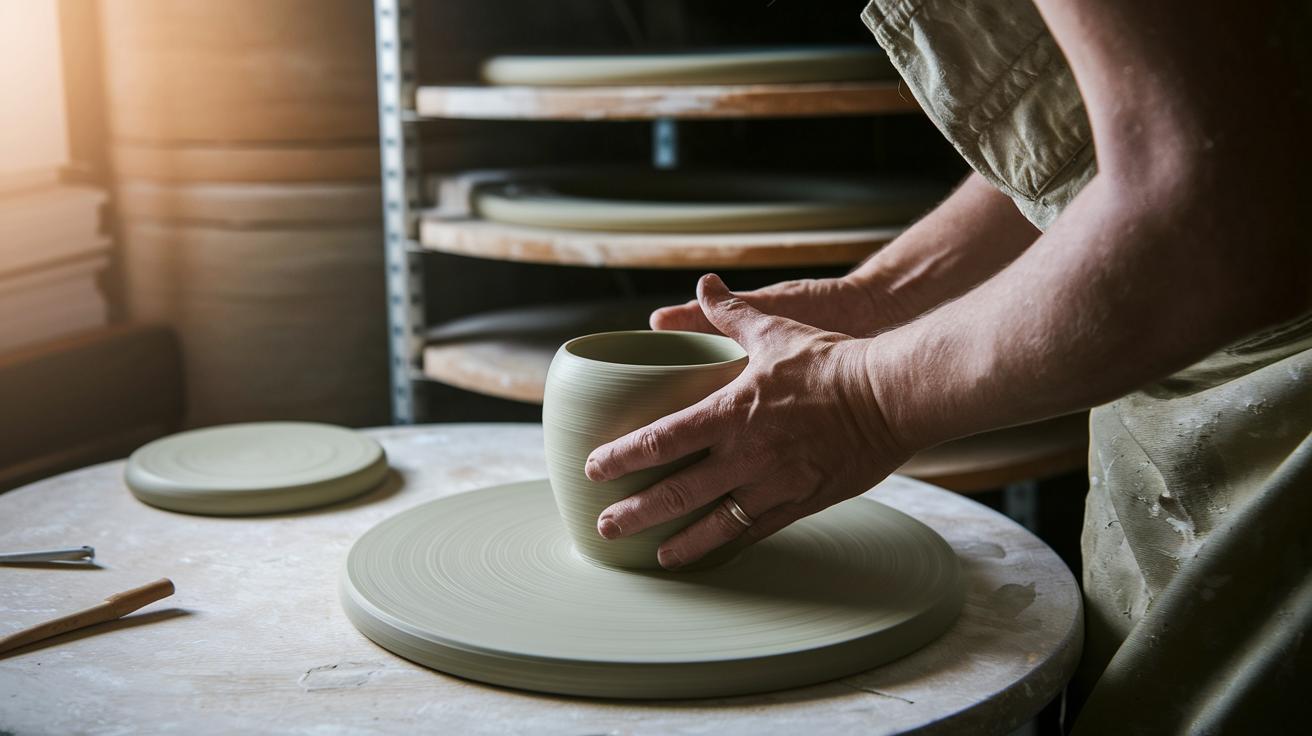
Learn Pottery Wheel Techniques: Beginner Wheel Throwing Step-by-Step

-
Check out our earlier guide for the basics of wedging, centering, and pulling your clay. Wedge your clay (like kneading dough to push out air bubbles) and center it carefully on the wheel head. Pull evenly to create smooth, consistent walls.
-
When your clay reaches a leather-hard state, use your trimming tools to remove extra clay. Trim around the base and sides evenly to get a neat, smooth finish.
-
To attach a handle, try using a coil technique or a handle extruder. Shape your coil handle, secure it to your pot, and smooth the seam where they meet so your pot stays strong and looks nice.
-
After forming your pot, use the bat pin holes to remove the wheel head safely. This simple step lets you make further adjustments or store your piece with ease.
Learn Pottery Handbuilding Techniques: Pinch, Coil, and Slab Methods

Basic pinch pots, coil construction, and slip casting were covered earlier. This part focuses on building with slabs.
Slab Building Technique
Roll out flat slabs on a smooth, level table using a rolling pin. To keep your slab even, line up two rulers or straight edges as a guide. For example, roll a 1/4 in (6 mm) thick slab and use a ruler to check your edges.
Set your slab on a gentle hump or slump mold to create soft curves. The mold helps shape the clay evenly so you don't have to smooth it by hand. For instance, lay your slab on a shallow mold and press it lightly to follow the mold’s curve.
Cut your slab with a scoring tool or a craft knife to get clean edges. Lightly score the area where pieces will join. For example, mark the joining edge with a few light cuts before adding adhesive slip.
To join slabs, first score the edges, then wet them with water and spread a thin layer of slip (liquid clay mixture). Press the pieces together and smooth the seam with a damp finger. For example, score a 2 in (5 cm) section, apply slip evenly, and press firmly for a neat join.
| Step | Action |
|---|---|
| 1 | Roll out a flat, even slab using a rolling pin and guide edges with rulers. |
| 2 | Press the slab onto a hump mold to form smooth curves. |
| 3 | Score, cut, and join edges with a damped thin layer of slip. |
Learn Pottery Glazing and Firing: Finishing Your Ceramic Creations
Let your greenware dry slowly and evenly to avoid cracks. Check its weight and feel; any leftover moisture can cause problems during firing.
Bisque firing is your first important kiln cycle. This process turns your clay into a porous ceramic ready to hold glaze. Follow your kiln's temperature guidelines. For example, fire until the recommended temperature is reached, then let it cool slowly.
Once bisque fired, pick a glaze that fits your design. Stir the glaze until it has a smooth consistency for an even coat. You can dip, brush, or spray the glaze based on the look you want. For instance, dipping a small bowl in the glaze can coat its interior evenly.
Next, run a second kiln cycle for glaze firing. Set the temperature according to the glaze instructions to achieve a glass-like finish. Remember, air-dry clays cure at room temperature but are less durable than kiln-fired pieces. Always keep an eye on your kiln's temperatures for safety and best results.
Resources to Learn Pottery: Online Classes, Workshops, and Community Programs

Discover your creative side with both online and hands-on classes. Many websites offer easy-to-follow video series that guide you from beginner to advanced skills. These courses include live Q&A sessions so you can get help as you learn. You can watch clear, step-by-step demos on YouTube channels like Tim See Tim See, Karans Pots & Glass, Florian Gadsby, Amii Ceramics, Ingleton Pottery, and Old Forge Creations. One channel may show you how to perfect your wheel throwing, while another teaches handbuilding techniques.
Local art centers and community workshops give you a chance to work with clay in a group setting. These sessions usually happen on weekends or after work. You might find small-group classes that allow you to practice while meeting others who share your passion. This mix of in-person and online advice helps create a friendly and supportive learning community.
If you want an even deeper experience, try immersive programs like Clay Camp or Ceramics Congress. There are also mentorship programs that pair you with skilled potters. Some artist residencies in Europe even let you work side-by-side with professionals in a creative space. Plus, joining online forums or social media groups lets you share projects, swap tips, and solve problems together.
| Resource | Type |
|---|---|
| Tim See Tim See YouTube Channel | Online Video Series |
| Karans Pots & Glass YouTube Channel | Online Video Series |
| Florian Gadsby Video Series | Online Tutorials |
| Local Community Art Center Classes | In-Person Workshop |
| Clay Camp Immersive Program | Immersive Learning |
| Ceramics Mentorship Schemes | Guided Learning |
Troubleshooting Learn Pottery Projects: Common Challenges and Expert Tips

Working on clay projects can sometimes bring small problems that grow into big headaches. Air bubbles and cracks appear if you don’t wedge your clay well. Take a few extra minutes to knead out all the air pockets, just like you would with dough. Let your clay dry slowly and evenly to keep stress inside the piece low. When you pull or stack your coils, make sure the wall thickness stays the same. Run your fingers along the wall to check for evenness and apply steady pressure.
Glaze issues like pinholes or crawling can happen if your glaze isn’t mixed thoroughly. Stir and sieve your glaze several times until it is smooth, then coat your work evenly. Also, keep your workspace clean. Remove any dried clay pieces to stop them from mixing with your fresh work and to keep the air safe to breathe.
Follow these expert troubleshooting tips to help your process go smoothly:
- Check your wedging technique to get rid of all air pockets and avoid cracks.
- Keep your pressure steady when pulling or stacking coils for uniform walls.
- Mix your glaze well by stirring and sieving so you avoid pinholes and crawling.
- Clean your workspace often and clear away any clay debris.
- Wear an apron or old clothes and work in a well-ventilated area, especially near the kiln.
Stay patient and take the time you need. These tips will help you build your pottery skills and enjoy a smoother workflow.
Final Words
In the action, we broke down essential pottery techniques, from wedging and hand building to wheel throwing, glazing, and firing. We discussed setting up a safe home studio, choosing a cost-effective toolkit, and troubleshooting common issues. Each step builds your confidence and practical skills. Keep practicing and enjoy every creative win along the way. Use these practical steps to learn pottery and watch your creative process unfold. Remember, every piece you create is a step forward on your journey.
FAQ
How can I learn pottery near me?
Finding local pottery classes means searching for community art centers, local colleges, or dedicated studios. Many venues offer hands-on workshops that let you practice essential techniques in person.
How can I learn pottery online, including free options?
Learning pottery online is accessible with free YouTube channels and online tutorials that walk you through basic techniques. These lessons let you start your pottery journey from the comfort of your home.
Are LearnPottery.com reviews positive and is it a legitimate resource?
Reviews and user feedback indicate that LearnPottery.com is a trusted resource for clear, step-by-step pottery tutorials. The site is considered legit by beginners and experienced potters alike.
What are recommended books for learning pottery?
Recommended pottery books cover essential techniques like wheel throwing, hand building, and glazing. Such titles often include step-by-step guidance, making them practical references for beginners.
How can I teach myself pottery at home as a beginner?
Teaching yourself pottery at home is possible by using online classes, books, and self-guided tutorials. A dedicated workspace, basic tools, and regular practice help you build essential skills step by step.
Is pottery as a hobby expensive?
Pottery can start as a budget-friendly hobby using affordable tools and inexpensive materials. Over time, investing in specialized equipment like a wheel or kiln may gradually increase costs.
What does the 3 pull rule in pottery mean?
The 3 pull rule refers to a technique where you consistently pull and shape the clay in three stages to create a uniform wall thickness and a balanced form on the wheel.
What are the 4 S’s of clay?
The 4 S’s of clay commonly refer to attributes such as stickiness, softness, smoothness, and strength. These qualities help you assess clay workability and the suitability for different pottery techniques.
