
Before you start your small remodel, have you checked that it is safe for your family? Many homeowners skip basic safety checks when fixing up their space. Taking small steps like marking off work areas and packing away fragile items can help stop accidents before they happen.
In this guide, we show you how to spot hazards, what steps to take, and how to protect your home. Stick with us for a safer work zone and peace of mind during your remodel.
Initial Construction Safety Checklist for Small Remodels
- Walk through each room and mark off the areas where work will happen. Use tape or a portable barrier to keep kids and pets safe.
- Carefully wrap fragile items like glass, ceramics, electronics, and art with bubble wrap or packing paper. Pack them in sturdy, labeled boxes and snap a few photos for your insurance records.
- Test your home alarm systems and update them if needed. Place a fire extinguisher near any work area with electrical gear or flammable materials to help prevent fire or theft.
- Set clear work hours with your contractor. Establish a schedule for when tools and materials come in so your space stays orderly.
- Discuss cleanup plans with your contractor. Agree on debris removal and use protective covers on floors, counters, and door frames to avoid lasting damage.
Have you measured twice? This plan will help you keep your remodel safe and organized from the start.
Identifying and Assessing Hazards in Home Remodel Safety
Start your project by walking through the work area. Look around each room and check for hazards like loose wires, slippery floors, open nails, unstable flooring, and low-hanging obstructions. For instance, if you spot a worn cord near a kitchen appliance, address it immediately.
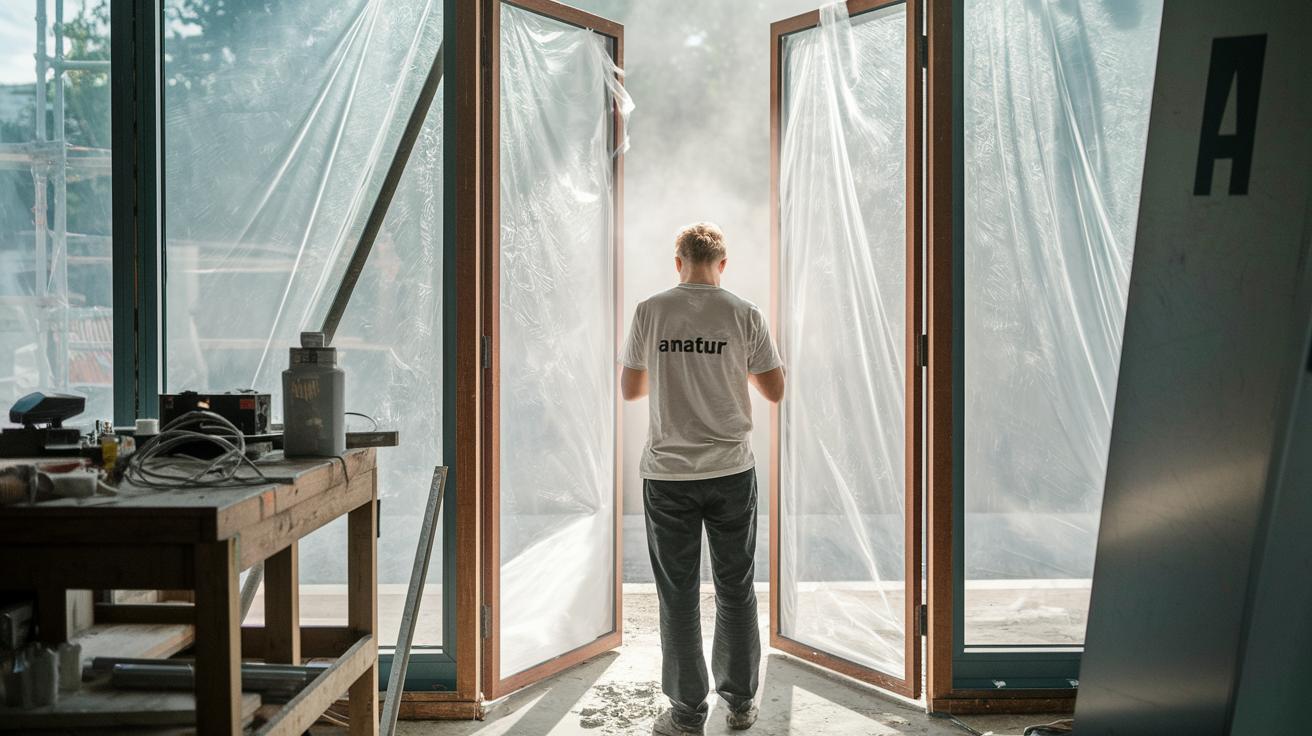
Be alert to construction dust because it can harm your lungs. Use sealed plastic sheeting to cover doorways, vents, and windows. Think of it like placing a lid on a boiling pot, this keeps the dust contained.
Before you start on decorative updates, inspect key structural elements such as the foundation, load-bearing walls, and roof framing. Overlooking these can lead to serious collapse risks. Sort hazards into clear groups: electrical (like exposed live wires), chemical (old, crumbling sealants), fall hazards (unprotected stairs), trip hazards (tools left around), and manual-handling risks (heavy objects without proper lifting aids).
Create a simple hazard checklist that ranks issues by priority. Remember, even a small mistake can become dangerous, so take a moment to double-check your findings. This careful approach will help you work safely and confidently throughout your remodel.
Essential Personal Protective Gear for DIY Remodeling Safety
Wear the right protective gear when you work on a remodel. Hard hats keep your head safe, safety goggles shield your eyes, and ear protection stops noisy tools from hurting your ears. Use an N95 respirator or dust mask to block dust. Work gloves, knee pads, and steel-toe boots add extra safety. Each item is picked based on the risks of the job, following OSHA guidelines.
Check your gear regularly to ensure it still works well. Look at the straps, lenses, filters, and padding before you begin your project. If any part is worn or damaged, replace it right away. Keeping your gear in top shape helps you stay safe and prevents worksite injuries. For a full list of items, refer to the PPE checklist for DIY projects (link provided). Spending a few extra minutes on upkeep can save you time and help avoid accidents.
Tool Handling and Equipment Safety Protocols for Small Remodels
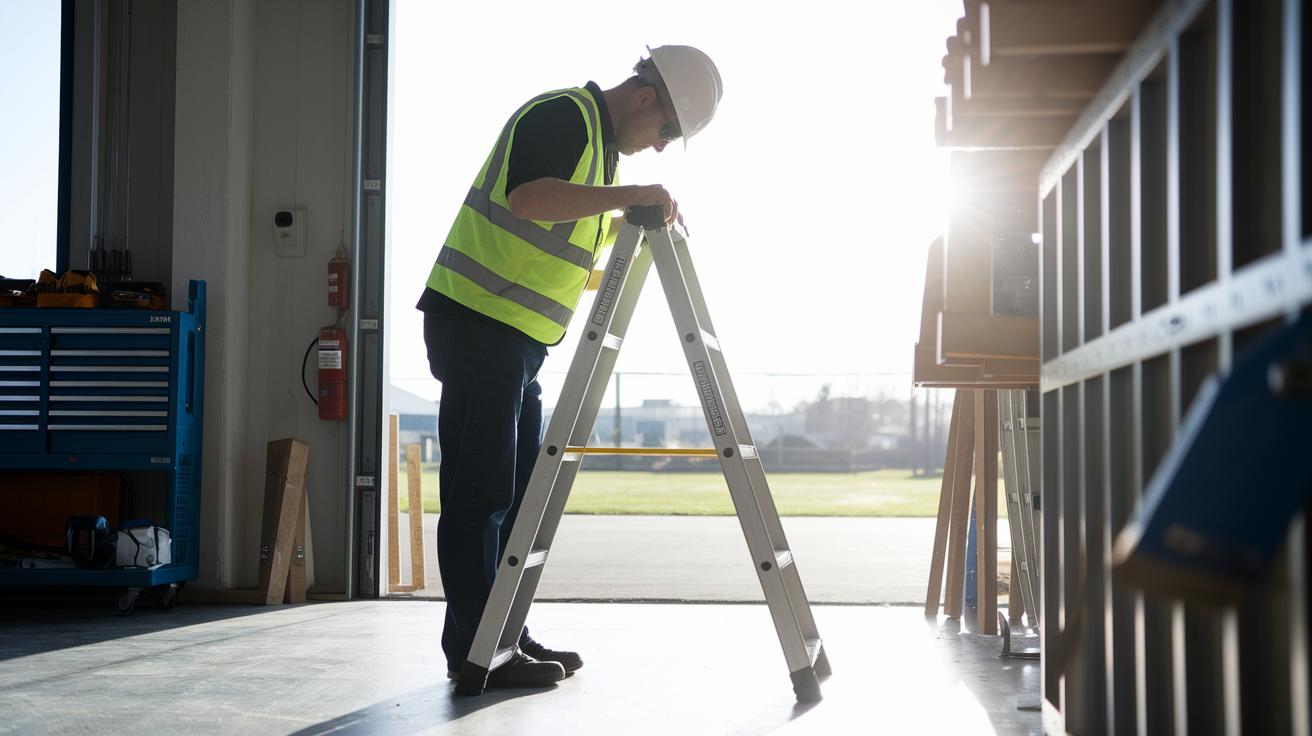
Ladder Safety
When using a ladder, set it up with a 4:1 ratio. This means you should place the base 1 foot (0.3 m) away for every 4 feet (1.2 m) of height. Check the ladder each time before you use it. Look for worn steps or shaky feet. Always follow the three-point contact rule, keep two hands and one foot or two feet and one hand on the ladder. When climbing up or down, face the ladder and move slowly to avoid slips.
Power Tool Operation
Before turning on any power tool, make sure all safety guards are in place and that the emergency stop works. Check the cords for any cuts or damage and keep them away from busy walkways. Follow the manufacturer’s speed limits (RPM) to keep the tool working right. Use push sticks or guides when cutting materials. This keeps your hands safe by keeping them away from the blade.
Manual Tool Care
Sharpen blades often so they cut better and you don’t have to use extra force. Look over tool handles to make sure there are no cracks or splits that could lead to breakage. When you finish working, store sharp tools in a locked cabinet or safe spot. Not only does this protect you from accidents, it also keeps your workspace neat and prolongs the life of your tools.
Implementing Safe Work Practices and Site Organization
Start by placing clear signs and barriers around active work areas using color-coded tape or cones. This warns everyone of the limits and keeps kids and pets safe. Use portable UL-listed LED lights to brighten the area, and secure cables along walls or overhead so the walkways stay clear.
Next, collect debris right away and put it in bins that are clearly labeled. Use a HEPA-filter vacuum to pick up dust, and quickly wet any plastic sheeting before you remove it to stop dust from rising. Make sure you let everyone know about any changes in the work zone or equipment positions.
Keep the air fresh by opening windows or running exhaust fans in spots where chemical smells or fine dust build up. Do a quick check each day to spot any issues, and hold brief meetings to remind everyone of the safe work practices and any updates.
Finally, set up proper cable management to lower the risk of trips and falls. Build a regular cleanup routine to handle debris and dust during your remodel. These simple steps create a safe, organized, and efficient work site where everyone can work with confidence.
Adhering to Regulations and Emergency Planning in Remodel Safety

Make sure you follow your local building codes and OSHA guidelines before you begin any remodel. Check permit limits for electrical and structural changes to stay within legal limits. Even small projects must meet these legal standards for safety. Always ensure that any electrical work follows current codes. For extra help, check out electrical safety tips for DIYers to know when to call an electrician.
Keep a record of any incidents during construction. Use a standard form to log near-misses, and report any serious injury to the proper authorities within 24 hours. This record keeping helps you spot patterns and prevent future accidents.
Plan for emergencies by marking clear exit routes. Mark all exits and post emergency contact numbers for fire, medical, and gas leaks where everyone can see them. Always have a list of local emergency phone numbers handy so you can get help fast.
Test smoke alarms and carbon monoxide detectors every month. Place fire extinguishers (Class A/B/C) within 25 ft (7.6 m) of your work area. Regular checks like these keep your fire prevention steps strong and reliable.
Follow local permit rules and schedule inspections as needed. Use clear incident reporting guidelines and stick to legal mandates to stay compliant. By taking these safety and emergency steps, you create a safer work area and reduce unexpected hazards during your remodel.
Maintaining Safety Through Routine Inspections and Documentation
Start your workday with a quick pre-shift meeting. In this meeting, review the top three hazards from the previous patrol and check for any changes in the work area. This simple routine helps everyone focus on safety from the start.
Use this daily checklist to review key safety points:
- Inspect your PPE (personal protective equipment).
- Check that tools are in good condition.
- Ensure barricades are intact.
- Confirm that walkways are clear.
- Test that emergency lights work.
This list serves as a friendly reminder that safety is always a priority. A brief scan of the site each day can catch small issues before they turn into bigger problems.
Also, perform a weekly safety audit. Fill out a simple log to record any safety concerns, note what needs fixing, and set up follow-up checks. Doing this builds accountability and keeps the job site secure. Update your safety procedures after each audit or near-miss event to address any new risks. Regular checks and clear documentation help prevent mistakes and maintain an organized, safe workspace throughout your project.
Final Words
In the action of planning your remodel, a clear safety checklist sets the stage for a smooth project. We covered how to secure work areas, wrap fragile items, and organize your site. Steps on identifying hazards, using the right personal protective gear, and handling tools safely add extra layers of security. Following these remodel safety guidelines and regular inspections will keep you on track. Stay confident and safe while applying these construction safety basics for small remodels, your project progress is in your hands.
FAQ
Construction safety basics for small remodels pdf
The construction safety basics for small remodels PDF offers a step-by-step checklist covering hazards, PPE, tool handling, and safe work practices. Use it to plan and document safety measures before work begins.
Construction safety basics for small remodels free
The free construction safety basics guide provides homeowners with easy-to-follow steps to secure work zones, identify hazards, and use proper protective gear for a safe remodel project.
PCB safety precautions
PCB safety precautions focus on proper handling of printed circuit boards by disconnecting power sources, using protective gloves and masks, and applying safe cleanup methods to reduce exposure to dust and chemicals.
PCB wipe sample cleanup criteria
PCB wipe sample cleanup criteria define the steps for collecting and cleaning potentially contaminated samples. They include proper solvent use, following product instructions, and observing safety protocols to prevent exposure.
What is the 30% rule for renovations?
The 30% rule for renovations suggests limiting spending on major upgrades or redesigns to 30% of the total budget. This helps reserve funds for unexpected costs and maintains project balance.
What are the 5 E’s of workplace safety?
The 5 E’s of workplace safety refer to Education, Engineering, Enforcement, Evaluation, and Excellence. These principles guide effective hazard control and continuous improvement on job sites.
What’s the 20/20/20 rule in OSHA construction?
The 20/20/20 rule in OSHA construction is a guideline encouraging regular safety checks. Though not an official standard, it promotes periodic inspections and breaks to keep safety in focus during work shifts.
What are 20 general safety rules?
The 20 general safety rules cover practices like wearing proper PPE, maintaining clear work zones, handling tools safely, conducting regular inspections, and preparing for emergencies to secure a work environment.
