
Ever wonder if your pool area is as safe as it could be? Many areas now require a pool fence that stands 4 ft (1.2 m) high and includes a self-closing, self-latching gate that swings outward to keep little ones safe. This DIY guide shows you how to meet these code rules without spending a lot of money. We break the project into clear, simple steps so you can turn a safety challenge into a successful project. Keep reading to learn how you can secure your backyard and give your family peace of mind.
DIY Pool Safety Fence Code Requirements and Compliance
Most U.S. places now require a pool fence that is at least 4 ft (1.22 m) high to help stop little ones from climbing over. The rules also call for a gate that automatically closes and latches, and this gate must swing outward. For example, a typical kit with these features usually costs between $445.20 and $487.48. This design is essential to block unsupervised access and lower the risk of drowning among young children.
Using the right specifications is key for safety and to follow the law. When planning your DIY pool fence, check your local codes to ensure every detail meets the minimum standards. Follow these important points:
- The fence must be 4 ft (1.22 m) tall as a minimum.
- Use a gate that self-closes and self-latches.
- Make sure the gate swings outward.
When installed correctly, these guidelines not only create a secure barrier but also add to the overall look of your pool area. This simple setup gives you peace of mind every time you see your backyard.
Essential Tools and Materials for DIY Pool Safety Fence
Before you begin, gather all the tools you need. You will need a power drill for tightening bolts and screws, a level or a string with a level to check that posts and panels are straight, and a tape measure for accurate measurements. Also include a shovel, a post hole digger, and a wrench in your toolkit. When using the level, check that the bubble sits right in the center so that the board stays flat and does not tilt.
Next, prepare your building materials. Mesh panels or pickets will form the walls of the fence. These attach securely to sturdy fence posts using brackets and mounting stakes. A self-latching gate kit is also important for safety. Use stainless-steel hardware to keep parts rust-free and strong. Always follow the manufacturer’s instructions for both the panels and the gate kit to avoid any installation mistakes. If you have heavy posts, ask for help to reduce the risk of injury.
For more ideas on a well-equipped project, check out the recommended resources in the best home tool kit for homeowners at https://alphapix.org?p=100.
Planning and Layout for Your DIY Pool Safety Fence
First, measure your pool perimeter with a tape measure. Look at the pool’s shape and note any slopes, decks, or landscaping. This step helps you decide where the fence posts should go.
Next, mark each spot for a fence post. Use stakes or spray paint so that the marks stand out. Keep the posts about 6–8 ft (1.8–2.4 m) apart. This spacing works well with most mesh panels.
It helps to use a DIY project planning checklist. That way you can track your measurements and any adjustments you make.
Review the entire pool area to check for any sharp turns or irregular parts. If the ground is uneven, allow for small changes. By planning carefully, you ensure your fence is safe, neat, and meets local codes.
Take a moment to recheck every mark.
Step-by-Step Installation Guide for DIY Pool Safety Fence
Digging and Setting Posts
- Mark each post location along your pool edge with a tape measure and spray paint. Adjust your marks for curves or any obstacles.
- Dig a hole for each post to about one-third of the post’s height. For a 6 ft post, aim for an 18 in (46 cm) deep hole. This helps the post stay steady.
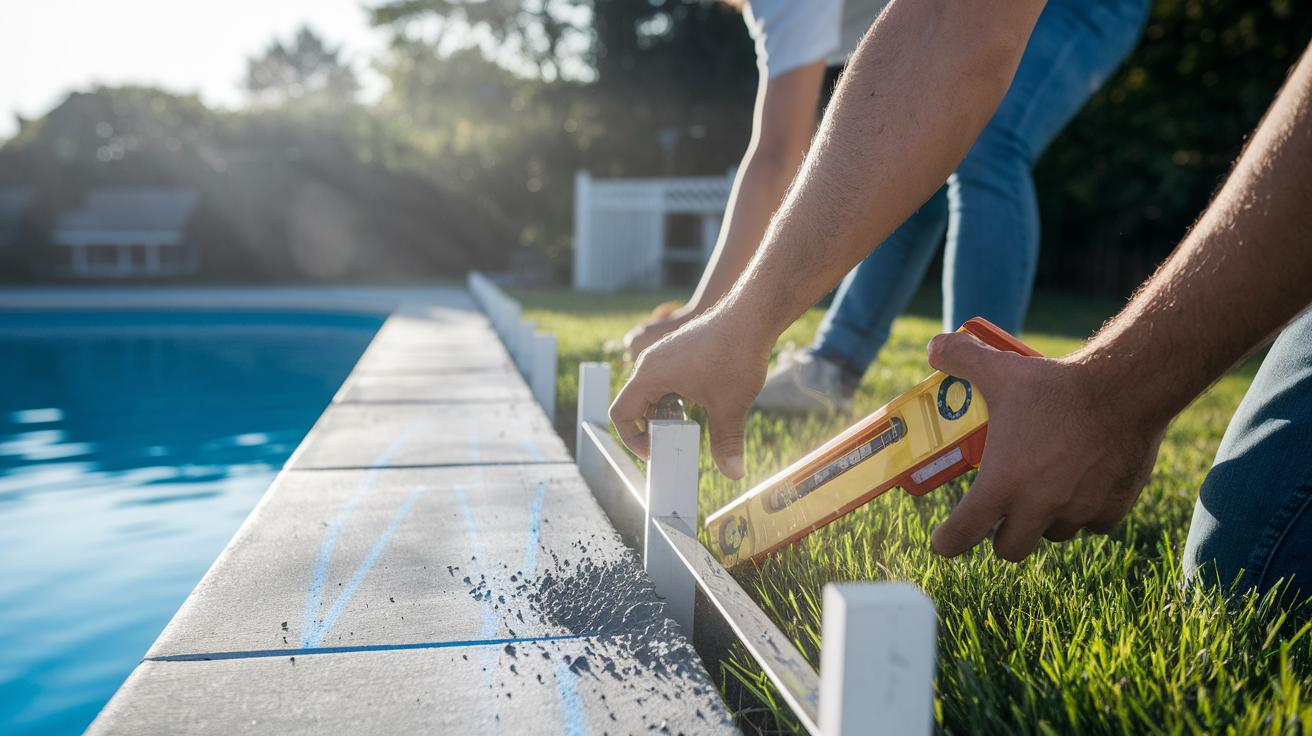
- Place a post in each hole. Fill the hole with concrete or tamp down gravel. Use a level in two directions to ensure the post is straight before the filling sets.
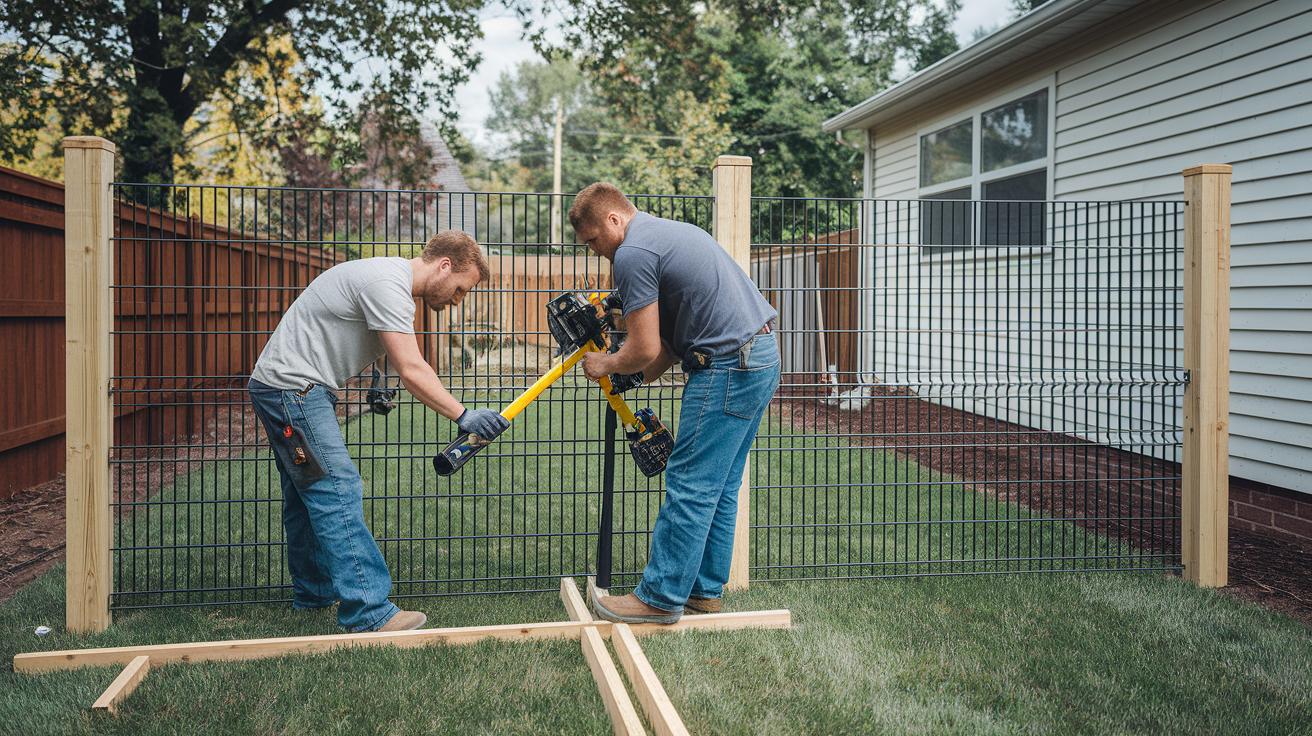
Attaching Panels and Securing Hardware
- With your posts set, align the mesh panels or picket rails against them. The panels should fit snugly with gaps less than 4 in (10 cm).
- Use brackets to attach each panel securely to the posts. Spread them evenly for a solid hold.
- Tighten the stainless-steel screws with a power drill. Check with your level to ensure the panels remain even as you secure them.
Installing and Adjusting the Gate
- Pick a spot for the gate that gives you convenient access while keeping the fence intact.
- Install the gate frame so it swings outward. Mount the self-latching mechanism at 54 in (137 cm) above the ground.
- Secure all bolts and screws around the gate with a power drill. Make sure all hardware is firmly fixed.
- Test the gate by opening and closing it. Check that it self-closes properly and that there are no gaps at the bottom or between panels.
Follow each step carefully. With these clear directions, you will build a secure, code-compliant pool safety fence that protects children, pets, and guests, while giving your pool area a neat, finished look.
Safety Inspection and Troubleshooting for DIY Pool Safety Fence
Check your pool fence every month to catch small problems early. This helps keep your fence safe and up to code. Use a level or string line to make sure the posts are straight.
- Inspect each screw, bolt, and bracket for looseness. If one feels loose, tighten it with your power drill.
- Look at the fence panels for any bends or damage. Bent panels can leave gaps that make the fence unsafe.
- Use a level on both sides of each post to ensure they are perfectly vertical. If a post seems off, you might need to re-tamp the concrete or gravel base.
- Test the gate to be sure the latch closes tightly and the self-closing feature works from every open angle.
- Check the gate hinges for proper alignment. If the gate swings unevenly, adjust the hinges for smoother operation.
If you notice the latch hanging a bit open, tighten the screws or re-align the gate frame. This simple monthly routine keeps your pool area safe and secure over time.
Permit and Legal Considerations for DIY Pool Safety Fence
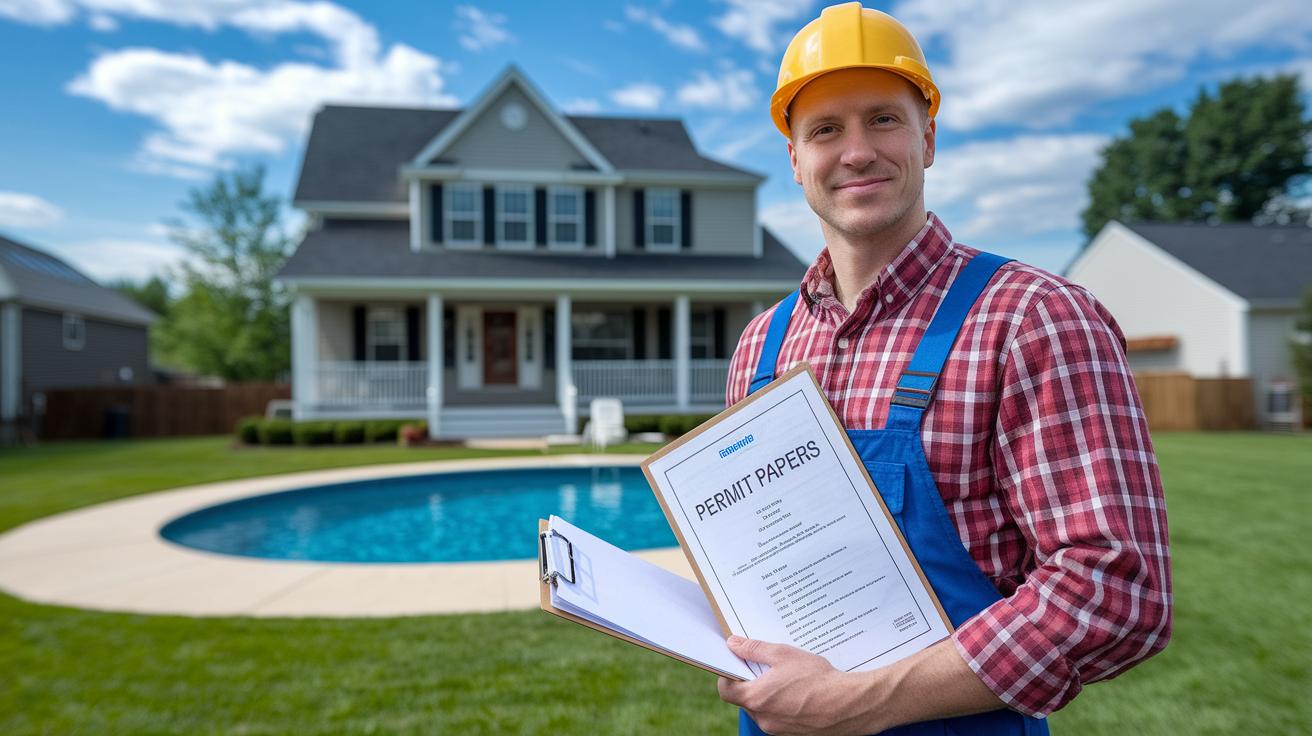
Before you start your DIY pool fence, check with your local building department. Many towns require permits and inspections before and after you begin. Permit fees can change from one area to another, so plan your budget and gather all needed paperwork. Local rules may also set rules like specific setback distances or require certain materials.
Before you begin, do these three things:
- Call your local building department to ask about permits and fees.
- Find out if you need extra documents like a site plan or a material list.
- Ask if there are any extra rules about setbacks or materials.
Also, plan for an inspection after your fence is installed to be sure everything meets local codes.
Following these steps can help you avoid legal problems. Even if permits are not required, following the rules can boost your property value and keep everyone safe. Keep all permit papers and inspection receipts in your files. This record is smart not just for safety now, but also for any future home sales or inspections.
Taking time to learn your local regulations protects your project and investment. Staying legal makes sure your fence is safe and helps the process go smoothly.
Final Words
In the action of setting up your safety barrier, we broke down every step, from reviewing code requirements and gathering tools to mapping your layout and installing the panels. We explained how to secure posts and attach a self-closing gate properly, keeping your project on schedule and within budget.
This guide gives you clear instructions to build your diy pool safety fence (code and installation) that stands strong and secure for your pool area. Happy building and stay safe!
