
Ever thought about turning your passion into a community event? You can host a DIY skill-sharing workshop where neighbors come together to learn and share ideas. Picture your community gathering to build new skills and forge lasting bonds. This guide breaks everything into clear, simple steps so you can plan, budget, promote, and host a smooth event. Follow along to set up a fun, educational session that your neighbors will love and keep coming back to.
Essential Steps to Host a DIY Skill-Sharing Workshop

Hosting a DIY workshop is a rewarding way to connect with your community. Start by scheduling your next event right after each session. This simple habit keeps your calendar full and your group excited.
Follow these steps:
- Plan and Schedule – Write down key dates and deadlines using a checklist.
- Budget Management – Set a budget that covers materials, tools, and venue costs.
- Promotion – Create a short pitch that explains the hands-on fun of your workshop.
- Venue Setup – Choose a spot that is easy to get to, well-lit, and set up for easy movement.
- Execution – Lead the session with clear, simple instructions so everyone can follow along.
- Follow-Up – Send out a survey for feedback and schedule your next workshop without delay.
By breaking your event into these clear stages, planning, budgeting, promotion, venue setup, execution, and follow-up, you can turn your creative ideas into a smooth, successful workshop. Each session builds trust and keeps the momentum going, paving the way for more community learning experiences.
Planning and Budgeting Your DIY Skill-Sharing Workshop

Start planning early to set your workshop up for success. When you work on your framework and branding 5 to 6 months ahead, you create a clear picture of what you want to do. This early step lets you lock in great instructors, volunteers, and local partners before the busy season hits. It also builds confidence in your budget and keeps your timeline on track, so you won't be rushing at the last minute.
| Timeframe | Action |
|---|---|
| 5-6 Months Before | Define your workshop framework and branding |
| 4 Months Before | Recruit instructors, volunteers, and partners |
| 2 Months Before | Start marketing to attendees and secure funding |
| 1 Month Before | Finalize logistics and assign roles |
For budgeting, break your costs into clear parts such as venue rental, supplies, instructor fees, and marketing. Try using a detailed budgeting plan like the DIY project budget template (https://alphapix.org?p=109) to track every expense. Save extra funds for surprises, and consider small investments like quality tools that can make your sessions run smoother and boost learning. Check off each expense and update your budget as you plan. Keeping a close eye on your spending makes the process less stressful and builds trust with everyone involved.
Selecting and Preparing the Perfect Venue for Your DIY Skill-Sharing Workshop

Pick a spot that is easy to reach, bright, and roomy. It should have enough space for both active work and relaxed conversation. Check that the cost fits your budget and that the room meets all safety guidelines. Verify the size and any needed permits before you book.
Think about everyone who will attend. Make sure there are wide, clear paths (free of barriers) and good lighting throughout the space. Weigh the rental cost against the benefits of a safe and comfortable location.
Use this checklist:
- Easy access with clear entry and exit points
- Enough power outlets and proper lighting
- Room for group work as well as individual tasks
- Required permits and safety measures in place
Arrange the room to feel welcoming and flexible. Use open floor space with movable chairs and tables. Set up workstations so they are well spaced to prevent crowding and allow easy movement. This layout supports smooth work flows and creates a safe, inviting atmosphere for everyone.
Designing Engaging Activities and Hands-On Demonstrations for Your DIY Skill-Sharing Workshop
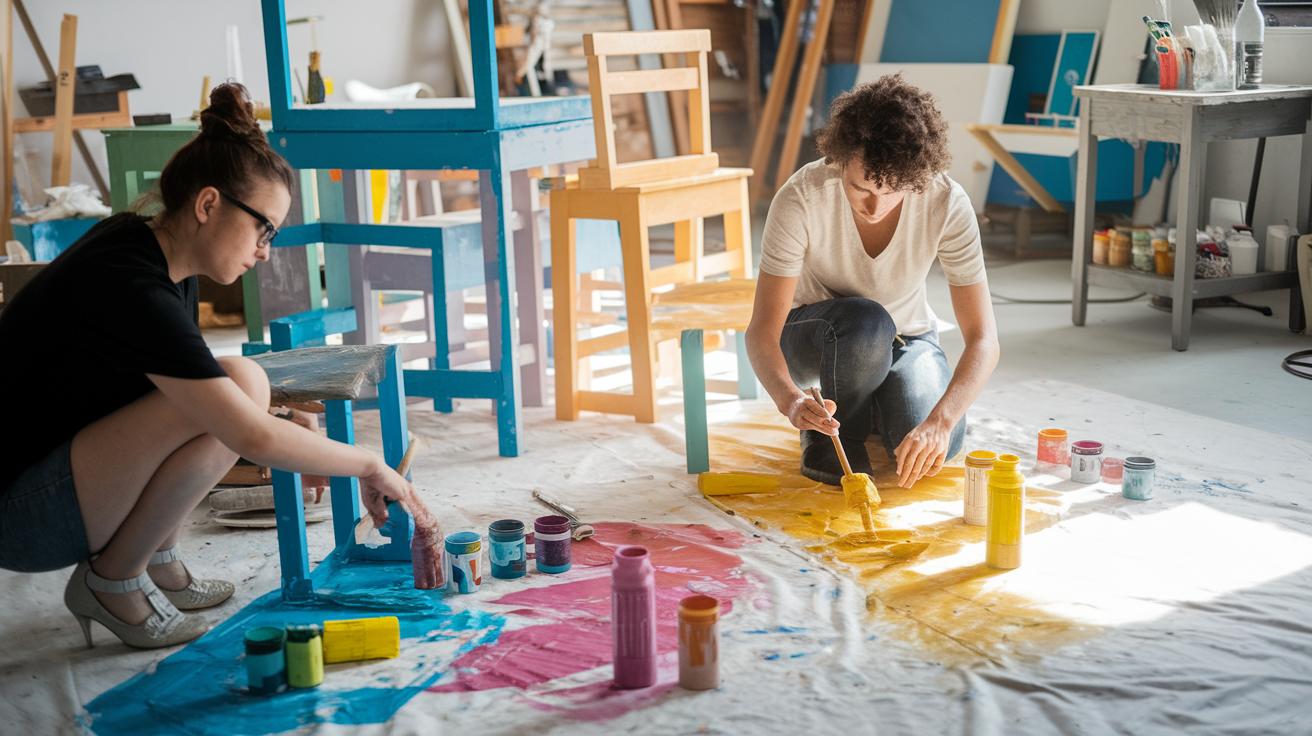
Mix clear, short demos with plenty of time for everyone to try the steps themselves. Alternate between showing a technique and letting participants try it on their own. Each demo can be brief and interactive, giving tips while attendees work on their projects. This approach makes it easier for everyone to ask questions and build confidence. Using both visual aids and hands-on work makes the process fun and clear.
- Paint a small piece of furniture on site as a fun giveaway.
- Work side-by-side with participants on a project to show each step.
- Set out small canvases and samples for quick, creative experiments.
- Hold a Q&A session while you work to address any issues right away.
- Start mini-challenges related to the project to spark friendly competition.
Adjust each activity for different skill levels. For beginners, simplify the steps and offer extra help by breaking down tasks into small parts. For more experienced DIYers, show creative techniques and ways to make the project unique. This mix supports everyone’s learning and creates a friendly, team-like atmosphere.
Promoting Your DIY Skill-Sharing Workshop to Boost Attendance

Start with a 30-second pitch that grabs attention. For example, you might say, "Join our hands-on DIY session where you learn to make cool projects, meet local makers, and have fun. Visit our website for details." Use this pitch in every message to build word-of-mouth buzz.
-
Use Digital Channels.
Post on Facebook, Instagram, and Twitter. Share updates, photos, or short videos of past sessions. Always add your website link so people have an easy way to learn more. -
Send Email Updates.
Email blasts keep your audience informed and excited about upcoming dates. Insert your website link in every email to make it easy for readers to check out more details. -
Advertise Locally.
Put up posters in community centers, local shops, and on community boards. Hand out flyers in busy neighborhood spots to serve as a friendly reminder about your event. -
Partner with Local Groups.
Work together with local organizations or community groups. They can share your pitch in their newsletters and meetings, widening your reach and showing that your workshop is a friendly local event.
Facilitation Techniques for an Inclusive and Casual DIY Skill-Sharing Workshop Environment
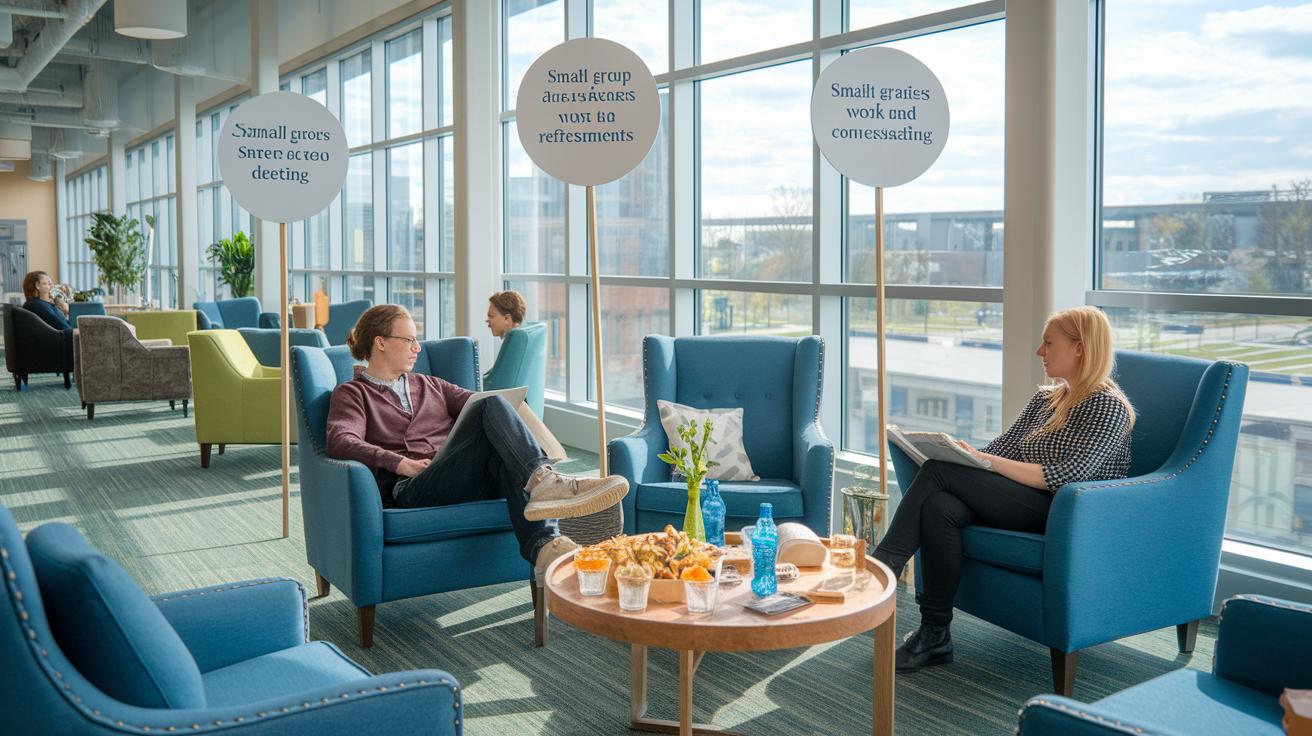
Begin by arranging a friendly space. Set out comfy chairs and keep plenty of open room so everyone can move about easily. Use flexible seating and a clear layout so people can talk and work together without crowding.
Invite everyone to join the conversation. Ask each person to share their questions and thoughts as the session unfolds. Use simple signs to show where work areas and refreshments are located. Set up a table with light snacks and drinks. For example, you might say, "Feel free to grab a drink and chat while you work."
Keep the energy high with interactive teaching. Share short stories about your own projects and challenges to build trust. Walk around and offer one-on-one tips during activities. Organize quick Q&A sessions and mini demonstrations to explain techniques clearly. This approach makes the workshop fun and helps each person feel like a valued part of the creative process.
Collecting Feedback and Planning Follow-Up for Your DIY Skill-Sharing Workshop

Right after the session, hand out a short survey to gather thoughts on the content, pace, and setup. Use simple digital forms or paper questionnaires with clear questions like “How clear were the demonstrations?” or “What would you change about the workshop?” This quick survey shows you what worked and what needs improvement.
Group the answers into clear categories such as how well the instructions were given, how engaged the participants felt, and how smooth the organization was. Look at both multiple-choice and open-ended questions to get numbers and personal comments. This review helps you see the learning outcomes clearly and plan a workshop that fits your community’s needs.
Use these insights to set up follow-up sessions and gradually improve your DIY skill-sharing experience.
Final Words
In the action, we broke down each step in planning your workshop, from setting a timeline and budgeting using our resources to choosing a perfect venue and creating engaging activities. We also tackled promotion, facilitation, and follow-up feedback to build a lasting community experience. With this clear guide on how to host a DIY skill-sharing workshop, you're well-equipped to start planning with confidence and clarity. Keep planning smartly and enjoy the creative journey ahead!
FAQ
Q: What is a skill sharing workshop?
A: A skill sharing workshop means an event where participants exchange practical knowledge and hands-on techniques. It creates a collaborative space for experts and beginners to learn and help one another.
Q: How do you host a craft workshop and what do you need to get started?
A: Hosting a craft workshop means planning a suitable venue, setting a clear schedule, recruiting skilled instructors, and gathering all necessary supplies. You need tools, materials, and a well-outlined plan for a smooth event.
Q: How do you structure a creative workshop?
A: Structuring a creative workshop means establishing a realistic timeline with interactive segments, arranging flexible seating, and including hands-on demonstrations to guide participants while fostering an open and engaging environment.
