
Have you ever thought about building your own sturdy, budget-friendly tool bench at home? Our DIY plans show you how to do just that. We use simple materials like 2×4 lumber and strong plywood to create a workbench that fits your tools and machines perfectly. The blueprints are clear and the steps are easy to follow, so you can tailor your bench to your needs while saving money. With careful planning and basic tools, you can build a solid and practical workspace you'll enjoy for years to come.
Planning Your DIY Tool Bench Plans: Key Features & Blueprint Overview
This build is made for DIY lovers who want a strong and useful workspace. The bench uses a frame built from 2×4 and 4×4 lumber. It has a sturdy plywood work surface and a bottom shelf for extra storage. You can add drawers or wheels to help with moving and organizing your tools. The design is simple and lets you choose a height that fits your table saw or other machines.
The total material cost is about $175. You only need standard wood screws to put it together, which makes the project easier and faster. Download the free blueprints to get a cut list and PDF guide. For example, search for "diy workbench plans" at https://alphapix.org?p=293 to get the free manual.
Every step is clearly explained so you can start your DIY project with confidence. Remember: measure twice, cut once, and enjoy your new, adjustable workbench.
Materials and Tools Needed for DIY Tool Bench Plans
Before you begin your tool bench project, gather all the supplies and tools. This will help your build go smoothly and safely.
Supplies:
- 7 pieces of 2×4×8 boards (add 2 more if you want a flip-open top)
- 1 sheet of 3/4″ plywood for the work surface and bottom shelf
- 4×4 leg posts to create a stable frame
- 2½″ wood screws for connecting the frame components (use pre-drilled holes)
- 1¼″ wood screws for securing the plywood panels
- Washers to attach four 4″ locking caster wheels securely
- Wood stain (Minwax Gunstock stain works well)
- Clear polyurethane to finish and protect the surfaces
Tools:
- A circular saw or miter saw to cut lumber accurately
- A drill/driver to drive screws safely and efficiently
- A sander to smooth all cut edges
- A measuring tape for precise measurements
- A framing square to check that angles are right
- Clamps to hold pieces firmly during assembly
- A pencil for marking cut lines
- Safety glasses to protect your eyes
Tip: Check your kit and gather all supplies before you start cutting. This extra step keeps your project organized and safe.
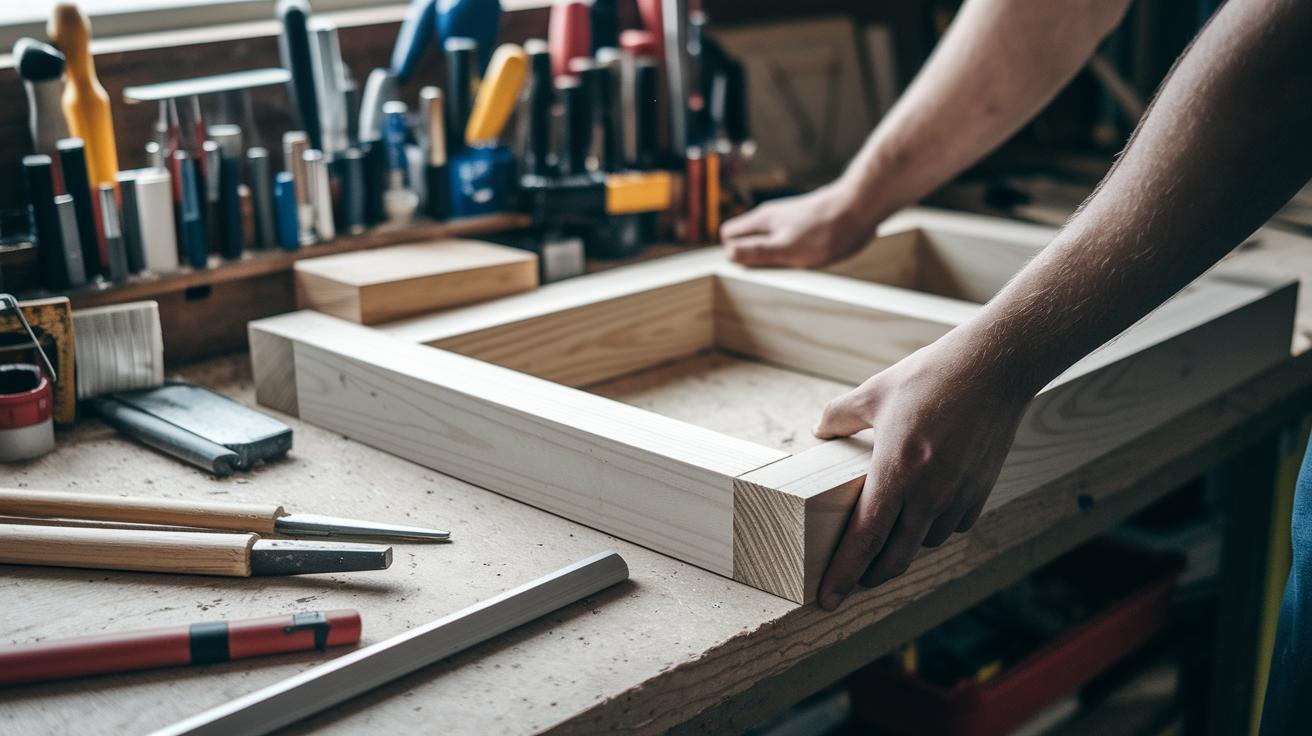
Step-by-Step Assembly in Your DIY Tool Bench Plans
Cutting and Preparing Lumber
Start by measuring each board with a tape measure and a square. Mark the cut lines clearly on your 2×4s and plywood with a pencil. Use a circular or miter saw to cut along those lines. Then, sand all the cut edges to remove splinters and rough spots. A square helps keep your marks straight.
Building the Top Frame
Attach the legs to the side stretchers. Place the stretchers between the legs and secure them with 2½″ wood screws in pre-drilled holes. Space the stretcher supports about 18″ apart along the top frame. This creates a solid and level base for your workbench. Using a square ensures each corner is right.
Assembling the Bottom Shelf Frame
Build the bottom shelf frame in a similar way. Insert the back support inside the legs to add extra workspace. Fasten all connections with wood screws, just like the top frame. This technique strengthens the structure and provides extra storage under the bench.
Attaching Plywood Surfaces
Lay the 3/4″ plywood panels carefully onto both the top and bottom frames. Pre-drill holes along the panel edges, then secure them with 1¼″ screws. Make sure the panels line up flush with the frame edges for an even and secure work surface.
Installing Drawers and Casters
Follow your plan to mount the drawer slides. Install dividers inside the drawers to create organized compartments. Next, attach four locking caster wheels, placing washers over the screws to distribute the load evenly. This setup makes the bench both mobile and versatile.
Final Alignment and Leveling
Check that every corner is square by measuring the diagonals. If needed, adjust the leveling feet or insert shims under each leg to ensure the bench sits level on uneven surfaces. This final step guarantees a durable and reliable workbench for your daily projects.
Custom Variations to Enhance Your DIY Tool Bench Plans
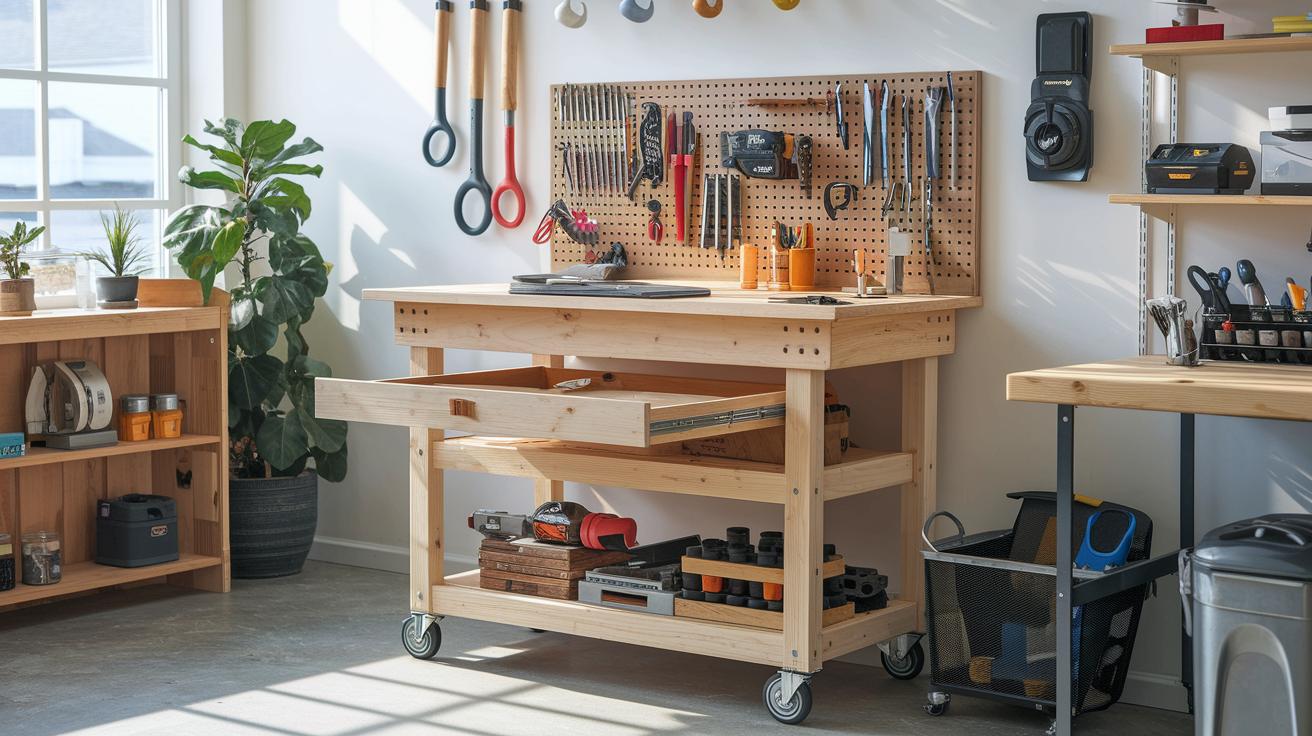
Customize your workbench to fit your workshop and project needs. One great option is a flip-open top. To do this, add two extra 2×4 boards to create a flip-top storage space. This space can also serve as an outfeed table that matches the height of your table saw. It gives you extra work surface and keeps your tools organized.
Try turning the bottom shelf into a drawer unit. This change lets you store small tools neatly and keeps your main area clear. If you need to move the bench around, add locking caster wheels underneath. Casters let you roll the bench easily and adjust your workspace when needed.
Another idea is to reduce the top width to 24 in (61 cm). This tweak saves one sheet of plywood, cutting your cost by about $35. For the finish, you can leave the wood raw for a natural look, stain it and add a clear coat for durability, or leave it unfinished if you need a work surface right away. Small adjustments like these help you create a bench that meets your exact needs.
Cost Breakdown & Budget-Friendly Tips in DIY Tool Bench Plans
Keep a close eye on your spending as you build. The table below outlines a simple cost plan. You can also use the DIY project budget template (https://alphapix.org?p=109) to track and update your expenses.
| Item | Quantity | Estimated Cost |
|---|---|---|
| 2×4 Lumber | 7 boards | $21 |
| Plywood Sheet | 1 sheet | $50 |
| Screws & Hardware | N/A | $20 |
| Finish Supplies | N/A | $30 |
| Casters | 4 wheels | $20 |
| Total | N/A | $175 |
If you’re looking to reduce costs, try bulk-buying materials or using scrap lumber. For example, setting your bench width to 24 in (61 cm) might allow you to use just one plywood sheet, which could bring the total down to about $140. Review your expense list regularly. A clear cost breakdown helps you stay on track and keeps the project running smoothly.
Maintenance & Safety Guidelines for DIY Tool Bench Plans

Safety is always our top priority in the workshop. Always pre-drill screw holes so the wood doesn’t split and connections stay secure under heavy loads. Wear your safety glasses and ear protection when cutting materials to keep flying chips and noise under control. These simple steps not only help you work faster but also create a safer workspace.
- Use adjustable feet or shims to keep the bench level on uneven floors.
- Check and tighten all screws and casters every 6 months to maintain stability.
- Inspect drawer slides regularly to ensure they move smoothly.
- Refresh the finish coat every year to protect the wood from moisture damage.
Regular maintenance is key to a durable workbench. Take a moment at each session to inspect your bench. This extra check helps catch problems early and boosts the bench’s ability to support heavy loads. A clear safety checklist lets you focus on your DIY projects with confidence.
Final Words
In the action, you’ve seen how to plan, gather materials, and build a sturdy bench. The post guided you from measuring lumber and assembling frames to installing removable drawers and casters. You learned simple steps to safely cut and assemble parts plus tips for budgeting effectively. Use the free schematic along with these DIY tool bench plans to simplify your project. Enjoy the process, build confidently, and create a workspace that fits your tools and workflow perfectly.
FAQ
DIY tool bench plans free
The DIY tool bench plans free provide free downloadable designs that include a cut list and step-by-step instructions, helping you build a solid workbench with minimal fuss.
DIY tool bench plans PDF
The DIY tool bench plans PDF offers a complete blueprint with schematics, measurements, and a parts list, so you have a detailed guide to build your own tool bench confidently.
Free workbench plans PDF
The free workbench plans PDF gives you ready-to-use schematics with clear material lists and easy steps, making it simple to construct a reliable workbench without spending extra money.
Simple DIY tool bench plans
The simple DIY tool bench plans are designed with straightforward instructions and basic measurements, perfect for beginners looking to build a practical and sturdy workbench.
Ultimate workbench plans PDF free
The ultimate workbench plans PDF free deliver comprehensive blueprints that include design variations and full cut lists, letting you build a versatile workbench tailored to your workshop needs.
Heavy duty workbench plans PDF
The heavy duty workbench plans PDF include reinforced design details and precise measurements, ensuring you build a bench that supports heavy tools and withstands tough work conditions.
Free heavy duty workbench plans
The free heavy duty workbench plans offer robust designs with clear assembly instructions and a parts list, allowing you to construct a durable bench capable of handling more demanding tasks.
2×4 workbench plans PDF
The 2×4 workbench plans PDF focus on using standard 2×4 lumber with precise instructions and a detailed parts list, so you can easily create a cost-effective, strong tool bench for your workshop.
